
Showing posts with label tutorial. Show all posts
Showing posts with label tutorial. Show all posts
Friday, 13 June 2025


Tuesday, 4 January 2022

The Bridle Tree Barn-Raising Challenge 2021!

This project has been a long time coming, and just to warn you, this is one of my biggest blog posts to date, so I'd advise getting yourself a cup of tea and a snack if you're intending on reading the whole thing in one go! (seriously, it's like 10k of tutorial and angst)
Sunday, 11 July 2021

Friday, 23 April 2021
DIY Tortilla Wrap Tutorial!

It's something I've been wanting to do for years, but now that we at long last have decent internet* and I've found video editing software I like, I can finally start making YouTube video tutorials!
Monday, 1 March 2021
Max and Juno's Craft Room - A step by step guide
As you'll have seen in my last post, Max and Juno gained a new favourite room this month.
Considering the complexity, it actually didn't take all that long to put together!

...and now you'll find out why!
Wednesday, 8 April 2020
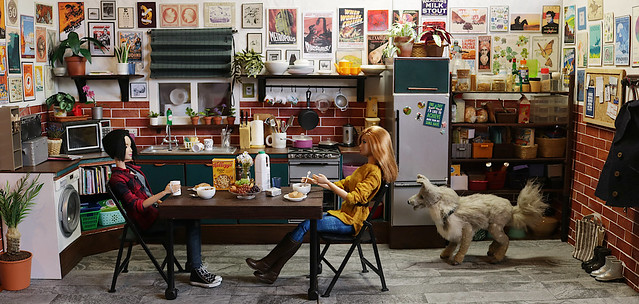
1/6th scale Kitchen Tutorial
A kitchen for Max and Juno has been top of my list for years, but making such a diorama was going to be tricky thanks to all the appliances and accessories. Luckily you know how much I love a challenge, so I took it on with gusto...
This is going to be a loooooong post with lots of photos so consider yourself warned!
Tuesday, 30 July 2019
DIY Miniature Salad Tutorial
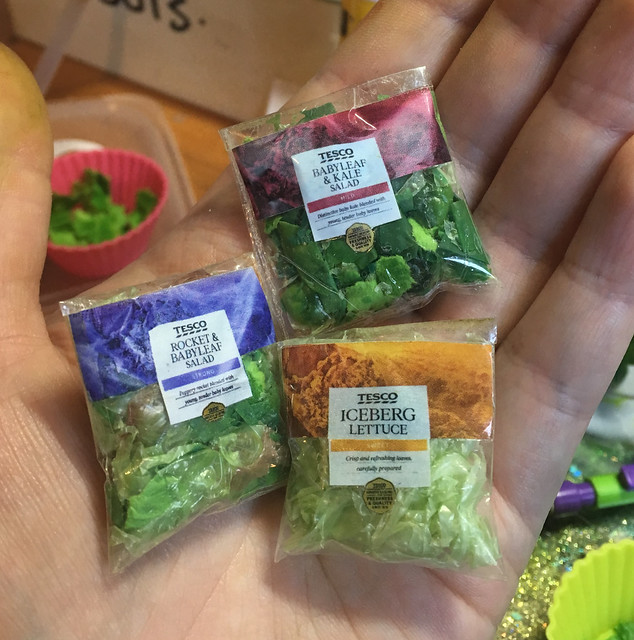
I've been in the mood for making food recently, and after posting photos of these on Instagram and Facebook, got lots of requests for a tutorial, so here it is!
Tuesday, 2 April 2019
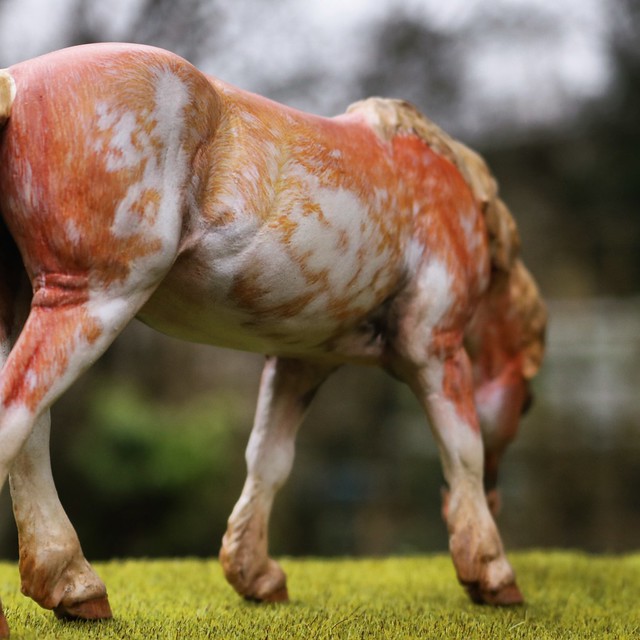
NaMoPaiMo 2019!
I've been procrastinating more than usual recently, and as a result my documentation of this year's event has been delayed by far too long!
I filmed as I painted, so there’ll eventually be a full video tutorial on YouTube at some point once I’ve got round to editing it all!
---
For a project like NaMoPaiMo, success can be measured in many different ways.
For some, success can be as simple as adding paint to a model after years of no motivation, or trying out a new colour or technique. For others, it can be more specific, like finally finishing that AR you’ve been putting off painting because you lacked the confidence to even start it, or nailing the perfect dappling technique.
Everybody’s experience is entirely their own, and therefore, in the words of the inimitable Bob Ross:
’we don’t make mistakes, we make happy accidents’
That said, I made my fair share of mistakes this year, but I think the successes drowned them out overall.
That said, I made my fair share of mistakes this year, but I think the successes drowned them out overall.
Thursday, 11 January 2018
Miniature Panettone tutorial!
It's tutorial time!
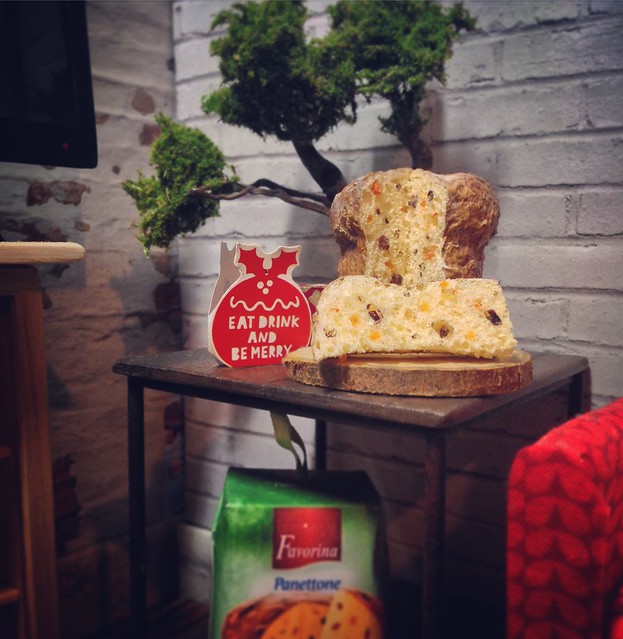
I actually had a whole 'this tutorial is stolen!' gag to title this post before I remembered it wasn't a Stollen, but a Panettone, so that was a bit of a fail. XD (although they look similar enough in texture so you totally could make one using this technique)
Anyway, here's how I made this 1/6th Panettone for Christmas - late to the party as ever!
Sunday, 12 November 2017
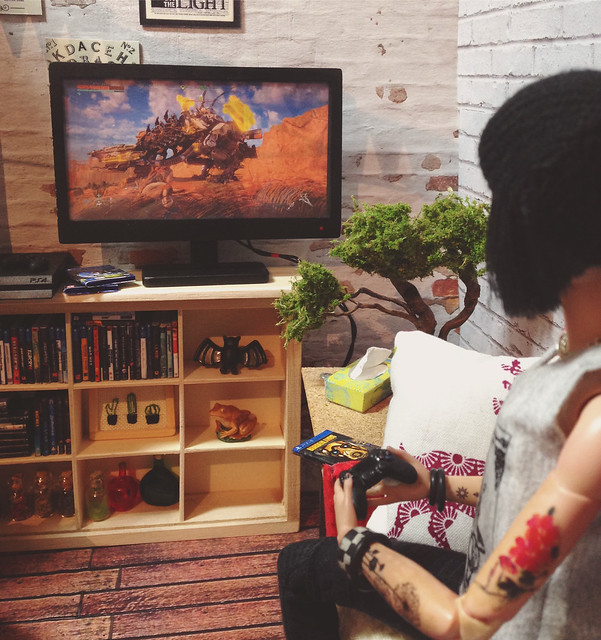
1/6th scale TV and PS4! (tutorial!)
Hurrah, not another holiday post! XD
I've been meaning to post about this for a few weeks now, so here's my 'kind of a tutorial/kind of shopping list' thing for how to create your own 'working' miniature TV.
Monday, 22 May 2017
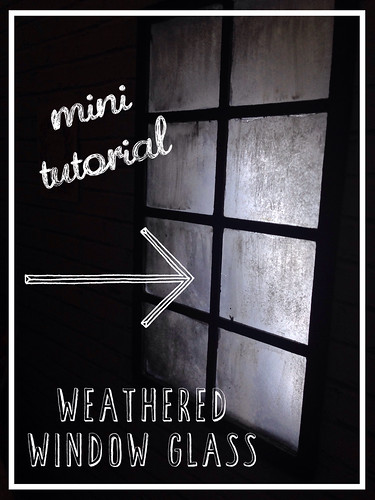
Warehouse Window Tutorial!
Here's a quick tutorial for you before we get back to holiday pictures! XD
I've been meaning to add an industrial style window to Max and Juno's living room for ages, as I think I've finally settled on their home being a fairly dilapidated old factory/warehouse that's been turned into apartments, and while I could find plenty of tutorials for making windows, or full scale privacy screens I drew a blank at doing the opaque and weathered glass you see so often in those kinds of buildings, so I had to come up with my own methods.
I wanted it to be opaque to disguise the fact that I don't have a background behind the windows and to give it a bit of age and a distressed feel.
Sunday, 16 April 2017
DIY Desks and Tableware!
Whilst binge watching Critical Role again last night, it hit me that I still hadn't got round to making Max and Juno a desk or table for their living room. (I still need to remake the sofa, but it'll do for now.)
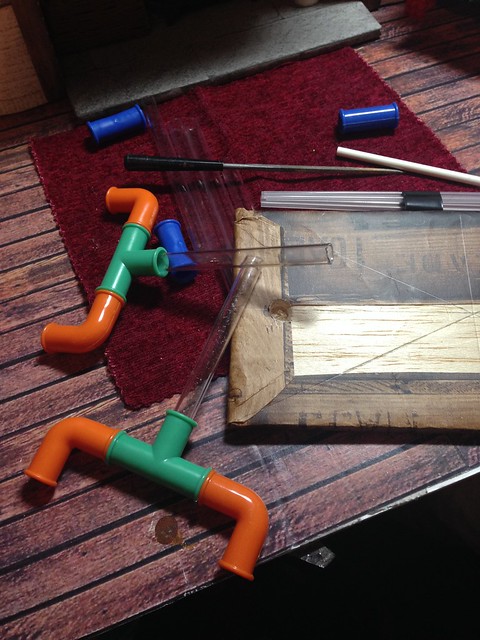
I wasn't in the mood for any proper woodworking, so I had a rummage and a quick browse of Pinterest for inspiration and hit on the perfect combo. I've been trying to go for a sort of industrial/shabby chic look with the furnishings, and I really liked the look of old reclaimed metal and wood for furniture.
I'd bought this novelty connecting 'pipe' drinking straw set years ago as I thought it had potential, and well, I was right!
Tuesday, 14 February 2017
Aeryn Stormwind, the Nord Sellsword
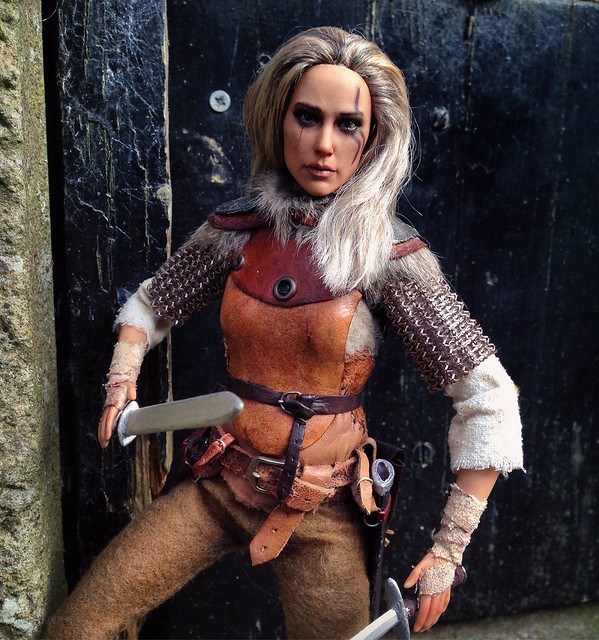
Taking a little break from the horses, I've been working on another of my Skyrim figures recently - Aeryn. I had her 90% finished a few months ago but I was never happy with her head, so I ordered up a replacement to customise a few weeks ago.
As this post is going to be pretty huge, here's a quick preview of her final form so you at least have something to look forward to...XD
Tuesday, 16 August 2016
New clothes and converses!
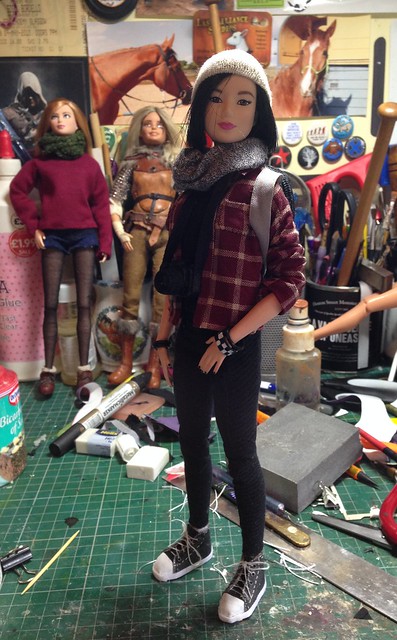
As you can see the happy couple have had me make them all manner of things in the last week!
Max demanded a shirt, and while I haven't got any tiny buttons for it yet I'm happy to leave it open like this without them. I don't have a sewing machine so everything here was done entirely by hand.
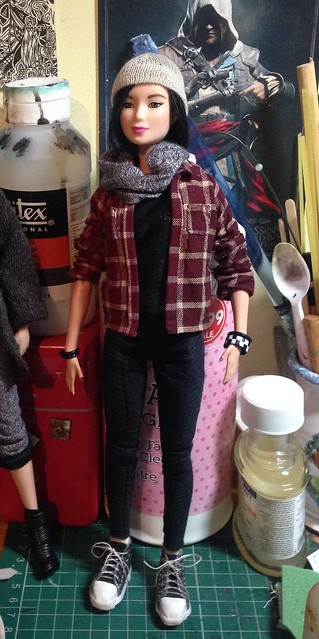
The fabric was originally bought to make Julip rugs from but it was perfectly scaled for a checked cotton shirt!
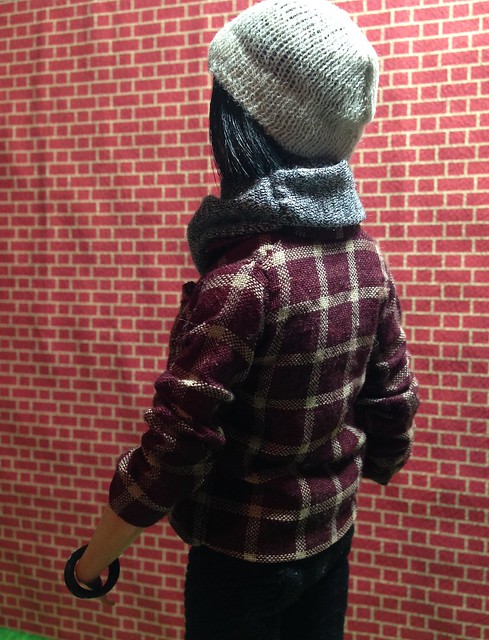
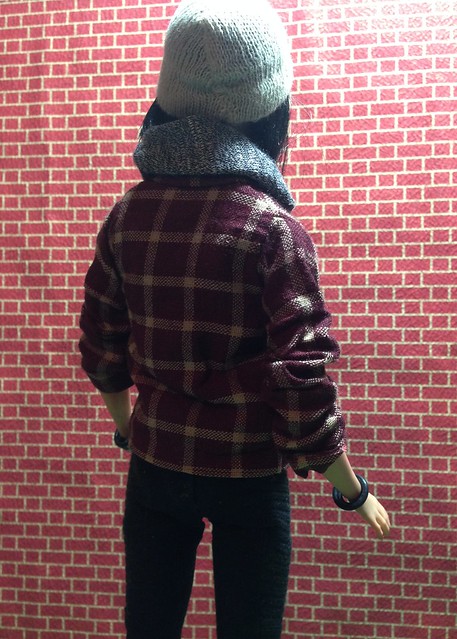
Once all fully glued and stitched together I soaked it in hot water with a touch of fabric conditioner then dressed her in it so I could get it to hang more naturally with the sleeves rolled up. It worked really well and feels far less stiff than it did to begin with. It also filled me with confidence in my sewing skills as it didn't immediately disintegrate upon being immersed in liquid!
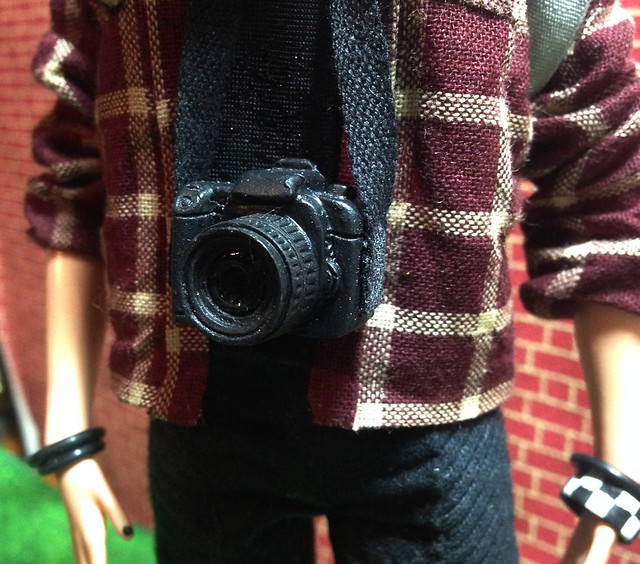
I definitely didn't make her camera - its a little resin DSLR I got from a friend a few years ago to use with my Julips. It was far too big for 1/12th scale (even though I think that's what its sold as) and probably slightly underscale for 1/6 but it's close enough to pass I think. I glued on a ribbon strap, painted the whole thing with matte varnish and added a little blob of gloss on the lens and the LCD display at the back. In an ideal world I'd love the gear from this set to play with but I couldn't find one at a good price so this will do in the meantime.
I knew she needed a pair of converses so I ordered up a pair online, but they're coming from the other side of the world and I'm ridiculously impatient so I thought I'd make her a pair in the meantime and the new ones can always go to someone else when they get here.
I used this paper tutorial from Mitchymoo Miniatures with a few minor tweaks as I was working with fabric rather than paper and obviously at a larger scale.
I built up a wooden last on the existing foot rather than epoxy over it as I may want to swap shoes at some point in the future and wanted these to be reasonably easy to take off.
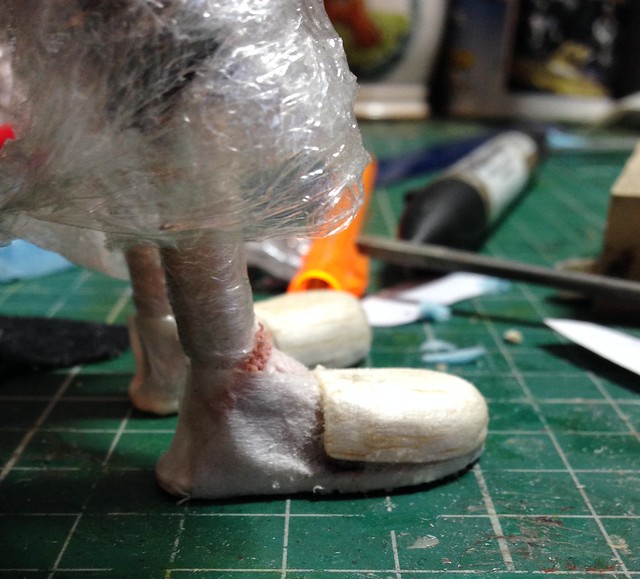 |
| Styrene base with balsa wood and micropore tape ftw! |
The printable canvas I used for miniature paintings the other day was the perfect material for the heel supports once soaked with water to soften it.
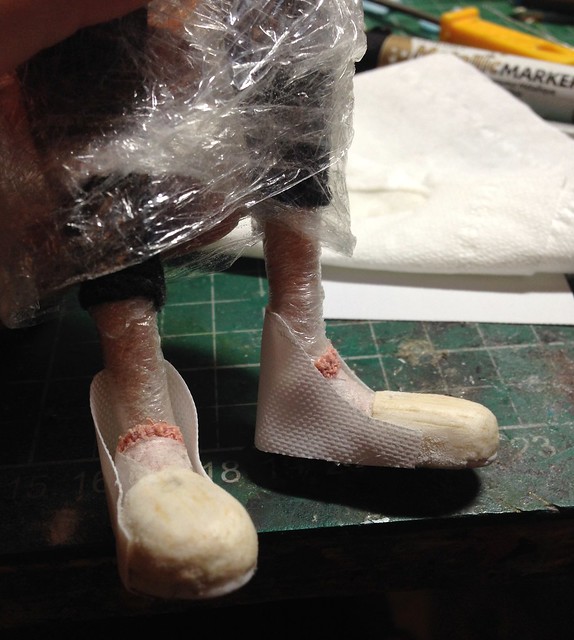
The main part of the shoe was thin denim from an old pair of jeans. I lined it with the canvas material, then punched in some holes for the laces with a thick needle.
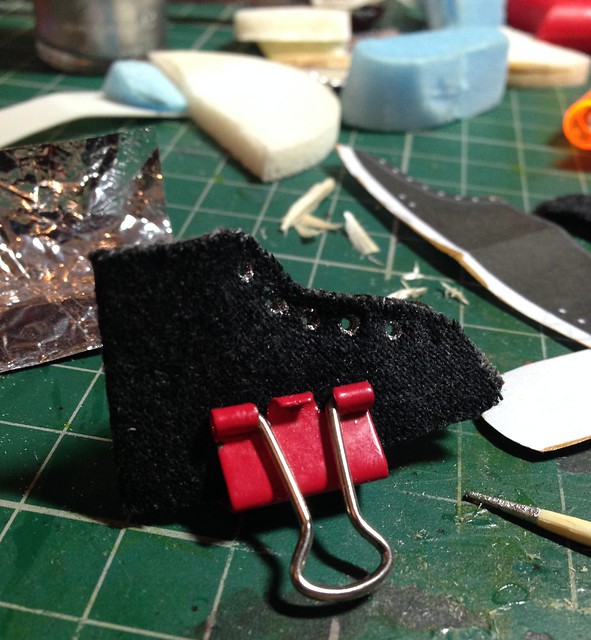
I painted on some metal 'eyelets' with a tiny touch of silver nail varnish applied with a toothpick. This not only did away with me having to track down small enough eyelets, but also stiffened the edges of the fabric so it didn't fray. I know real Converses have another row of stitches on the other side of the eyelets but it was just too close to be able to stitch without risking tearing so I just painted them on later. The rest is all stitched though.
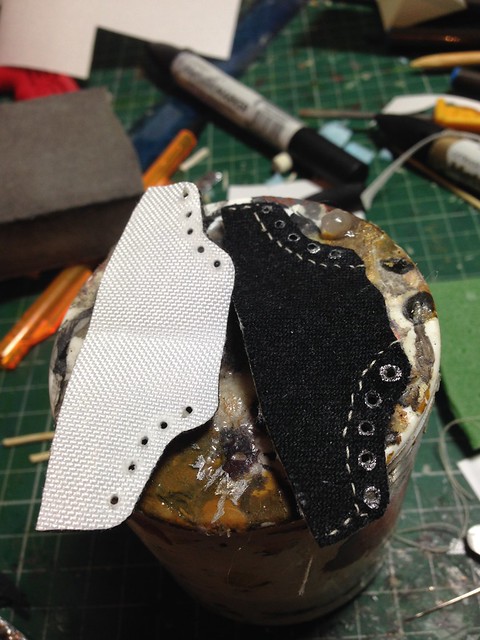
The tongues were just cut out sections of the same thin denim. The toe cap parts started off well, being glove leather they clung to the shape of the last really well but when I glued it on it turned out far bulkier and angular than I anticipated. I gave each a few coats of superglue to give them a nice shine and to harden them.
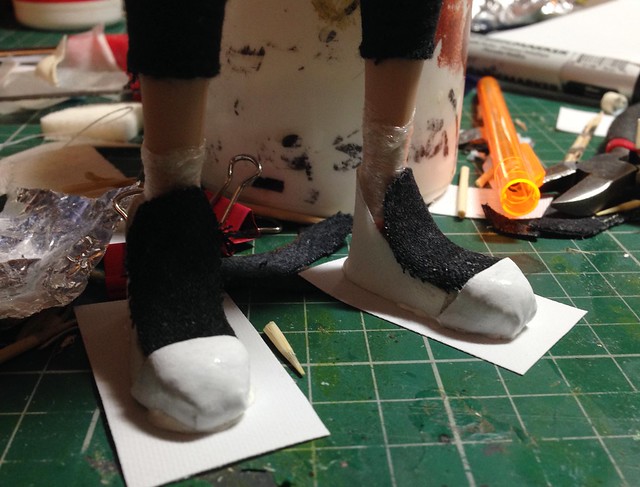
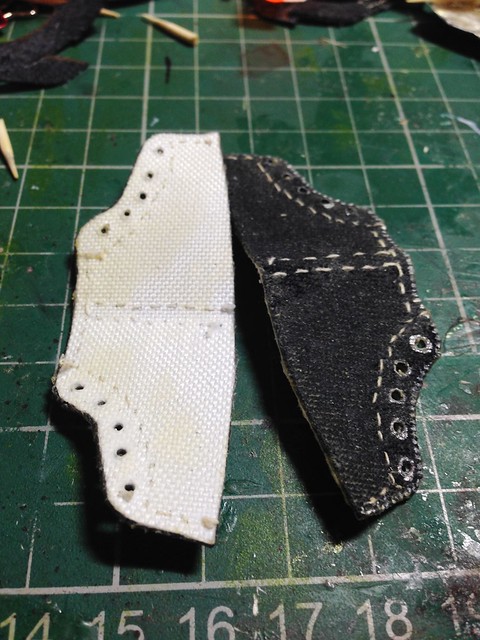
Because I know from personal experience that Converses aren't exactly known for their waterproof properties I rubbed on a layer of beeswax before assembly so at least my dolls can step in a puddle without ending up with wet feet!
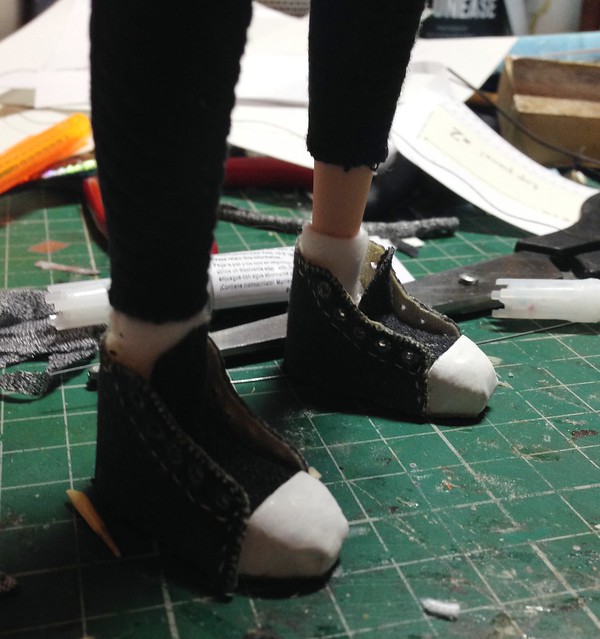
You can see the blocky toecaps there. :(
I couldn't find any decent thread to use for laces so to begin with she had to settle for toothfloss! XD
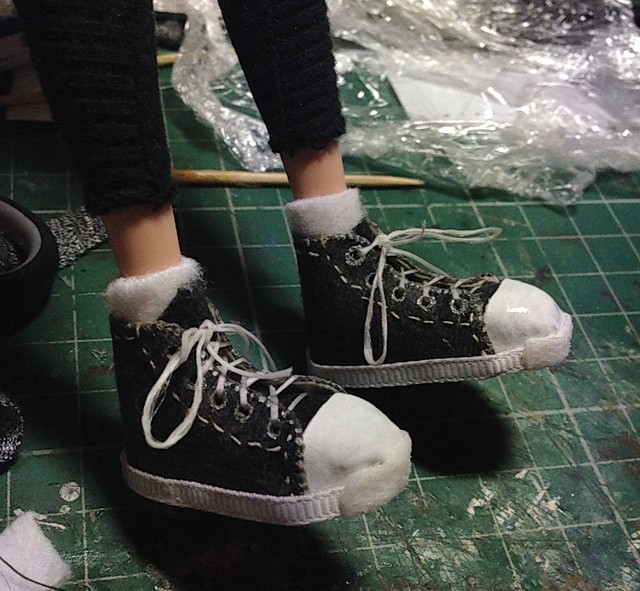
Some white grosgrain made the perfect edges!
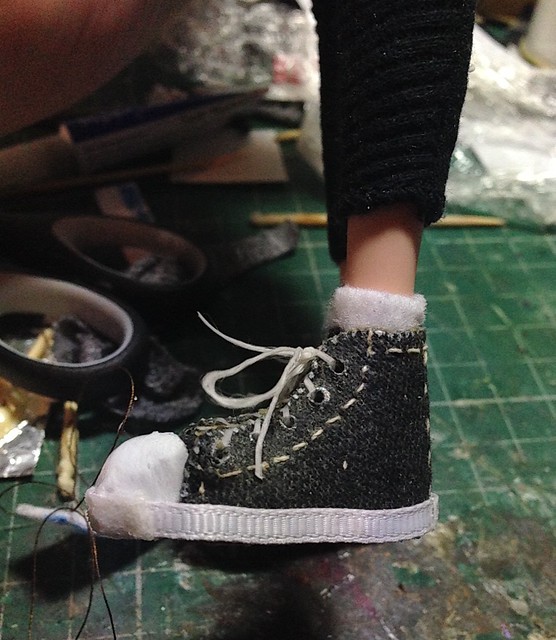
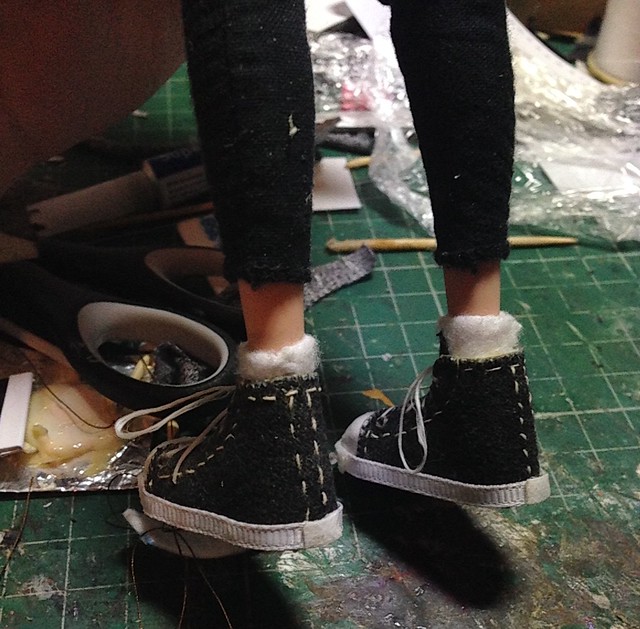
The 'socks' are just tiny scraps of white fabric stitched around her ankles.
Here's the final shoes with better laces.
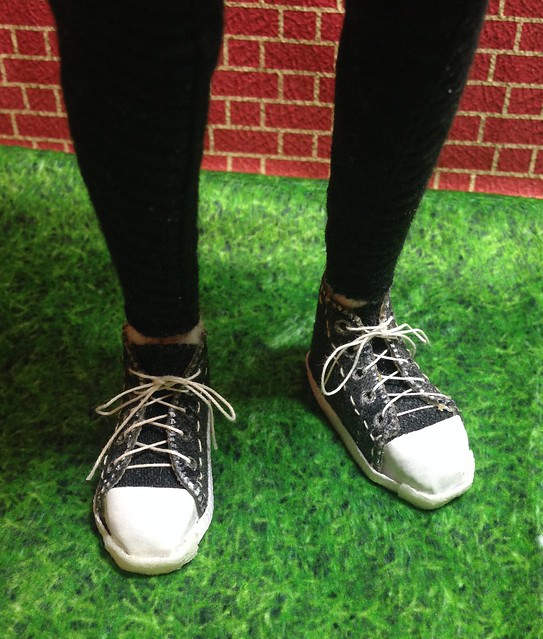
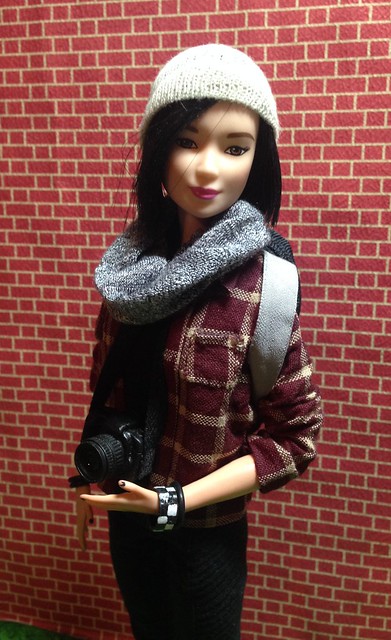
The infinity scarf was some scrap stretchy fabric I had lying around and her bracelets were tiny rubber rings I found in the plumbing department of B&Q! The black and white checkerboard one is simply a thin rectangle of pleather from an old purse stitched together and painted, with a bit of matte varnish on for protection.
As Juno stole her messenger bag I decided to make Max a rucksack instead. I'd saved the detachable hood from an old waterproof jacket of mine ages ago which I thought would be the perfect material, so after having a google for inspiration I got sewing. I liberated the zip from a cheap purse I'd initially bought for its 'chainmail'
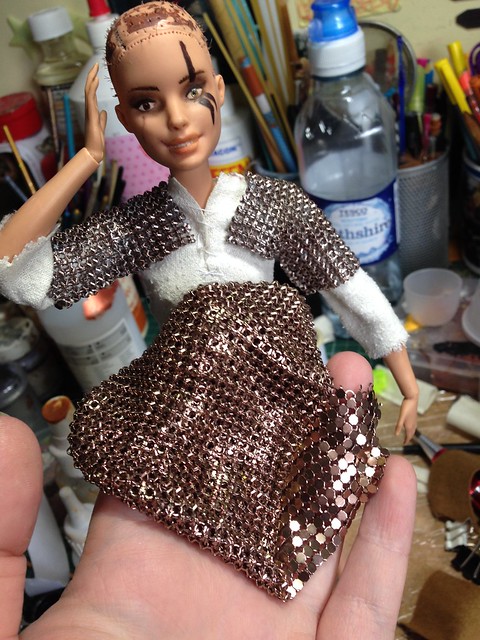
(Oh hey, sneak peek of another fig in the works! :P)
I'd never sewn anything with a zip before so this was something of an experiment.It's a little stiff to open and I accidentally broke the top of the actual zipper part but it still works, you just have to be careful.
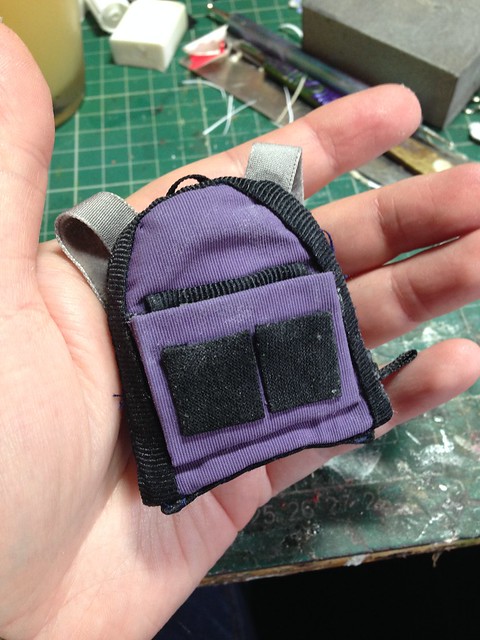
It has three front pockets - one big one and two little ones. The smaller ones are actually made from folded over bias binding. XD
I didn't have any wide enough grosgrain for the straps so I improvised with some soft grey ribbon. It really looks the part on one side and is velvety and fuzzy on the other size for 'comfort'
I didn't realise that my thread was dark blue instead of black until I was nearly finished which is a bit of a pain in the arse but I can always go over the stitches with a touch of black paint.
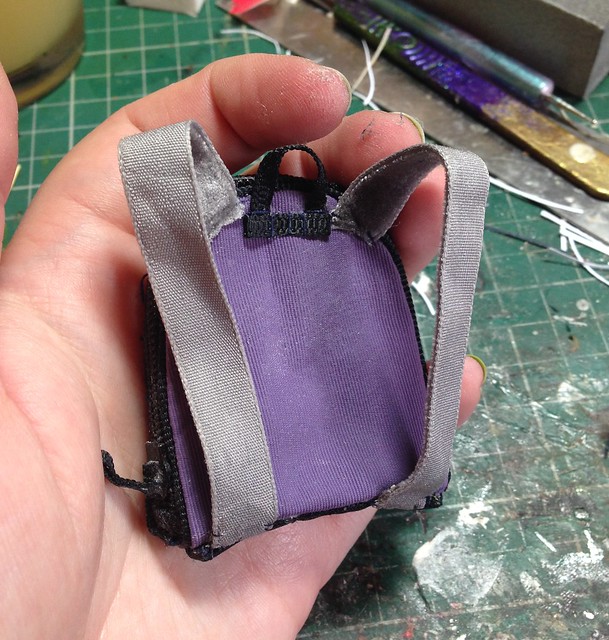
It won't hold a huge deal but it'll be handy for going out and about with. I'd like to customise it with some patches and badges eventually as its a bit boring right now.
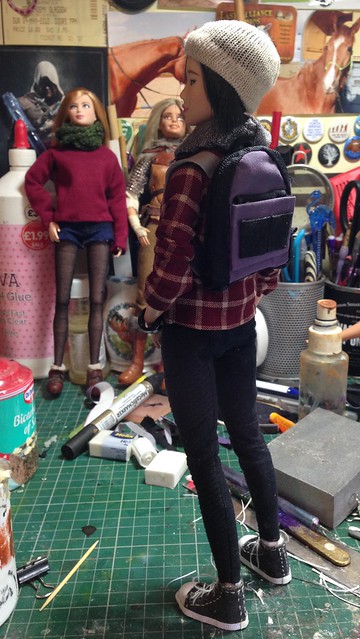 |
As something of a music aficionado Max really needed a set of headphones...
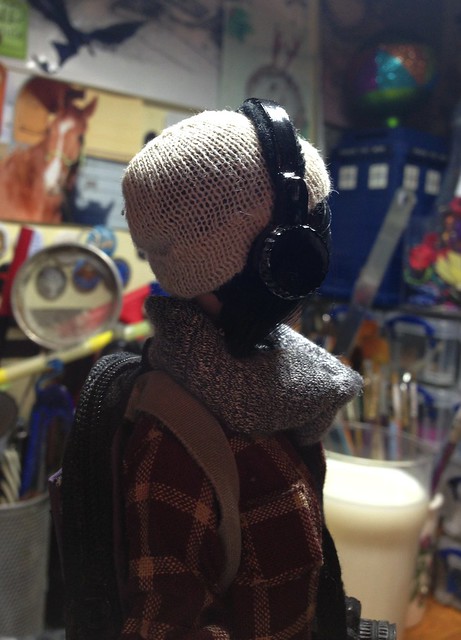
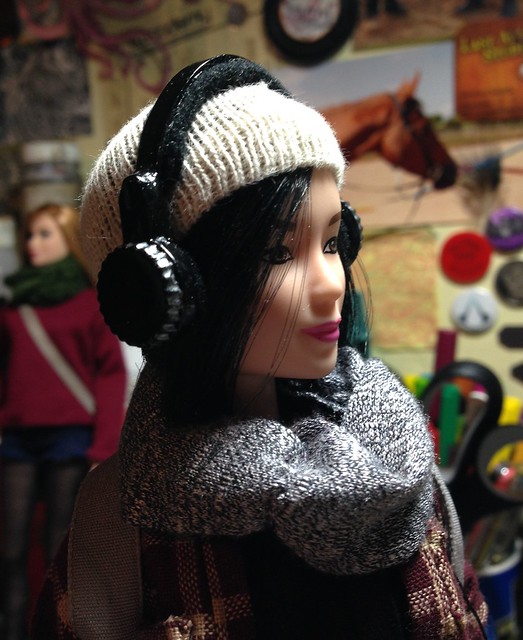
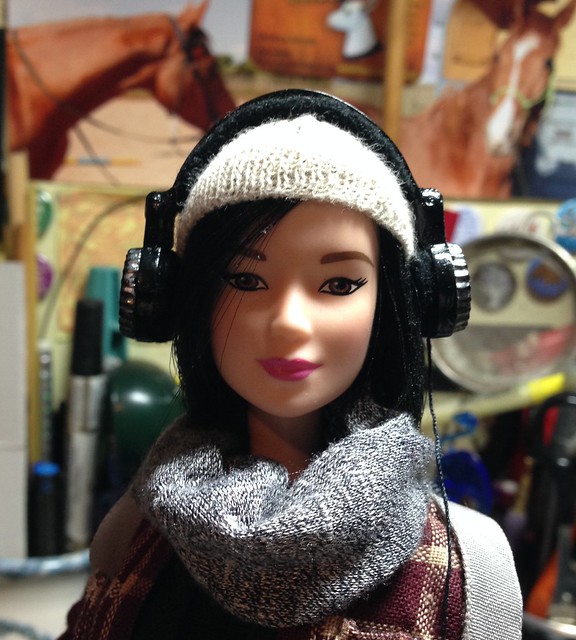
They turned out a little big but I'm really pleased with them nonetheless, especially considering what they started life as!
You know those plastic ring things round the neck of plastic bottles?
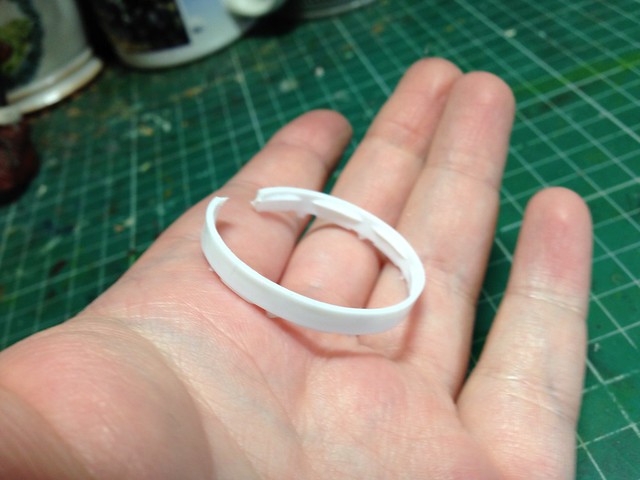
Yeah, those.
Trimmed to size and with the protruding plastic cut and sanded down, its perfect for the main structure. I can't take full credit for this observation however, I saw it here first!
Trimmed to size and with the protruding plastic cut and sanded down, its perfect for the main structure. I can't take full credit for this observation however, I saw it here first!
As for the speaker parts, I stumbled on these really randomly the other day in Staples. They're little novelty thumb tacks with hooks so you can hang stuff from them. I bought a packet with the intention of doing just that but it wasn't until I decided to make some headphones that I realised just how perfectly shaped they were.
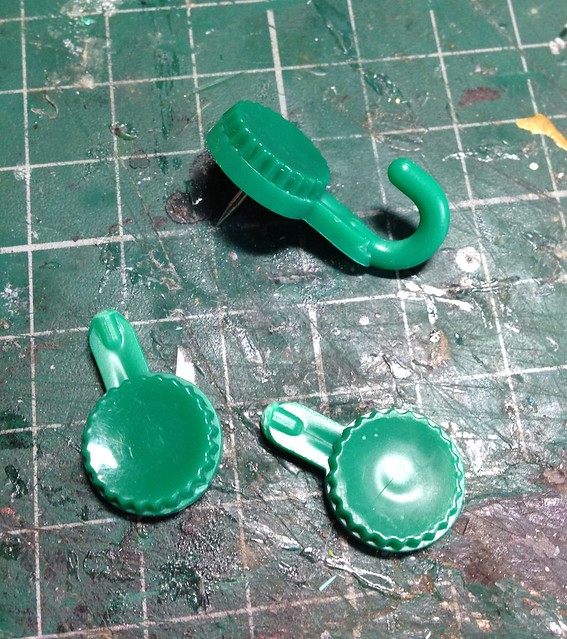
A little scalpeling, sanding and superglue/bicarbonate of sodaing later they were done, only requiring a couple of coats of glossy black nail polish and some silver for highlighting the detail. The padding on the earcups and headband is just trimmed down fleece. The cups look really plain from the sides so I may eventually add some kind of brand symbol or logo to jazz them up a bit.
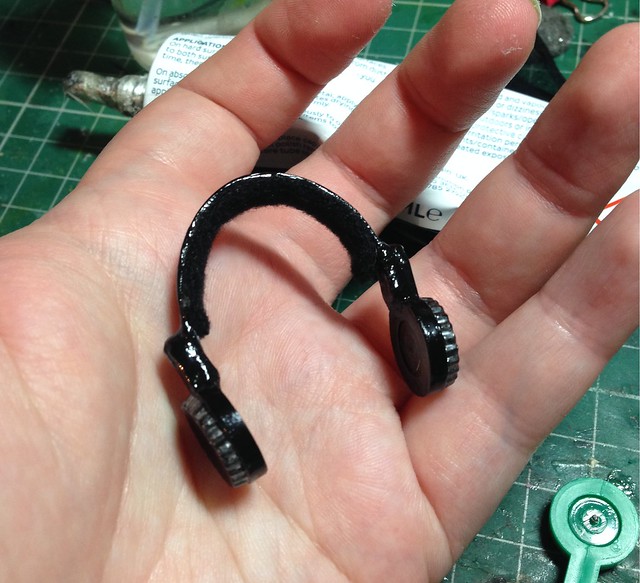
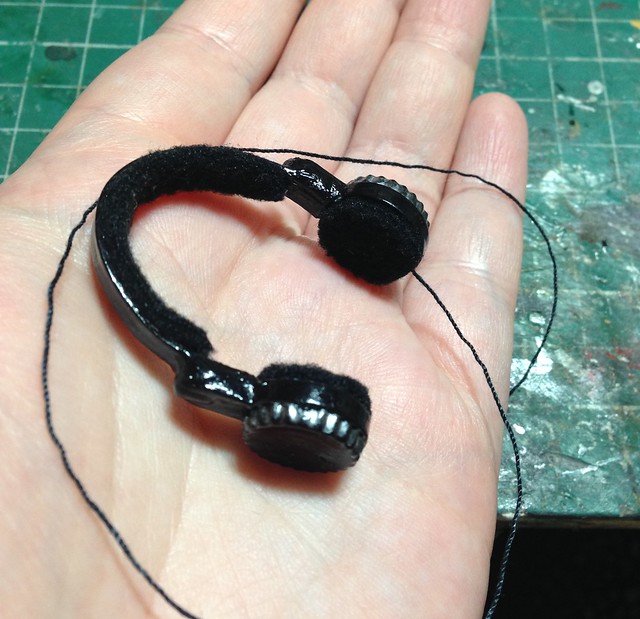
The 'cord' is just some synthetic thread sandwiched between the earcup and the padding. It doesn't connect to anything but with a little blob of bluetack it can be stuck to a hip under the clothes so it looks like it feeds into a pocket and presumably a phone or MP3 player.
While Max pretty much told me what she wanted to wear straight away, Juno hasn't been quite so easy to dress though, she's fickle.
To begin with she wanted something very summery and hipsterish, so I made her a simple crop top and some knee-length harem pants...
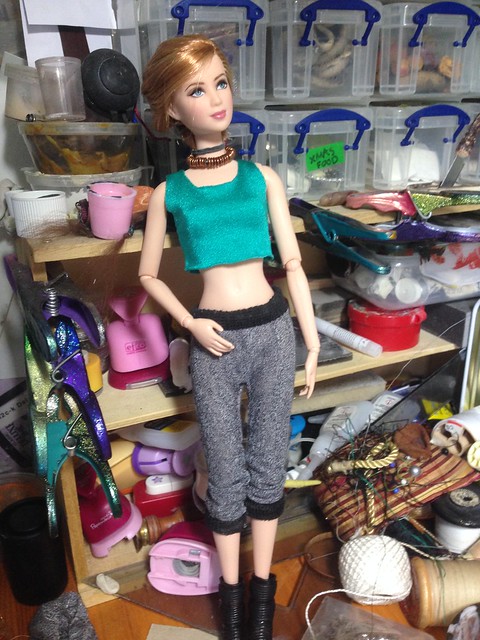
...but apparently she was cold so demanded a coat, which I slaved away on for hours, but the front didn't turn out as I'd have liked so that too was rejected...
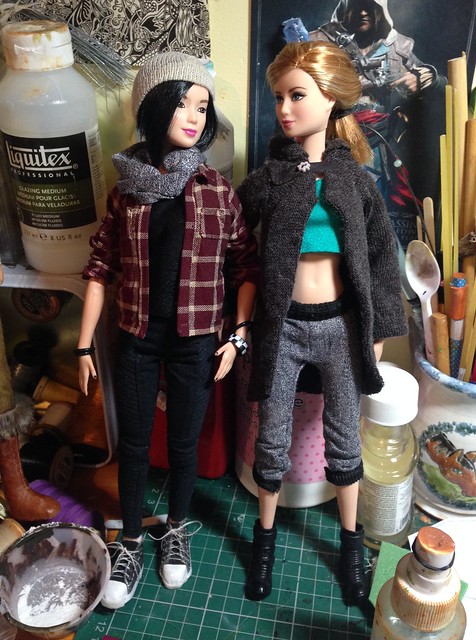
...in favour of this.
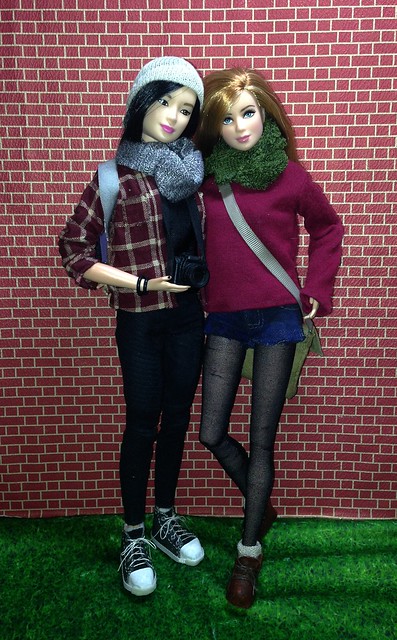
I'd made her jumper years ago for one of my male figs but it didn't fit him particularly well but with some better stitched edges it makes a good baggy jumper for a Barbie. The fabric was thicker than the stuff I used in Max's shirt so it doesn't have quite the same number of folds and wrinkles despite the fabric conditioner, but never mind. The shorts were cut down from an old pair of Barbie jeans but I'd like to make some better ones. I handstitched the tights and left too much of a seam allowance so there's quite an obvious inseam now, lol.
The boots ended up waaaay too short and stumpy so she'll probably fall heir to the converses I ordered unless I can get her some alternatives. The infinity scarf is from a pair of £1 shop thermal socks and sheds like nobody's business.
I didn't realise until after I'd dressed her that she's really going for an Amy Pond look which I swear wasn't the intention!
The boots ended up waaaay too short and stumpy so she'll probably fall heir to the converses I ordered unless I can get her some alternatives. The infinity scarf is from a pair of £1 shop thermal socks and sheds like nobody's business.
I didn't realise until after I'd dressed her that she's really going for an Amy Pond look which I swear wasn't the intention!
Isn't it funny how sometimes memories are seemingly imbedded into the things you make? I can vividly remember sewing Max's shirt during my binge watch of 'Preacher', and the rucksack was made during a similar binge of 'The Memoirs of Sherlock Holmes'. Netflix's 'Making a Murderer' was my background noise whilst making Juno's coat and I was watching a series about real life crime scene investigating whilst making the headphones too, so it kind of follows quite a dark theme!
Anyway, I bought a rescue Barbie at the car boot sale this weekend so she's getting a bit of TLC at the moment but I'll definitely be doing more with this pair soon as they're just so much fun to play with!
Anyway, I bought a rescue Barbie at the car boot sale this weekend so she's getting a bit of TLC at the moment but I'll definitely be doing more with this pair soon as they're just so much fun to play with!
Saturday, 6 August 2016
An unexpected art attack!
This post will be mostly about 1/6th scale miniatures but first, a bit of background...
A while ago now, Mattel released their newest iteration of Barbie - Made to Move.
These dolls have incredibly good articulation and after reading a couple of reviews online I knew I needed one or two to add to the 1/6th scale crew. I ordered a random pair from Argos and once I had them unpacked I was VERY impressed. Considering their incredibly low price I'd rate them extremely highly and I can see myself buying more of these in the future as they're really very, very good.
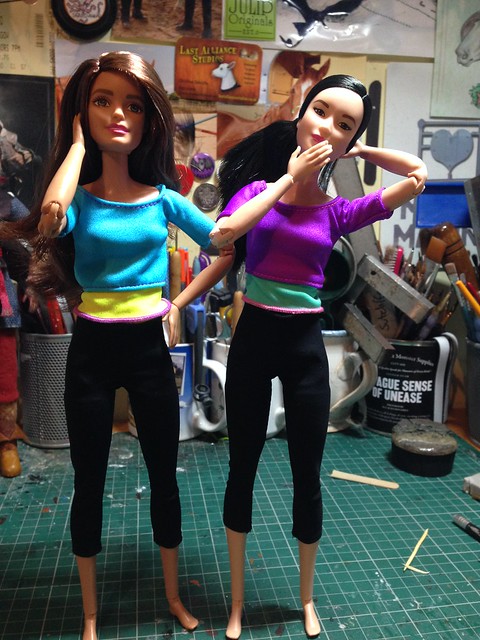
ERMERGERD, BARBIES THAT CAN STAND ON THEIR OWN TWO FEET?! O_O
They fall over a lot because their feet are still ridiculously tiny, but never mind, that can be solved with decent footwear - the articulation is more important to me!
The brunette is now a blonde and nearly ready to be shown off as a portrait of yet another of my Skyrim characters but her friend was destined for another fate. She got a haircut...
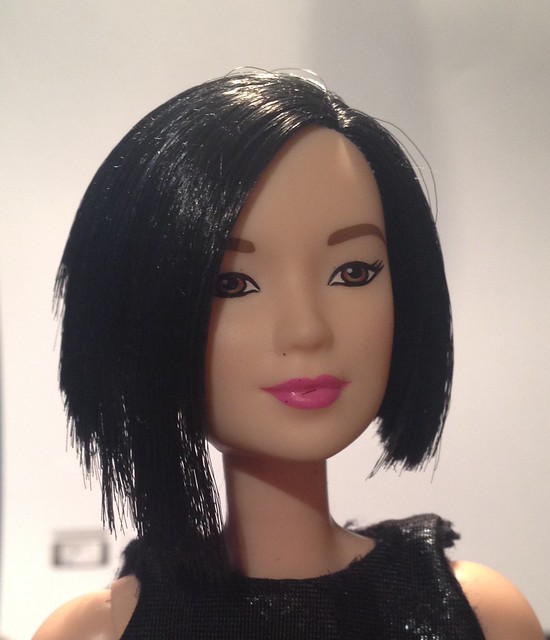
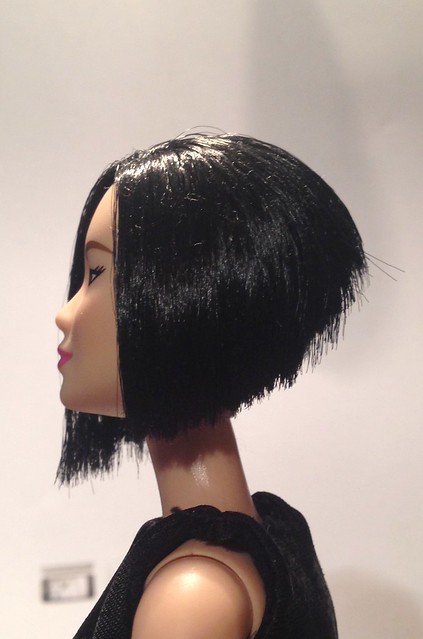
(which was an ordeal in itself, hence the hat! XD)
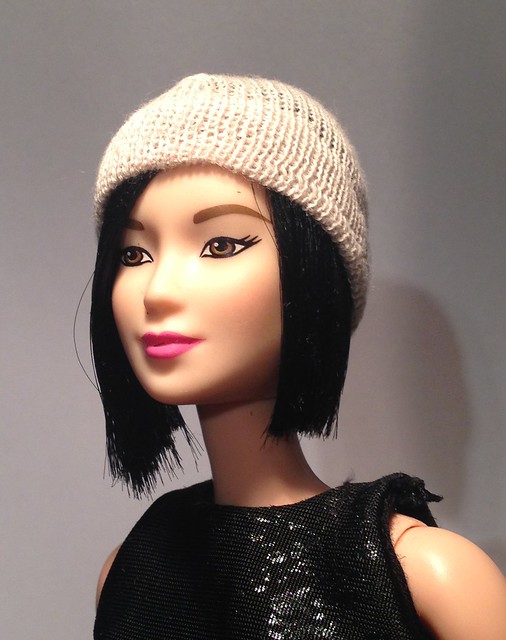
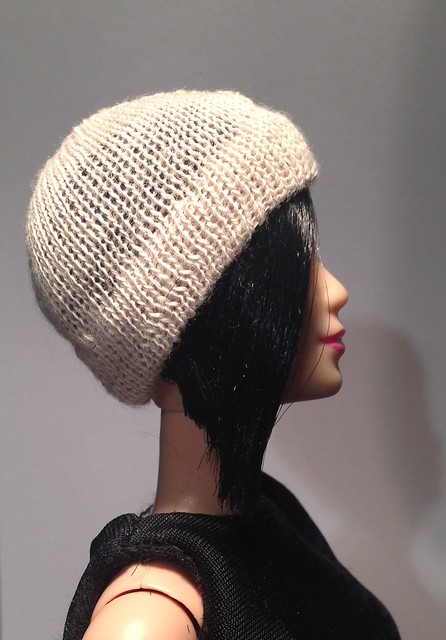
...some new and borrowed clothes and now, she even has a profession!
I decided she’s going to be an artist/photographer which will give me a good excuse to do some miniature paintings and take her out for photoshoots in scenic locations but I think I got slightly carried away the other night making her some art supplies...
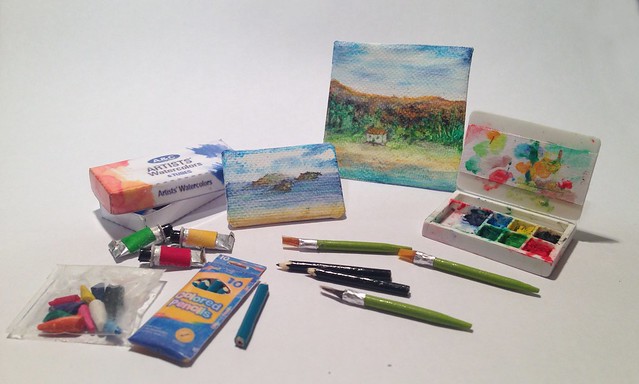
The pencil packaging and watercolour box were doll’s house printables I scaled up but everything else is made from scratch. I printed them out on normal printer paper, but set to high quality, then laminated them with clear parcel tape, cut them out and folded everything up. I used superglue to stick them together rather than my usual PVA.
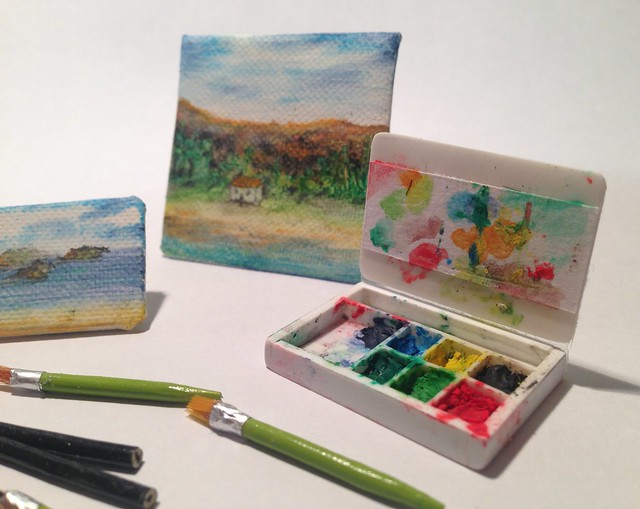
The watercolour palette is all styrene with the leads from watercolour pencils smooshed into each section! The hinge is just tape - I didn't want to risk making a proper one in case it broke from opening it up too much.
The watercolour palette is all styrene with the leads from watercolour pencils smooshed into each section! The hinge is just tape - I didn't want to risk making a proper one in case it broke from opening it up too much.
The paint tubes were made from the thick metal foil that tops some bottles of wine - I'd been saving some for ages in my stash for a project just like this! The lids are tiny eyelets glued upside down and painted. The pencils and brushes are toothpicks painted with nail varnish - the brush tips are trimmed down real bristles and tufts of faux fur with a scrap of tinfoil superglued on around them. The bag of 'oil pastels' are yet more watercolour pencil leads - they're so fragile!
I found the canvas in a rather unusual place - the £1 shop! In the stationary section they had a few packs of photo paper for printing but they also had some canvas effect matte 'paper' for doing homemade canvas prints. it's real fabric as far as I can tell, but synthetic. I made some (slightly wonky) tiny wooden frames from coffee stirrers, soaked the canvas so it would stretch round them, then held them in place with mini bulldog clips til they'd dried fully, at which point I got the superglue out and glued them on at the back. The watercolour pencils I used for the 'paintings' went on fine, but I wanted a little more realism so I made up a quick and messy gesso using some white acrylic and talc and daubed it on. I have to admit, it's such a minor thing but it makes a big difference! I think the paints adhere better and it has a much more convincing texture than before.
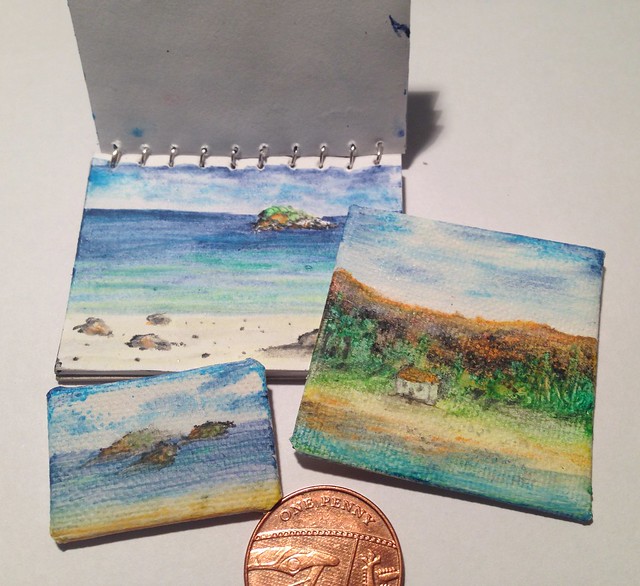
I’m actually going to take some canvases with me on holiday next time I go and do some proper watercolour painting at the beach…just in miniature!
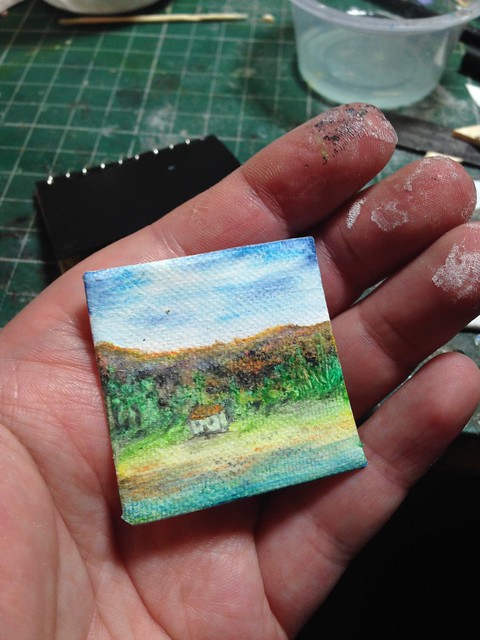
So, with that in mind, I made some sketchbooks as well for that very purpose – the ringbinding on the black one is a little big but I have seen full scale ones a bit like that so meh, artistic licence. :P I used this tutorial for it if anyone's interested. The elastic (a plaiting band from my ancient grooming kit, haha!) hasn't been attached yet.
The green one was a little simpler to make - I just cut out some pages and matching front and back covers, (from a textured christmas card and thin cardboard, respectfully) tapped them on the table a few times so they were level, then clipped them from the bottom and sides to hold them all together. A couple of layers of copydex glue on the spine end were applied, then when that was dry, a folded section of bias binding was glued over the end, and ta-da!
The green one was a little simpler to make - I just cut out some pages and matching front and back covers, (from a textured christmas card and thin cardboard, respectfully) tapped them on the table a few times so they were level, then clipped them from the bottom and sides to hold them all together. A couple of layers of copydex glue on the spine end were applied, then when that was dry, a folded section of bias binding was glued over the end, and ta-da!
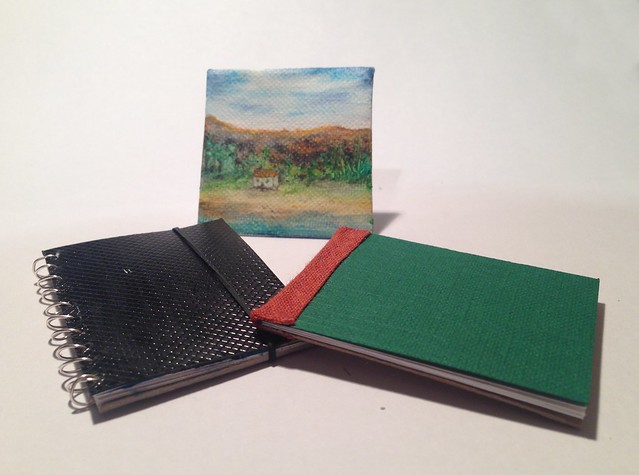
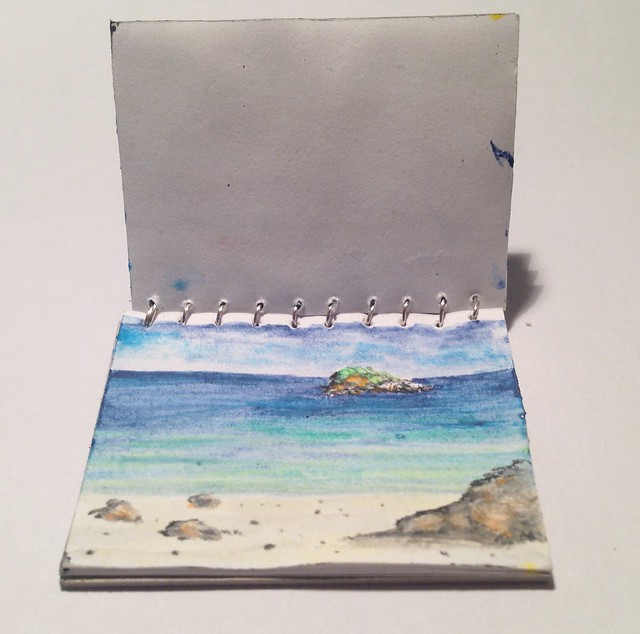
I used sketchbook paper for this rather than bog standard printer paper. This had the advantage that it was thicker and more realistic and held up to being repeatedly doused in water!
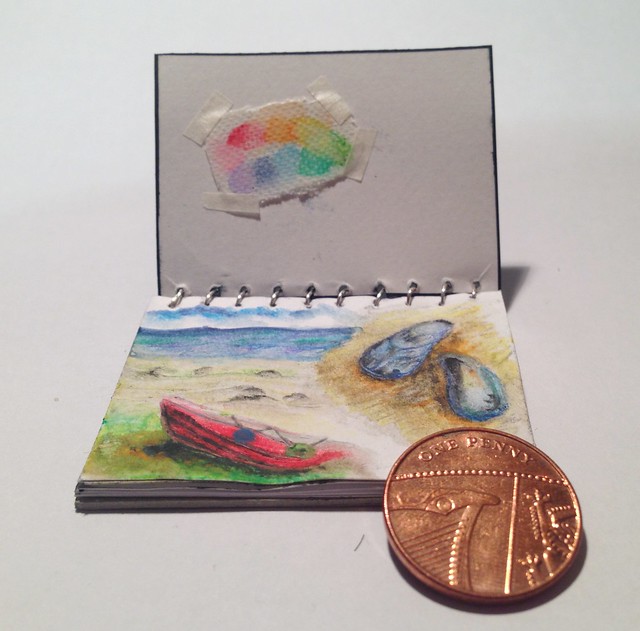
Obviously it would be a chore to carry all that around in your arms, so I also provided our aspiring artist with this!
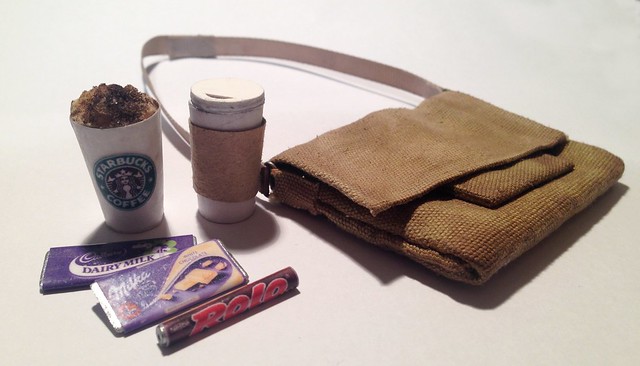
The messenger bag is made from some fabric scraps from my old full sized version and has working pockets. (and yes, all the art materials fit inside, minus the canvases obviously)
The chocolates are just printed out labels laminated with clear parcel tape and glued around rectangles of styrene painted with a wonderfully glitzy silver nail varnish which looks exactly like foil. The Rolo one was done exactly the same, but with a bit of clear plastic tubing I had knocking around. I don’t drink coffee myself, but I think she looks like the type to be slightly addicted to Starbucks so I made her two so she can drink on the go!.
The cups were printed out on two pieces of paper and glued together, then hardened with a couple of layers of superglue so they’re pretty sturdy. I’d have made them from thin card if I had any spare to print but I didn't so this had to suffice. The lid on one was just a couple of circles of cardboard and the frothy creamy bit is a scrap of expanding foam I picked at with a fingernail until it was the right shape, then sprinkled on some chocolatey coloured pastel dust and dabbed on some clear matte varnish to seal it.
She likes her tech, so I kitted her out with a shiny new Macbook, an iPad, and a now rather outdated iPhone 5 to match my own.
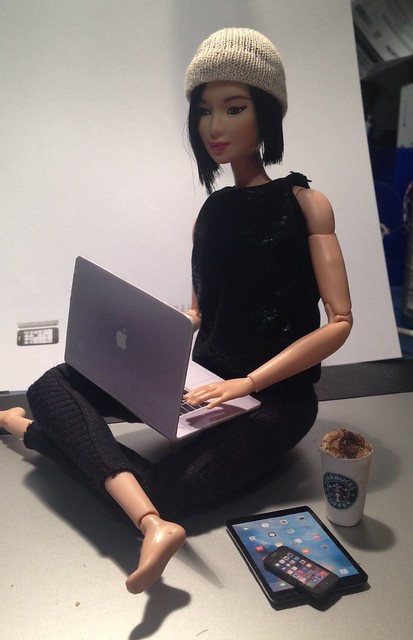
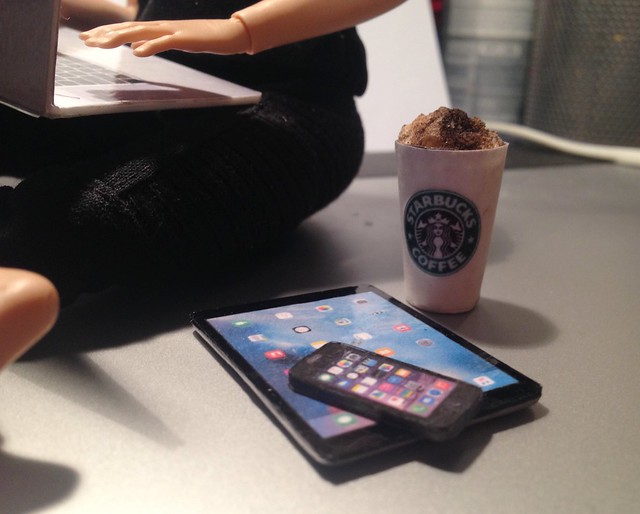
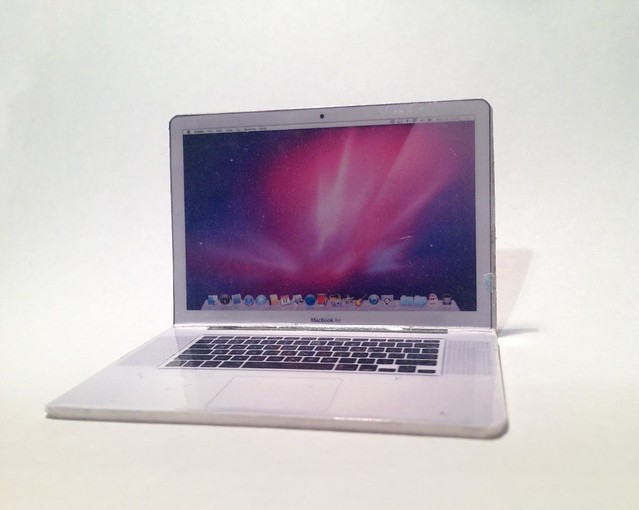
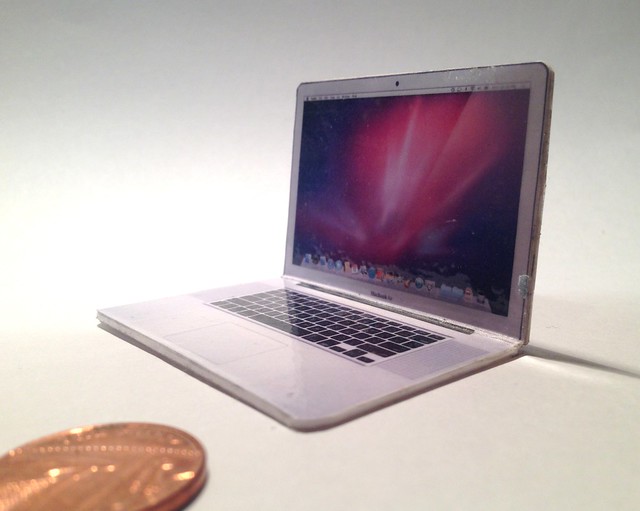


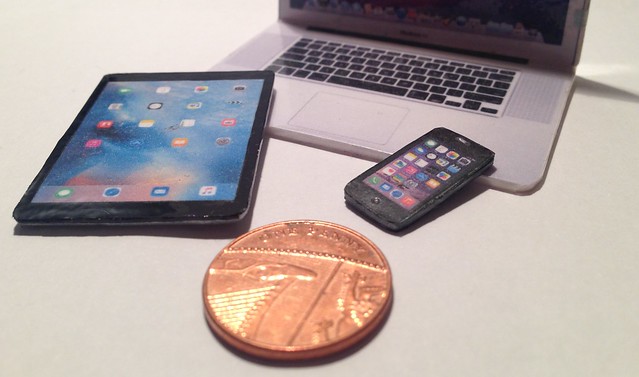
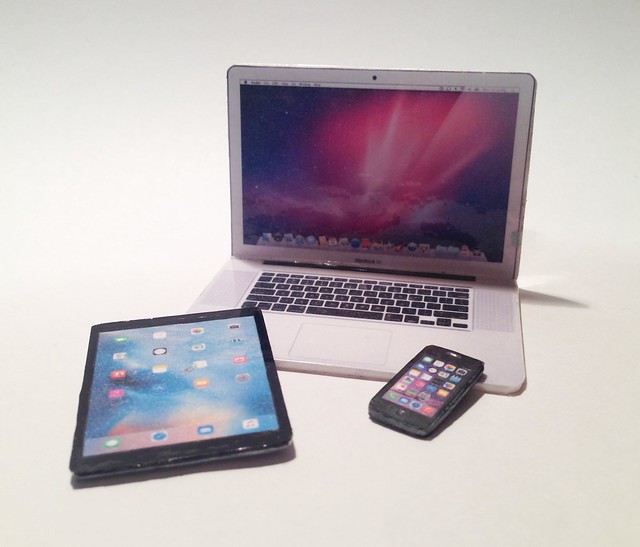
I made up the printables for them all using stock photos of the real products, printed them out and again, laminated them with clear parcel tape and used double-sided tape to sandwich each layer together.
The one thing she doesn't have yet is a name so any suggestions would be greatly appreciated! I like short and quirky names but nothing's sticking yet unfortunately.
Anyway, I have great plans for her so watch this space! I'll also be updating with the ponies I got from the Lake District Live at some point - I haven't been able to photograph everything yet but I have quite a few new faces to introduce.
Subscribe to:
Posts (Atom)