
Showing posts with label 1/6. Show all posts
Showing posts with label 1/6. Show all posts
Friday, 13 June 2025


Wednesday, 13 June 2018
Welcome to the Mighty Nein!
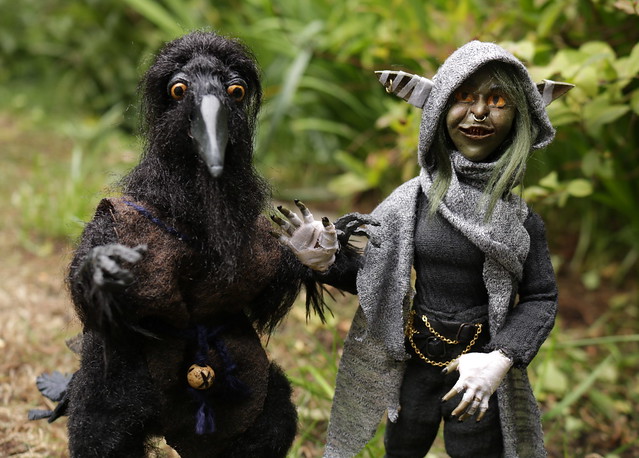
As most of you will know, I'm a massive nerd when it comes to fantasy/sci-fi.
I live and breathe all things geeky, but until a couple of years ago I couldn't fully consider myself a 'nerd' as I'd never experienced the utter joy that is the definitive role-playing game of Dungeons and Dragons. I still haven't managed to actually play yet, though I plan to DM for my friends at some point once I've got a session planned out, but in the meantime, I get my fix from the incomparable Critical Role; a weekly stream where 'a bunch of nerdy-ass voice actors sit around and play D&D'
I live and breathe all things geeky, but until a couple of years ago I couldn't fully consider myself a 'nerd' as I'd never experienced the utter joy that is the definitive role-playing game of Dungeons and Dragons. I still haven't managed to actually play yet, though I plan to DM for my friends at some point once I've got a session planned out, but in the meantime, I get my fix from the incomparable Critical Role; a weekly stream where 'a bunch of nerdy-ass voice actors sit around and play D&D'
I've been watching them for a good few years now, and with well over 500 hours worth of incredibly compelling storylines and emotive performances from the cast, it wasn't difficult to get swept up in the adventures of the heroic band of colourful characters - Vox Machina, and now, with their latest campaign, the motley crew known as The Mighty Nein.
I don't normally like making figures of other people's characters as they know them far better than I ever could, but I loved the new group so much I couldn't resist! So far I only have two (one of which doesn't quite count) but I fully intend to recreate the whole group! (and no, it isn't a typo, there really aren't actually nine of them, there's a huge in-joke related to nein/nine so it was inevitable that they ended up with that as part of their name)
Wednesday, 28 February 2018
Max does NaMoPaiMo - The Conclusion!
I meant to post this ages ago but I've been distracted by painting more ponies!😂
I managed to get everything spliced together into one video, so ta-da! Here's Max's work in its entirety!
I had a lot of fun making it all so I'll definitely be doing more like it in the future.
I managed to get everything spliced together into one video, so ta-da! Here's Max's work in its entirety!
I had a lot of fun making it all so I'll definitely be doing more like it in the future.
Tuesday, 6 February 2018
Max does NaMoPaiMo!
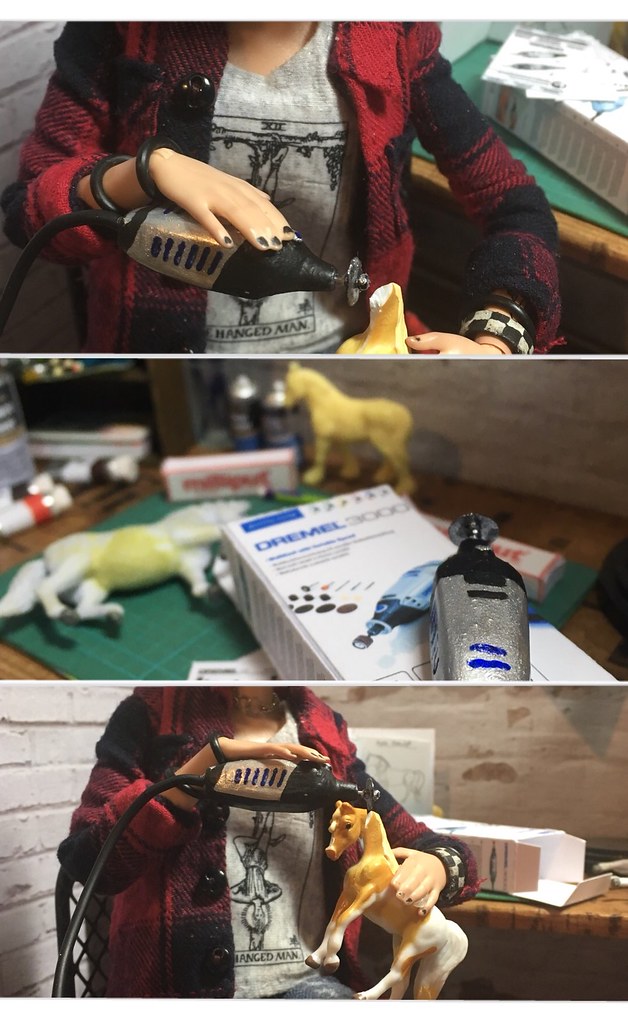
A little late to the party as ever, but the first of February marked the anniversary and new start to the incredibly fun and rewarding 'National Model Painting Month', or 'NaMoPaiMo'.
With well over 600 entrants this year, it's instantly bigger and better than last time and some people are already posting their finished horses on the Facebook group - some the same day the month long challenge began!
I aim to paint a micro mini I've had lying around naked for far too long...
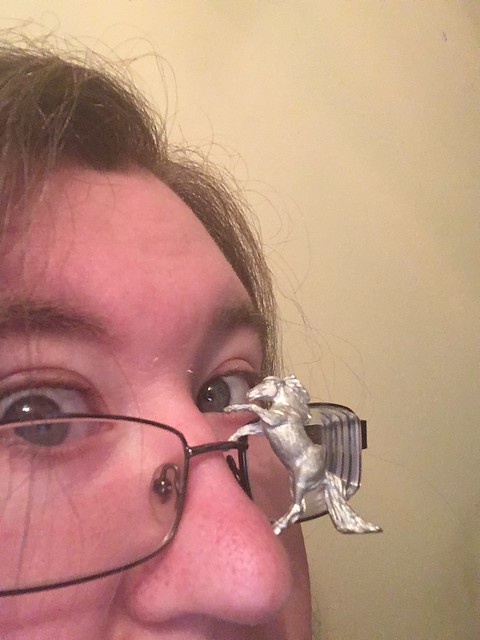
...but I wasn't the only one in the household who had some goals for this month - Max wanted to take part too!
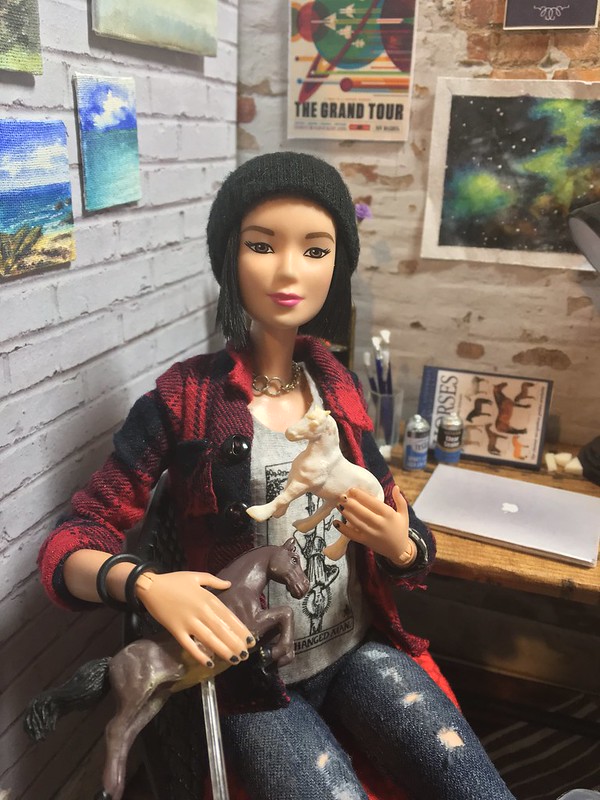
This post will contain the first part of her NaMoPaiMo experience...which includes stopmotions!
(click on the Instagram posts to view them)
(click on the Instagram posts to view them)
If you're on Instagram you can follow #maxdoesnamopaimo to see her progress!
I will of course be posting my own NMPM work, but let's face it, Max is way more photogenic!
Wednesday, 13 December 2017
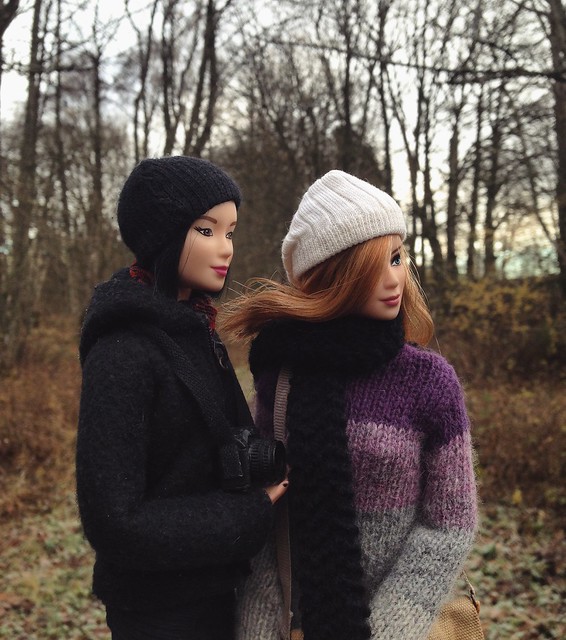
A Winter Wander
It's been pretty cold and frosty up here recently and so Max and Juno (and I!) took the opportunity to go for a wander...
Sunday, 12 November 2017
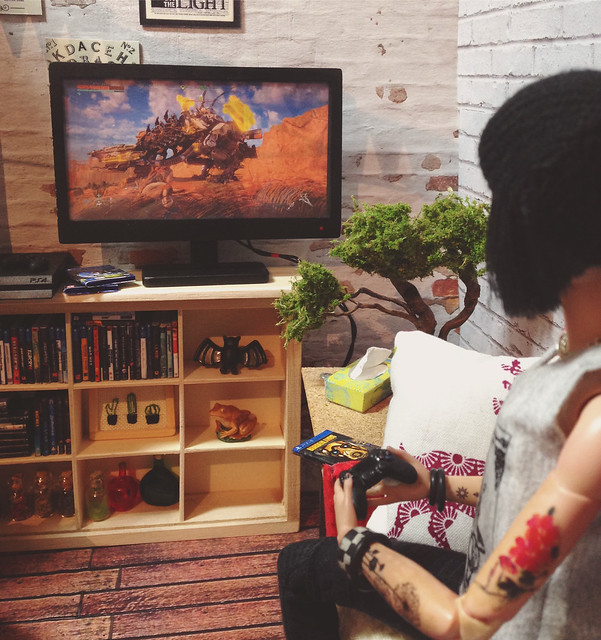
1/6th scale TV and PS4! (tutorial!)
Hurrah, not another holiday post! XD
I've been meaning to post about this for a few weeks now, so here's my 'kind of a tutorial/kind of shopping list' thing for how to create your own 'working' miniature TV.
Monday, 4 September 2017
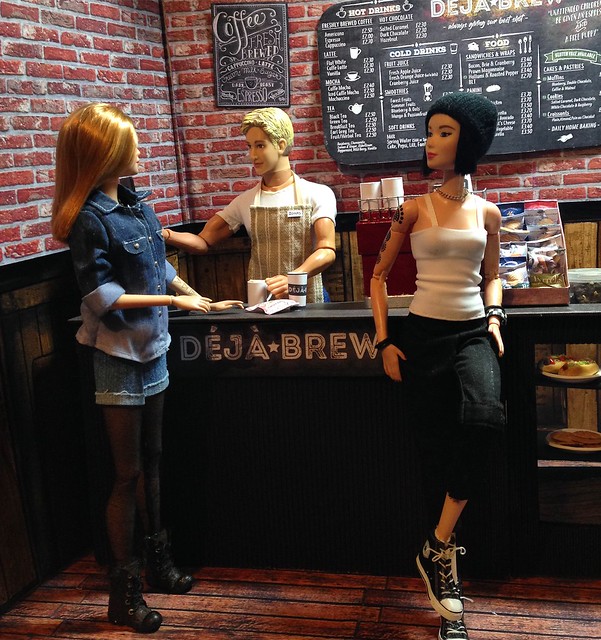
Deja Brew! (WIP)
One of the 1/6th scale projects I've been working on for months is a coffee shop. While Max and Juno's kitchen and bedroom are priorities, I felt I needed somewhere they could socialise with the rest of the cast. A coffee shop seemed like the logical solution, though perhaps not, as I don't drink tea or coffee so I'm very unfamiliar with what's actually available! 😂
I couldn't resist a good pun for the name though. :P
It's still very much a WIP at the moment but I thought I'd share what I have so far anyway!
Thursday, 4 May 2017
An interlude...
I've got lots to post about in the next week or so (some scenic scenery and a sneaky behind the scenes look at the newly relaunched Magpie Model Horses!) but I haven't uploaded all my photos yet so you'll just have to put up with this instead; another brief look into the daily goings on at Max and Juno's place...
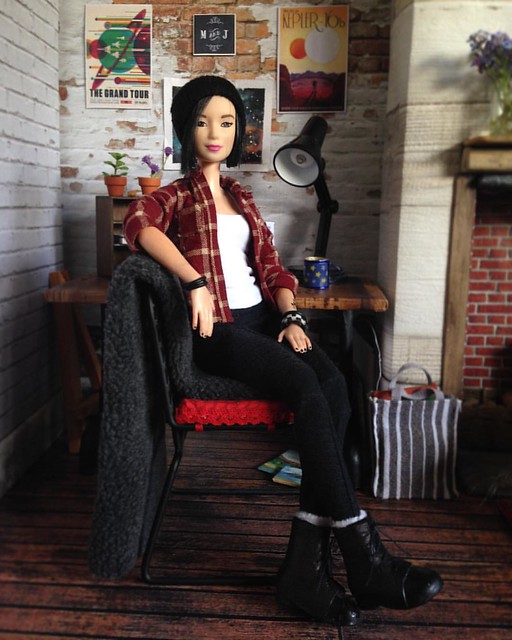
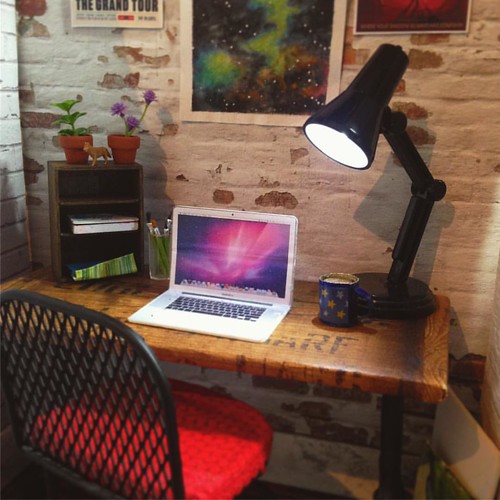
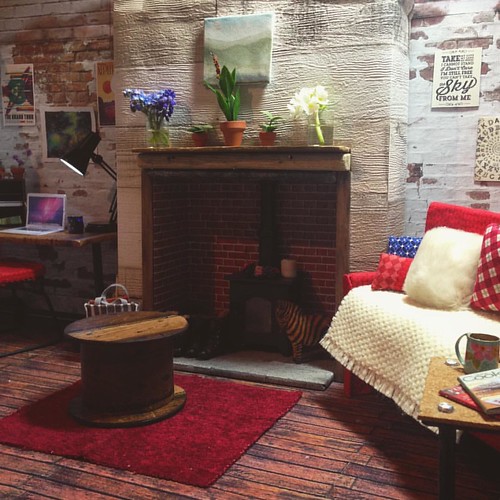
I made one of those fancy reclaimed wire spool tables that's all over Pinterest from a cardboard tube, some scrap balsa wood and more of the wood effect wallpaper. The delightfully carved wooden zebra by the stove was a lucky charity shop find by my dad - I've trained him well, he now actively searches for horse shaped objects for me!
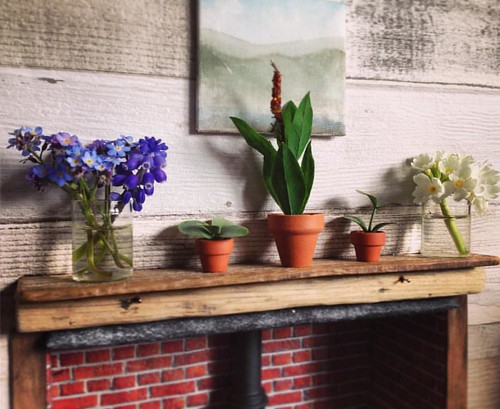
As I knew the real flowers I'd used for my Easter photo session wouldn't last, I rummaged through my bag of plastic planty bits and dug out a couple of tiny terracotta plant pots I'd bought at a recent craft fair. The soil is just a chunk of blue foam to pad it out, then covered in a liberal dollop of PVA glue and dried coffee and tea grounds.
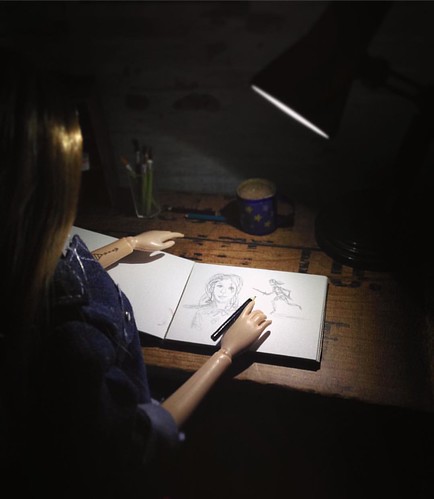
The anglepoise lamp on the desk was a £4 bargain from Flying Tiger Copenhagen, and is completely poseable as well as fully operational, which comes in very handy when Juno feels the urge to draw late at night...
Sunday, 16 April 2017
DIY Desks and Tableware!
Whilst binge watching Critical Role again last night, it hit me that I still hadn't got round to making Max and Juno a desk or table for their living room. (I still need to remake the sofa, but it'll do for now.)
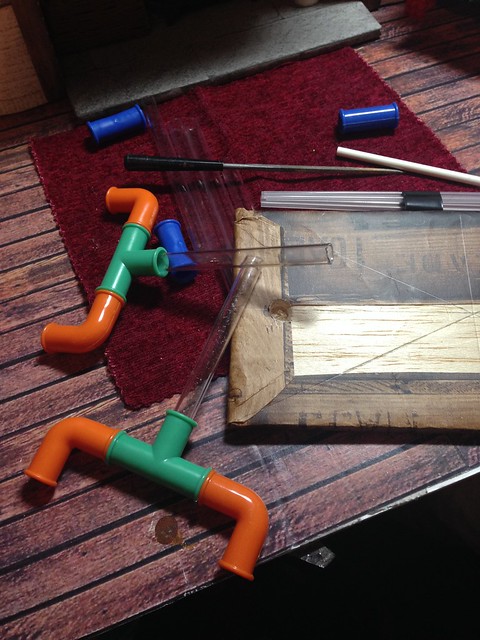
I wasn't in the mood for any proper woodworking, so I had a rummage and a quick browse of Pinterest for inspiration and hit on the perfect combo. I've been trying to go for a sort of industrial/shabby chic look with the furnishings, and I really liked the look of old reclaimed metal and wood for furniture.
I'd bought this novelty connecting 'pipe' drinking straw set years ago as I thought it had potential, and well, I was right!
Saturday, 6 August 2016
An unexpected art attack!
This post will be mostly about 1/6th scale miniatures but first, a bit of background...
A while ago now, Mattel released their newest iteration of Barbie - Made to Move.
These dolls have incredibly good articulation and after reading a couple of reviews online I knew I needed one or two to add to the 1/6th scale crew. I ordered a random pair from Argos and once I had them unpacked I was VERY impressed. Considering their incredibly low price I'd rate them extremely highly and I can see myself buying more of these in the future as they're really very, very good.
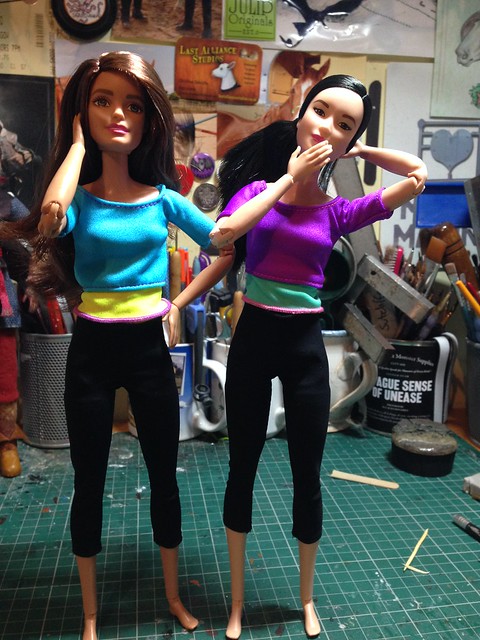
ERMERGERD, BARBIES THAT CAN STAND ON THEIR OWN TWO FEET?! O_O
They fall over a lot because their feet are still ridiculously tiny, but never mind, that can be solved with decent footwear - the articulation is more important to me!
The brunette is now a blonde and nearly ready to be shown off as a portrait of yet another of my Skyrim characters but her friend was destined for another fate. She got a haircut...
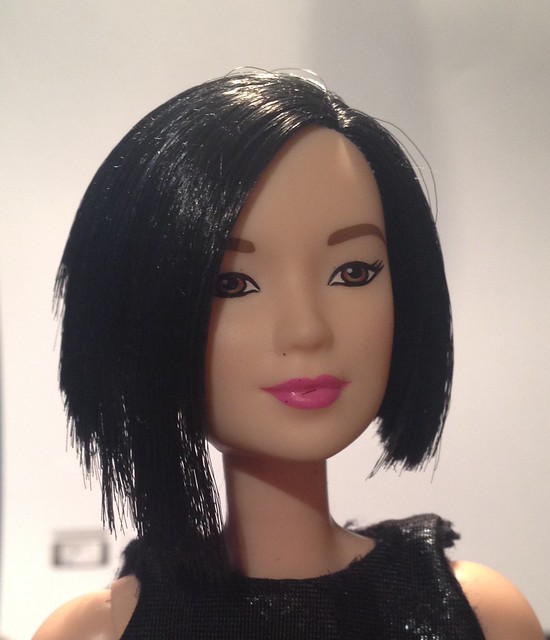
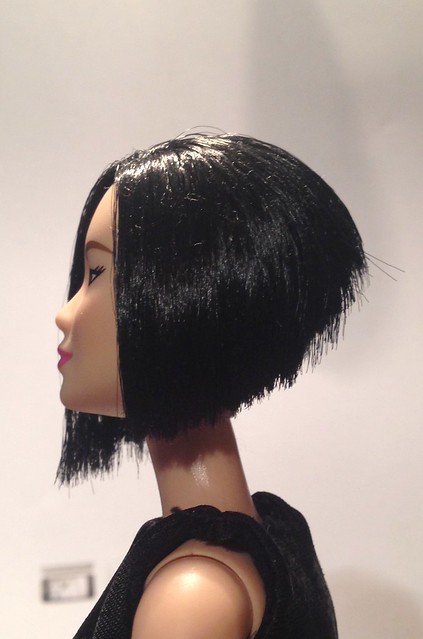
(which was an ordeal in itself, hence the hat! XD)
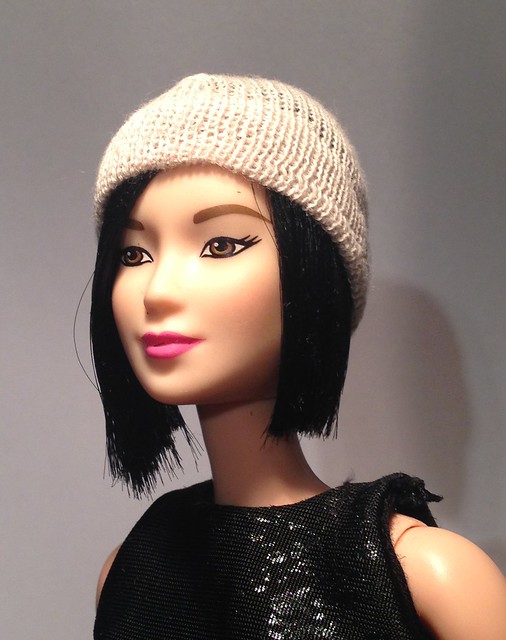
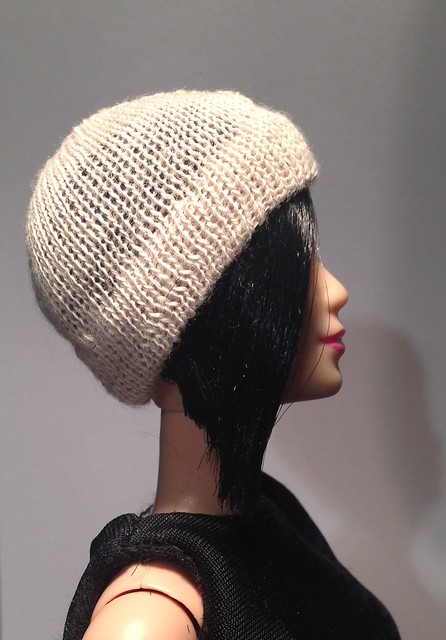
...some new and borrowed clothes and now, she even has a profession!
I decided she’s going to be an artist/photographer which will give me a good excuse to do some miniature paintings and take her out for photoshoots in scenic locations but I think I got slightly carried away the other night making her some art supplies...
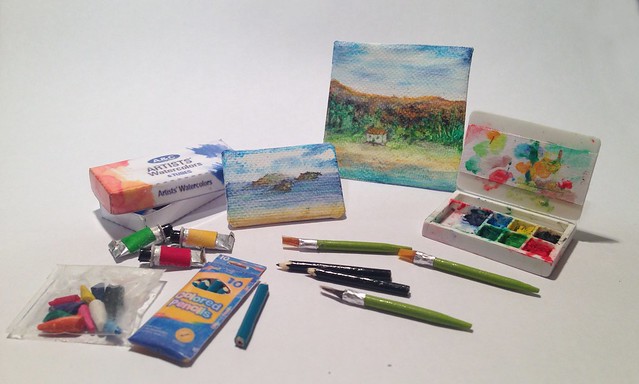
The pencil packaging and watercolour box were doll’s house printables I scaled up but everything else is made from scratch. I printed them out on normal printer paper, but set to high quality, then laminated them with clear parcel tape, cut them out and folded everything up. I used superglue to stick them together rather than my usual PVA.
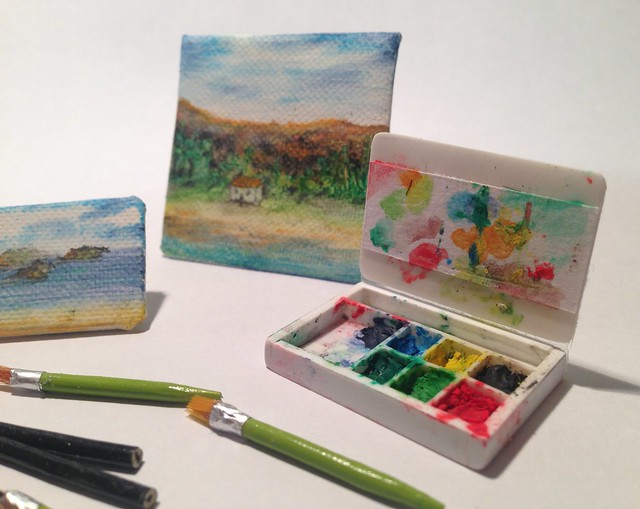
The watercolour palette is all styrene with the leads from watercolour pencils smooshed into each section! The hinge is just tape - I didn't want to risk making a proper one in case it broke from opening it up too much.
The watercolour palette is all styrene with the leads from watercolour pencils smooshed into each section! The hinge is just tape - I didn't want to risk making a proper one in case it broke from opening it up too much.
The paint tubes were made from the thick metal foil that tops some bottles of wine - I'd been saving some for ages in my stash for a project just like this! The lids are tiny eyelets glued upside down and painted. The pencils and brushes are toothpicks painted with nail varnish - the brush tips are trimmed down real bristles and tufts of faux fur with a scrap of tinfoil superglued on around them. The bag of 'oil pastels' are yet more watercolour pencil leads - they're so fragile!
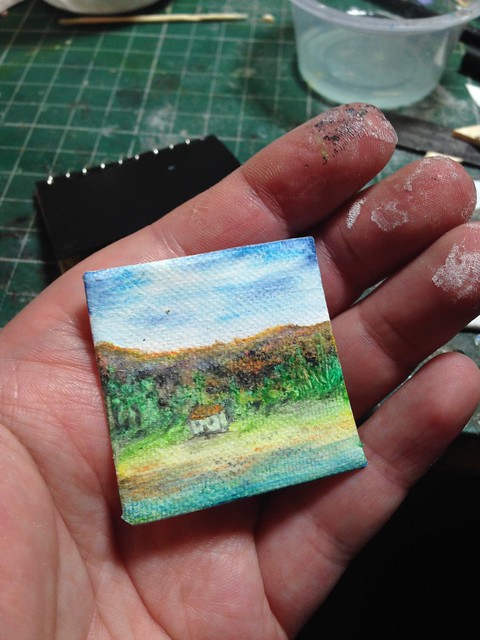
I found the canvas in a rather unusual place - the £1 shop! In the stationary section they had a few packs of photo paper for printing but they also had some canvas effect matte 'paper' for doing homemade canvas prints. it's real fabric as far as I can tell, but synthetic. I made some (slightly wonky) tiny wooden frames from coffee stirrers, soaked the canvas so it would stretch round them, then held them in place with mini bulldog clips til they'd dried fully, at which point I got the superglue out and glued them on at the back. The watercolour pencils I used for the 'paintings' went on fine, but I wanted a little more realism so I made up a quick and messy gesso using some white acrylic and talc and daubed it on. I have to admit, it's such a minor thing but it makes a big difference! I think the paints adhere better and it has a much more convincing texture than before.
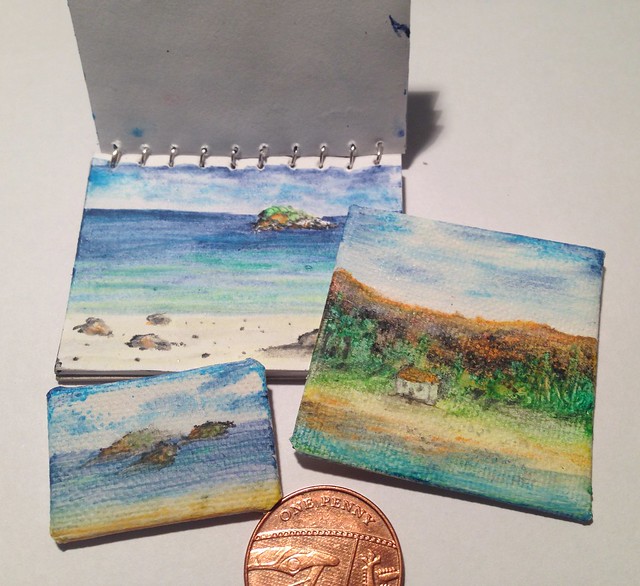
I’m actually going to take some canvases with me on holiday next time I go and do some proper watercolour painting at the beach…just in miniature!
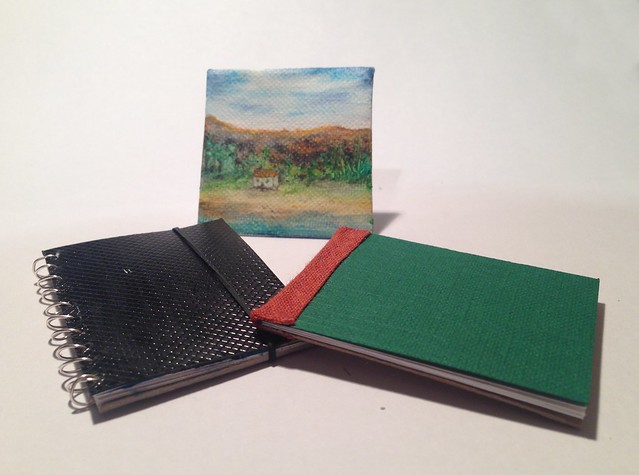
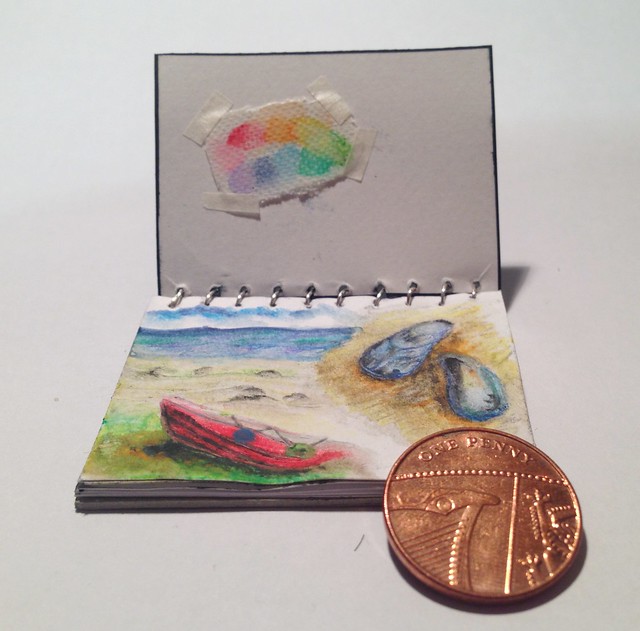
So, with that in mind, I made some sketchbooks as well for that very purpose – the ringbinding on the black one is a little big but I have seen full scale ones a bit like that so meh, artistic licence. :P I used this tutorial for it if anyone's interested. The elastic (a plaiting band from my ancient grooming kit, haha!) hasn't been attached yet.
The green one was a little simpler to make - I just cut out some pages and matching front and back covers, (from a textured christmas card and thin cardboard, respectfully) tapped them on the table a few times so they were level, then clipped them from the bottom and sides to hold them all together. A couple of layers of copydex glue on the spine end were applied, then when that was dry, a folded section of bias binding was glued over the end, and ta-da!
The green one was a little simpler to make - I just cut out some pages and matching front and back covers, (from a textured christmas card and thin cardboard, respectfully) tapped them on the table a few times so they were level, then clipped them from the bottom and sides to hold them all together. A couple of layers of copydex glue on the spine end were applied, then when that was dry, a folded section of bias binding was glued over the end, and ta-da!
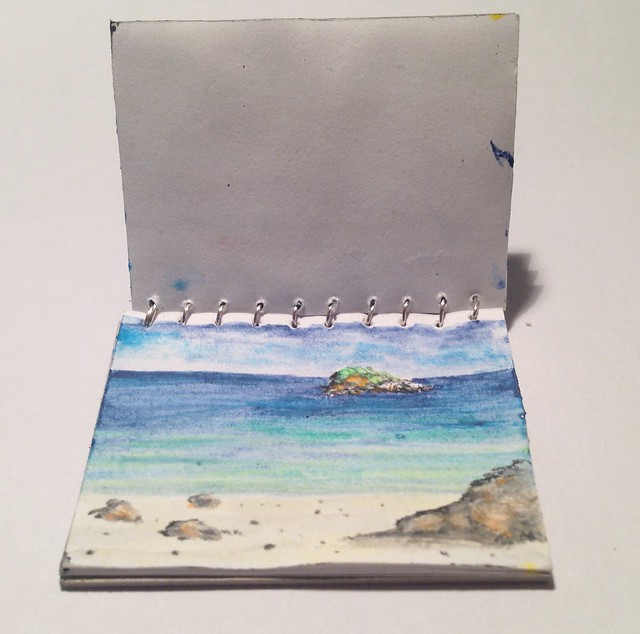
I used sketchbook paper for this rather than bog standard printer paper. This had the advantage that it was thicker and more realistic and held up to being repeatedly doused in water!
Obviously it would be a chore to carry all that around in your arms, so I also provided our aspiring artist with this!
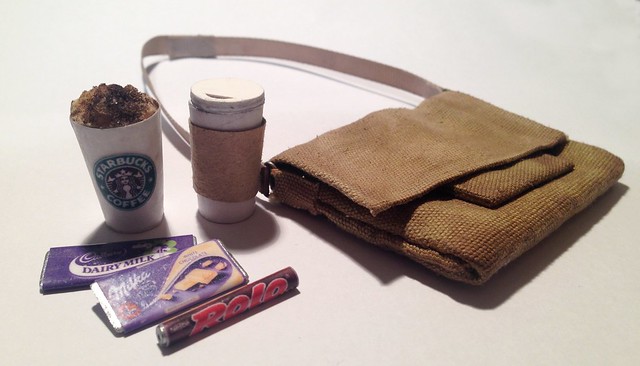
The messenger bag is made from some fabric scraps from my old full sized version and has working pockets. (and yes, all the art materials fit inside, minus the canvases obviously)
The chocolates are just printed out labels laminated with clear parcel tape and glued around rectangles of styrene painted with a wonderfully glitzy silver nail varnish which looks exactly like foil. The Rolo one was done exactly the same, but with a bit of clear plastic tubing I had knocking around. I don’t drink coffee myself, but I think she looks like the type to be slightly addicted to Starbucks so I made her two so she can drink on the go!.
The cups were printed out on two pieces of paper and glued together, then hardened with a couple of layers of superglue so they’re pretty sturdy. I’d have made them from thin card if I had any spare to print but I didn't so this had to suffice. The lid on one was just a couple of circles of cardboard and the frothy creamy bit is a scrap of expanding foam I picked at with a fingernail until it was the right shape, then sprinkled on some chocolatey coloured pastel dust and dabbed on some clear matte varnish to seal it.
She likes her tech, so I kitted her out with a shiny new Macbook, an iPad, and a now rather outdated iPhone 5 to match my own.
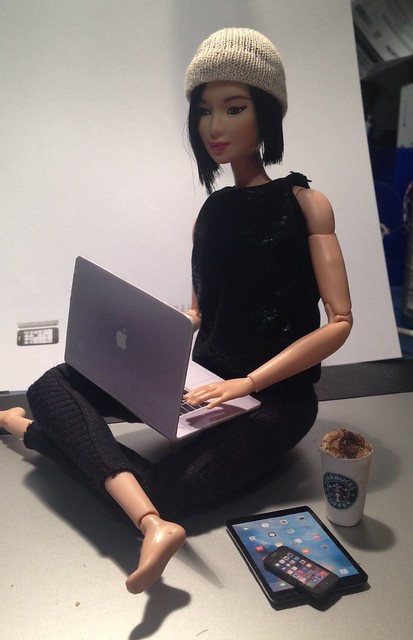
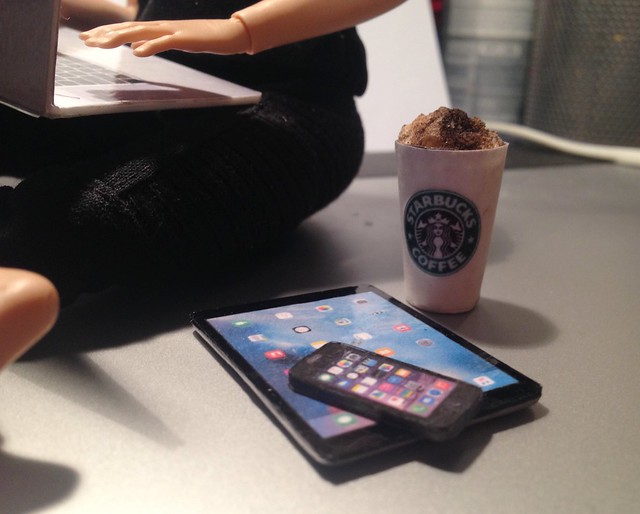
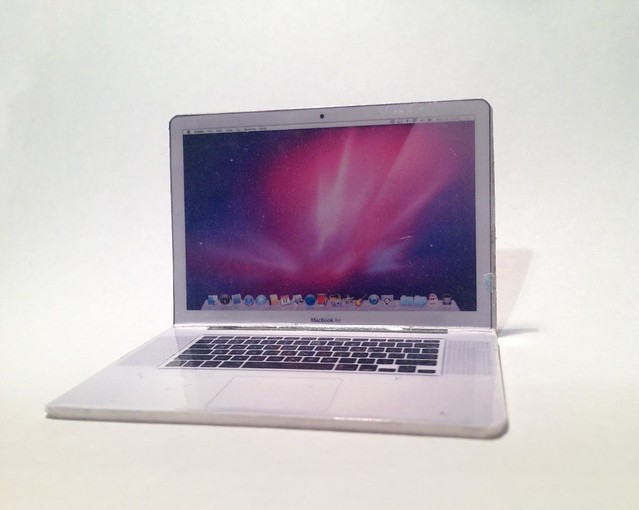
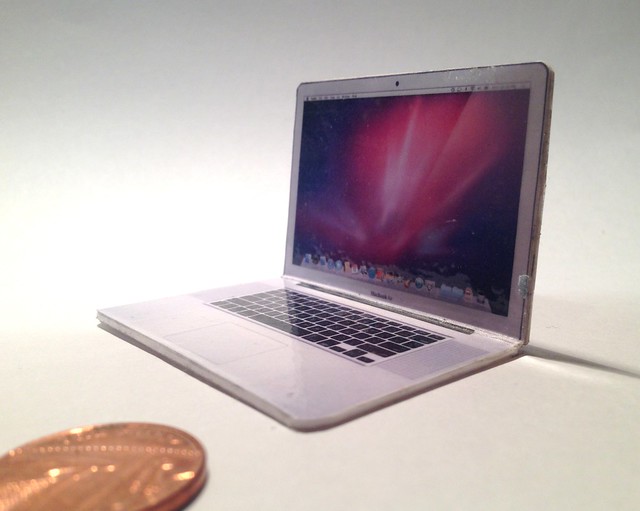


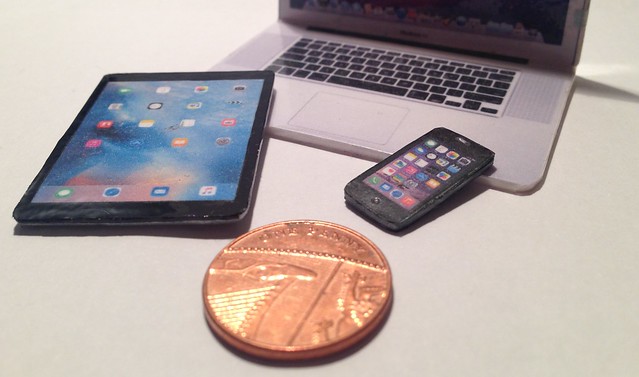
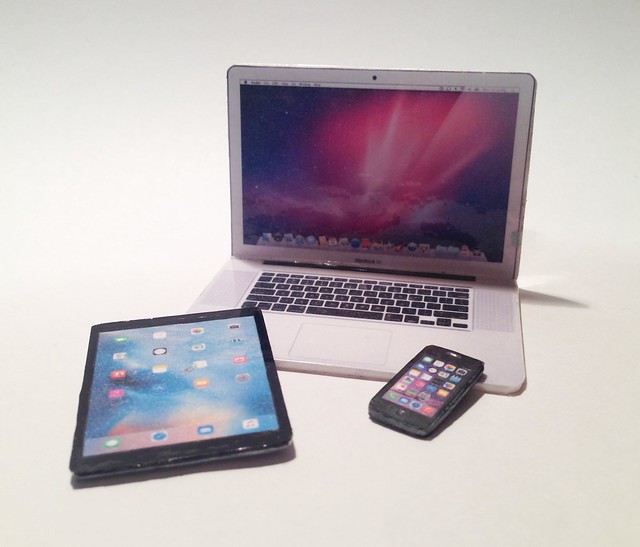
I made up the printables for them all using stock photos of the real products, printed them out and again, laminated them with clear parcel tape and used double-sided tape to sandwich each layer together.
The one thing she doesn't have yet is a name so any suggestions would be greatly appreciated! I like short and quirky names but nothing's sticking yet unfortunately.
Anyway, I have great plans for her so watch this space! I'll also be updating with the ponies I got from the Lake District Live at some point - I haven't been able to photograph everything yet but I have quite a few new faces to introduce.
Wednesday, 27 January 2016
Brenn the Spellsword and his foxy friend!
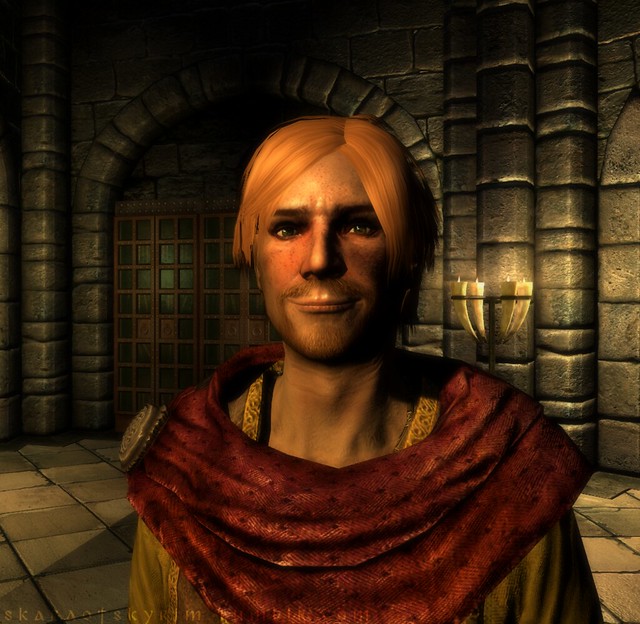
Another post I've been meaning to share for months, this one introduces another of my motley cast of Skyrim characters. He's one of my favourites to play with, and I've had great fun coming up with his backstory and personality as I've gone along.
Wednesday, 4 February 2015
Back to Skyrim...
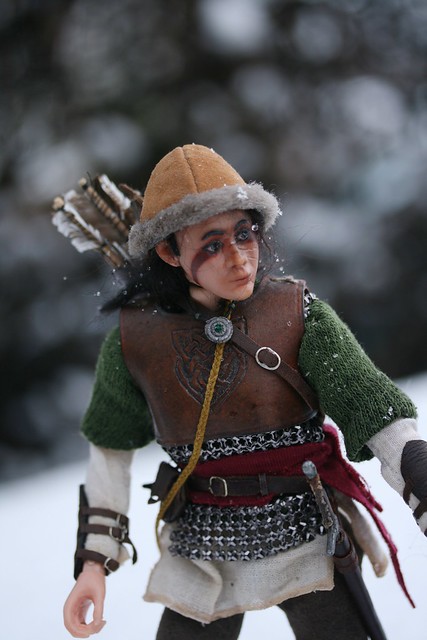
As you might remember, I've been working on and off on bringing some of my Skyrim characters to life in 1/6th scale form. So far I've created Skara the thief/archer and her squishy cob mare Inky, but not much other than that...
Until now, that is!
Wednesday, 9 October 2013
Skara Update!
I'm still working on her first photostory (my muse has disappeared again, typical) but for now, here's a bit of a costume update.
When you last saw her, Skara was kitted out in a very basic shirt 'n' trousers combo which, while fine for escaping a burning town and whatnot it just wasn't suitable for everyday adventuring. Her kit needed some work too, so...
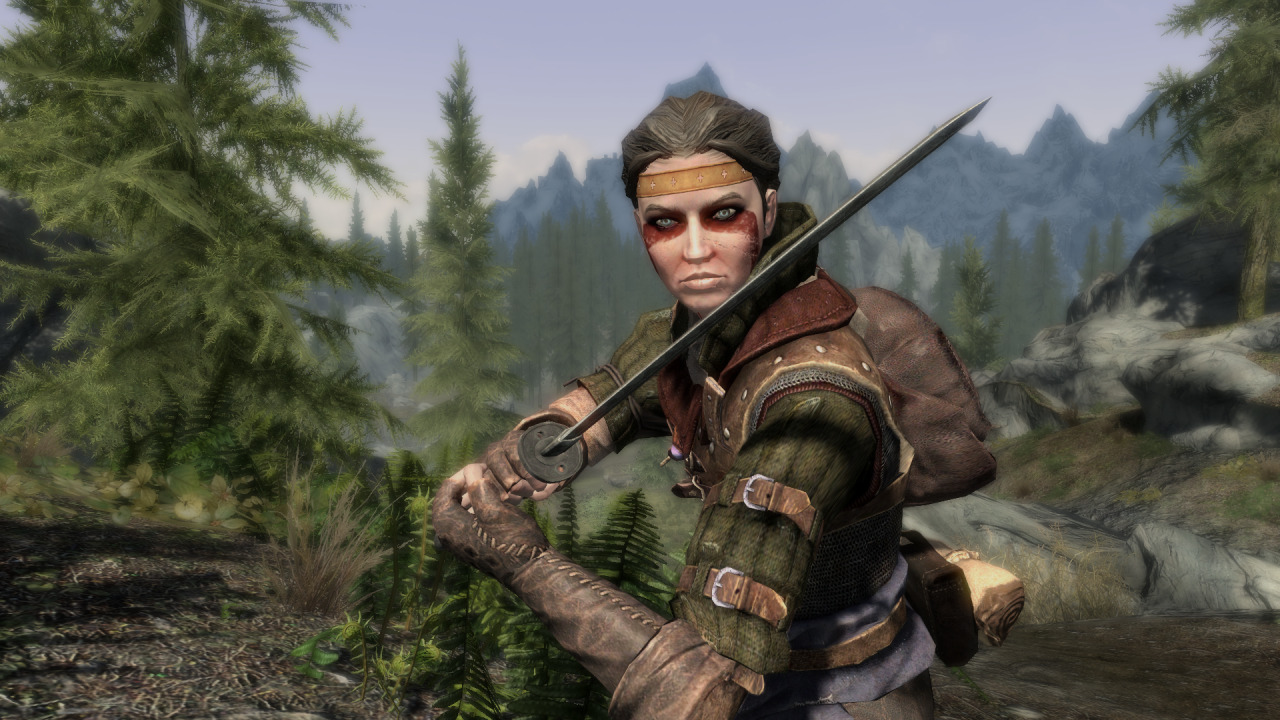
First to be tweaked was the costume. I use a lot of custom mods on my copy of Skyrim for the PC and by far, my favourite is -this armour- set I got from the Skyrim Nexus. I didn't want to copy it completely, just get the feel of it so I tweaked things rather a lot.
Here she is in game... (oh and I have a tumblr for all my screenshots now too, -here-)

First to be made was the leather breastplate. In hindsight, I should have made it a bit differently but hey-ho, I'm pleased with how it turned out nonetheless!
I used some tooling leather I had lying about and using a picture of some celtic knotwork I found online, began to carve it out. As often happens when a sudden bout of creative inspiration occurs, I found myself entirely without leatherworking tools so I was forced to improvise. In place of a punch, I had a mini screwdriver and my 'mallet' consisted of a bottle of water. Oh and did I mention that I was doing this not at my desk or in a specific working area but right in front of the PC with my parents trying to watch a film in the room almost directly below? Yeeeah, they weren't particularly impressed with the noise I was making but once I'd dampened the leather I couldn't just stop so they had to put up with it! :P

I'd never really carved leather before and aside from the tremendous noise I ended up producing alongside it, I really enjoyed it. The runes on the back piece say 'shadow' in Dovah script - an apt phrase to apply to a sneakthief archer I thought - and the symbols alongside relate to Skyrim's Thieves Guild.
I didn't have anything to treat the leather with once it was finished so after I had finished carving it I dampened it down and formed it to Skara's body so it would hold its shape once it dried, then I used a combination of acrylic washes and hand cream to keep the leather supple.

Oh and the hat is just fine leather from a charity shop purse (£1, bargain!) with some fur fabric. I had a little scrap of rabbit fur I was going to use instead as it looked nicer but I couldn't get it to sit properly. I've trimmed the fur since the picture too.
Next up was the maille. I'd attempted to make my own using tiny jump rings but gave up after only a row and a half as it was incredibly fiddly so I had to use my backup plan - metal mesh from an old purse. (another charity shop find) One one side it has flat metal pieces but the other side can double as chainmaille if you squint a bit.
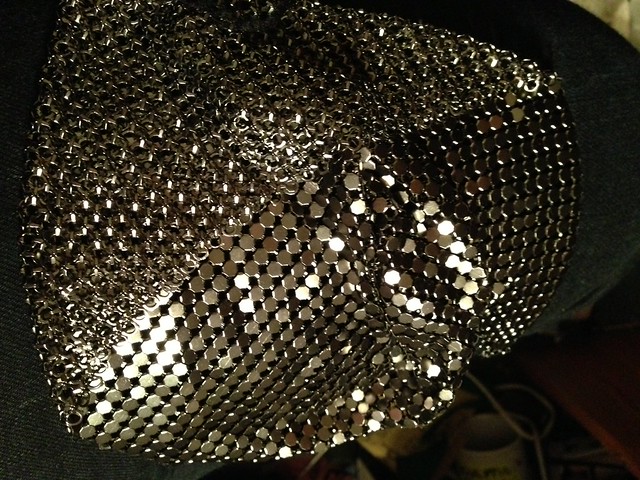
Either way, it was only a couple of pounds for the bag so I thought I'd better give it a go. The 'rings' are a little too big and I have another purse of the same material in a smaller size that would look better, only they're in a much more gold/bronze colour which isn't really what I wanted so I'll just have to put up with it for now until I can find some smaller stuff.

I made her a nice cosy looking overtunic out of some £1 shop socks the other day and oooft, I HATE sewing sleeves! I sewed one inside out at least twice and messed up the other once but now that they're done I can't say I'm too disappointed although now that I look at photos I realise I made it woefully too short. Bugger.
Oh well, she probably took them off someone else anyway so we can just say that it wasn't her size...


At some point in her story (which I will commence writing again once this is posted!) she will make her way to the small village of Falkreath which is one of my favourite places in the game. All the guards carry shields with the individual Hold's sigils so I thought it might be nice to make her one too as I tend to use a shield with her and a sword. I made it from balsa wood, with superglue/bicarb for the metal parts. The sigil I drew from a reference picture and ended up having to repaint it several times as it was so fiddly!
She got a sword too, though it's only temporary as I made it in a couple of hours from a wooden coffee stirrer and I'm not confident it'll last long, haha!
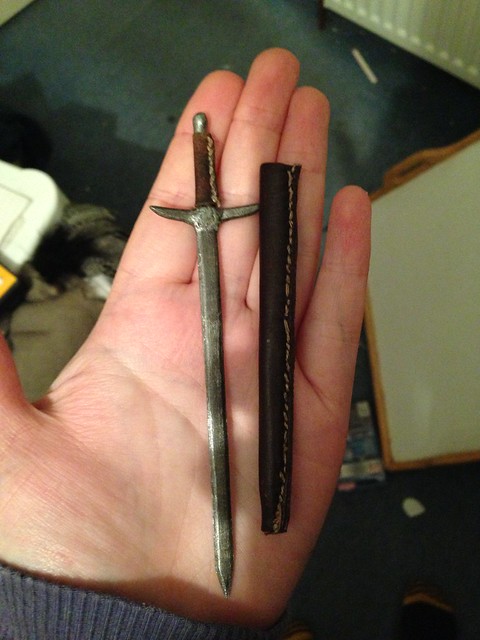
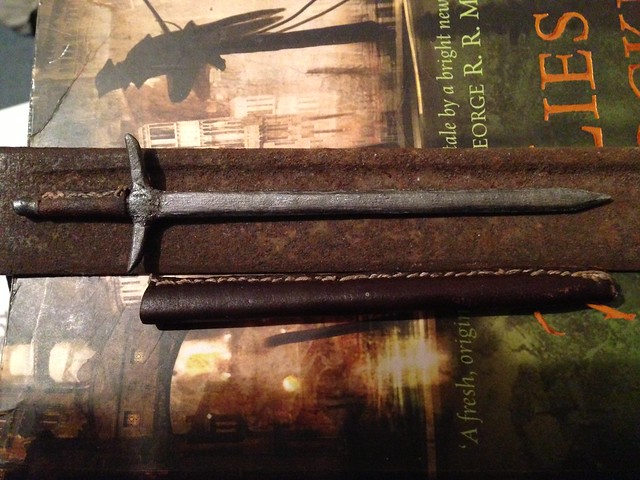
(on a strangely related side note, it sits in the above picture on the blade of a German WW1 bayonet that we found recently in my grandpa's garage. This is odd in many ways but mostly because he wasn't around in the First World War and even in the second he served in India on the trains so we have literally no idea how he came by it and neither does he!)
I'll be taking her and Inky down to Dumfries with me this weekend for a week's holiday so I'll be taking lots of photos, weather permitting!
When you last saw her, Skara was kitted out in a very basic shirt 'n' trousers combo which, while fine for escaping a burning town and whatnot it just wasn't suitable for everyday adventuring. Her kit needed some work too, so...
First to be tweaked was the costume. I use a lot of custom mods on my copy of Skyrim for the PC and by far, my favourite is -this armour- set I got from the Skyrim Nexus. I didn't want to copy it completely, just get the feel of it so I tweaked things rather a lot.
Here she is in game... (oh and I have a tumblr for all my screenshots now too, -here-)
First to be made was the leather breastplate. In hindsight, I should have made it a bit differently but hey-ho, I'm pleased with how it turned out nonetheless!
I used some tooling leather I had lying about and using a picture of some celtic knotwork I found online, began to carve it out. As often happens when a sudden bout of creative inspiration occurs, I found myself entirely without leatherworking tools so I was forced to improvise. In place of a punch, I had a mini screwdriver and my 'mallet' consisted of a bottle of water. Oh and did I mention that I was doing this not at my desk or in a specific working area but right in front of the PC with my parents trying to watch a film in the room almost directly below? Yeeeah, they weren't particularly impressed with the noise I was making but once I'd dampened the leather I couldn't just stop so they had to put up with it! :P
I'd never really carved leather before and aside from the tremendous noise I ended up producing alongside it, I really enjoyed it. The runes on the back piece say 'shadow' in Dovah script - an apt phrase to apply to a sneakthief archer I thought - and the symbols alongside relate to Skyrim's Thieves Guild.
I didn't have anything to treat the leather with once it was finished so after I had finished carving it I dampened it down and formed it to Skara's body so it would hold its shape once it dried, then I used a combination of acrylic washes and hand cream to keep the leather supple.
Oh and the hat is just fine leather from a charity shop purse (£1, bargain!) with some fur fabric. I had a little scrap of rabbit fur I was going to use instead as it looked nicer but I couldn't get it to sit properly. I've trimmed the fur since the picture too.
Next up was the maille. I'd attempted to make my own using tiny jump rings but gave up after only a row and a half as it was incredibly fiddly so I had to use my backup plan - metal mesh from an old purse. (another charity shop find) One one side it has flat metal pieces but the other side can double as chainmaille if you squint a bit.
Either way, it was only a couple of pounds for the bag so I thought I'd better give it a go. The 'rings' are a little too big and I have another purse of the same material in a smaller size that would look better, only they're in a much more gold/bronze colour which isn't really what I wanted so I'll just have to put up with it for now until I can find some smaller stuff.
I made her a nice cosy looking overtunic out of some £1 shop socks the other day and oooft, I HATE sewing sleeves! I sewed one inside out at least twice and messed up the other once but now that they're done I can't say I'm too disappointed although now that I look at photos I realise I made it woefully too short. Bugger.
Oh well, she probably took them off someone else anyway so we can just say that it wasn't her size...
At some point in her story (which I will commence writing again once this is posted!) she will make her way to the small village of Falkreath which is one of my favourite places in the game. All the guards carry shields with the individual Hold's sigils so I thought it might be nice to make her one too as I tend to use a shield with her and a sword. I made it from balsa wood, with superglue/bicarb for the metal parts. The sigil I drew from a reference picture and ended up having to repaint it several times as it was so fiddly!
She got a sword too, though it's only temporary as I made it in a couple of hours from a wooden coffee stirrer and I'm not confident it'll last long, haha!
(on a strangely related side note, it sits in the above picture on the blade of a German WW1 bayonet that we found recently in my grandpa's garage. This is odd in many ways but mostly because he wasn't around in the First World War and even in the second he served in India on the trains so we have literally no idea how he came by it and neither does he!)
I'll be taking her and Inky down to Dumfries with me this weekend for a week's holiday so I'll be taking lots of photos, weather permitting!
Subscribe to:
Posts (Atom)