
Hurrah, not another holiday post! XD
I've been meaning to post about this for a few weeks now, so here's my 'kind of a tutorial/kind of shopping list' thing for how to create your own 'working' miniature TV.

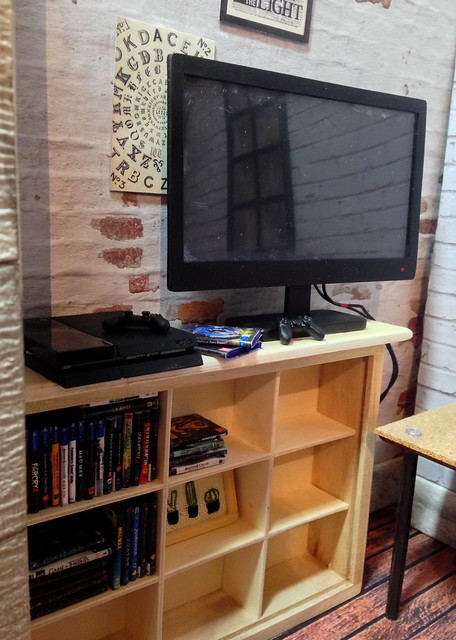
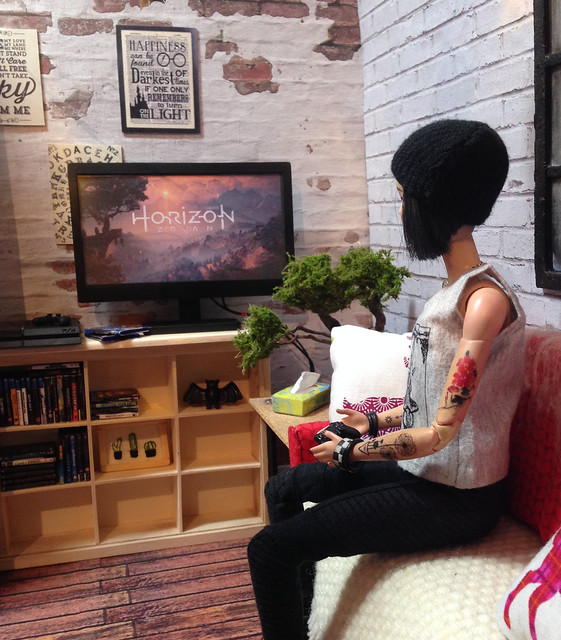
After setting up Max and Juno's room set multiple times, I just wasn't feeling the position of the sofa.
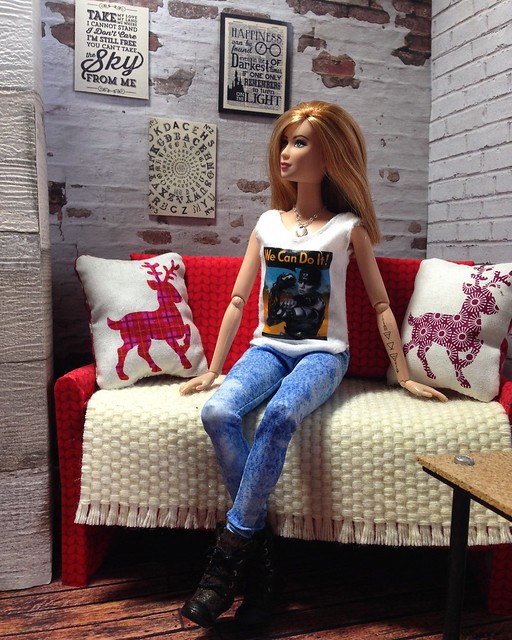
Tucked away in the corner like that meant that they couldn't really look out into the room and it really limited things like storage and table positioning, so I finally moved it to the right, which left a rather obvious space on the back wall. Most people have a TV of some kind in their living room and as I've wanted Max and Juno to have their own PS4 for ages now, and after seeing a really good tutorial on youtube for a 1/12th scale TV with insertable screens, my motivation meter filled up to the max and I gave it a go!
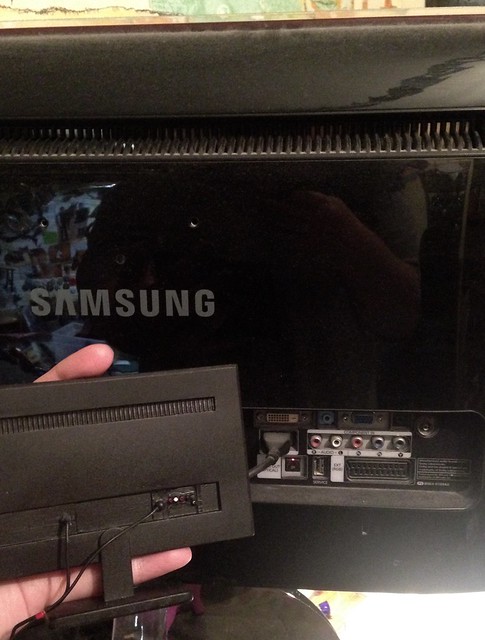
First of all I roughly measured my own full sized TV's dimensions, and using an online scale convertor, changed it to 1/6th scale.
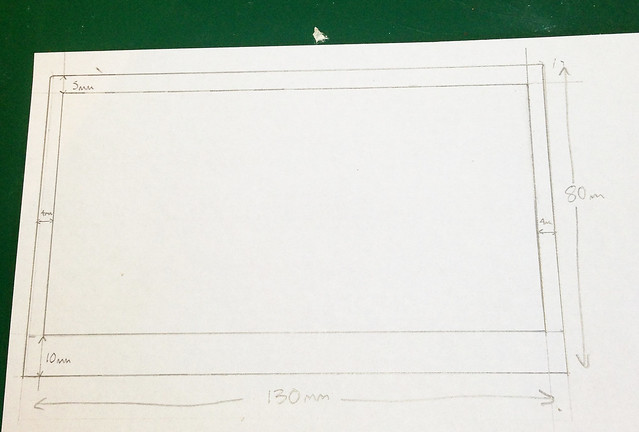
Using this as a template, I cut three identical rectangles out of 1mm styrene. I wanted to give the back part some extra detail, so I measured out a couple of narrower rectangles on two of them and cut them out. It was important that they match perfectly as they'd be stacked together. One is intentionally shorter and you'll see why later on.

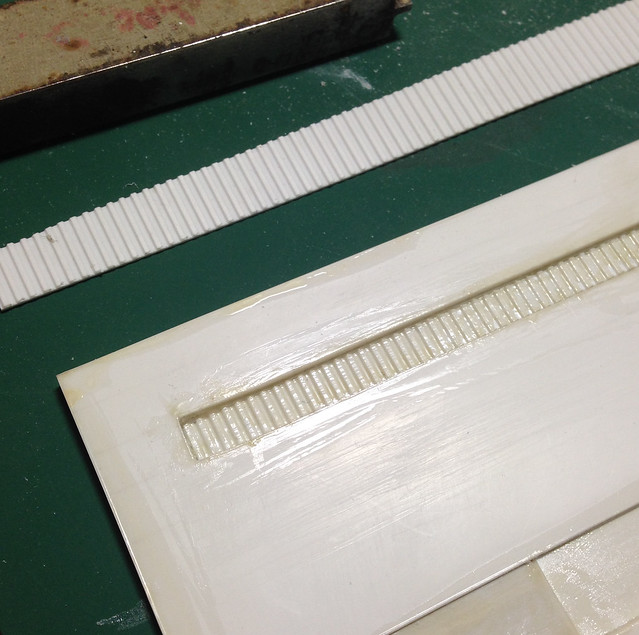
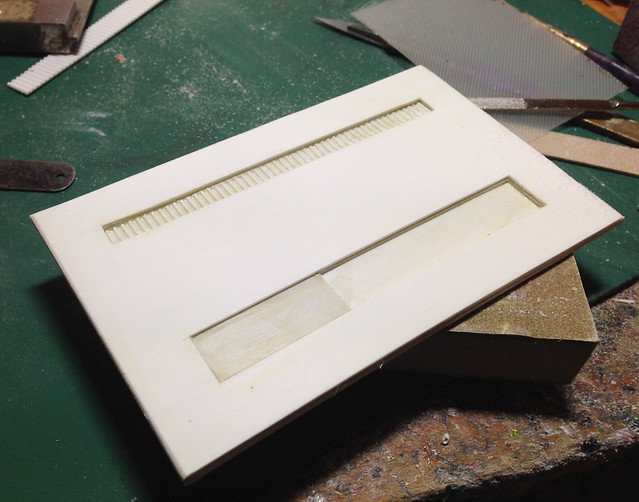
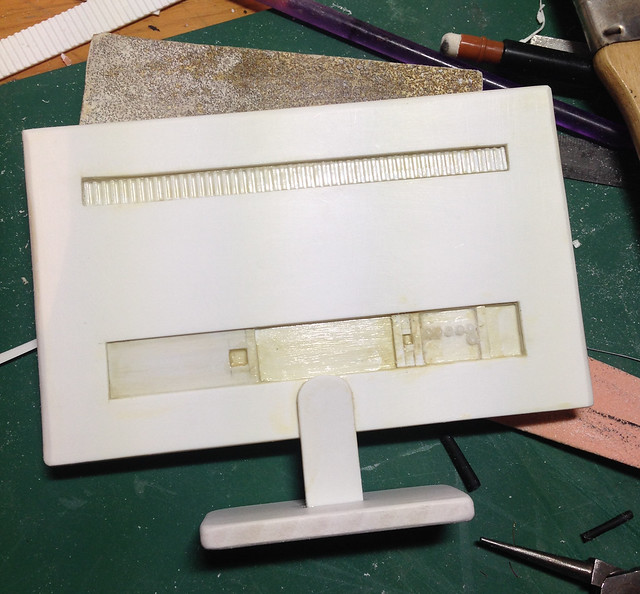
All three rectangles were welded together with dichlo/plastic weld, leaving two distinct alcoves in the surface. I had a couple of scraps of some textured styrene knocking around, so I cut some to fit to the top section, like a speaker grille.
Using some other styrene scraps and a few beads, I added some vaguely plug and button-shaped details before making a simple base support from more styrene and a small block of heavy duty foamboard.
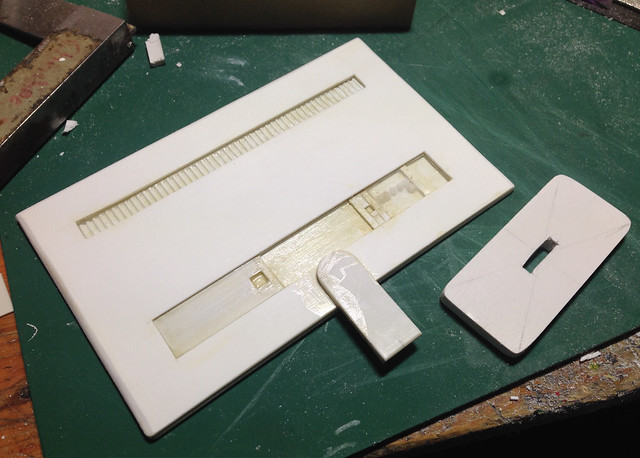
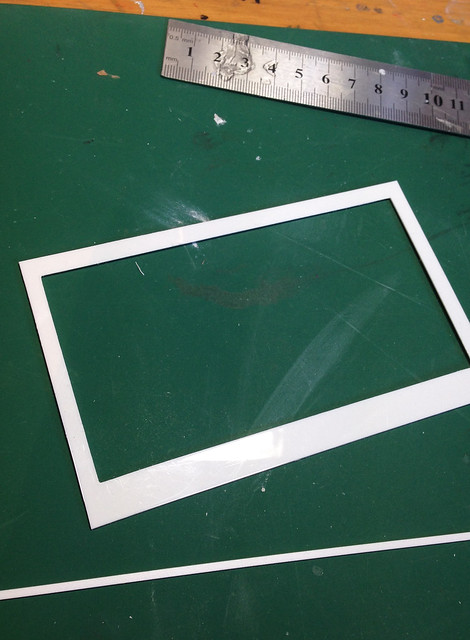
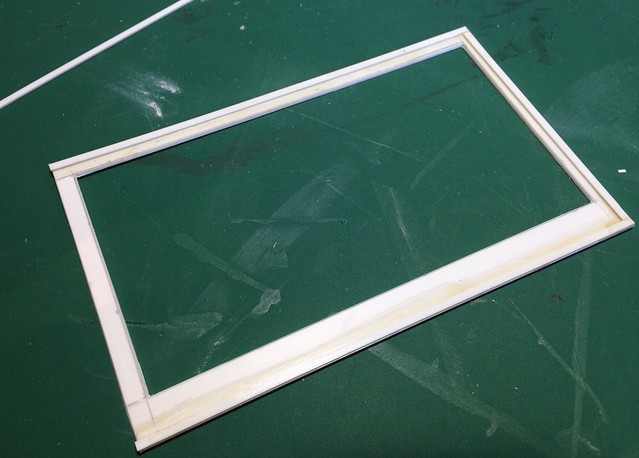
Setting that part aside for now I moved onto the front of the screen. I cut out yet another rectangle and carefully cut away the centre, leaving a nice 5mm/10mm perimeter.
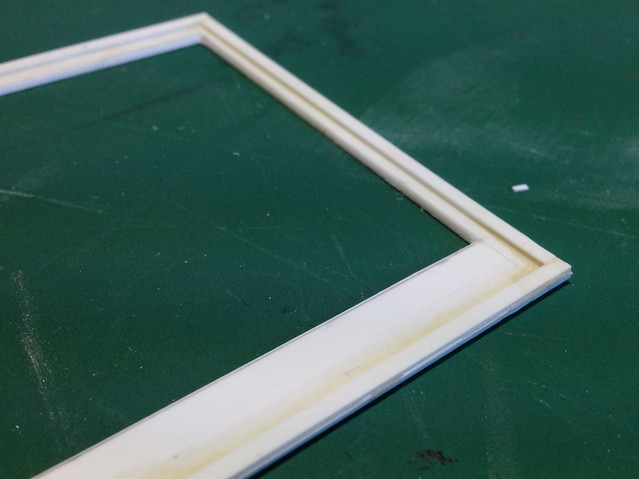
Because I wanted to be able to have the ability to 'change the channel' and insert different screens, I had to leave a gap between the back of the screen and the front for something to slot into. I achieved this with some thin styrene strip around the inside edges. I left them off the (facing) right side though.
Once I'd given everything a thorough sanding and buffing to round off the edges and make the joins disappear, I gave both sections a couple of coats of black spray paint, followed by a coat of matte varnish.
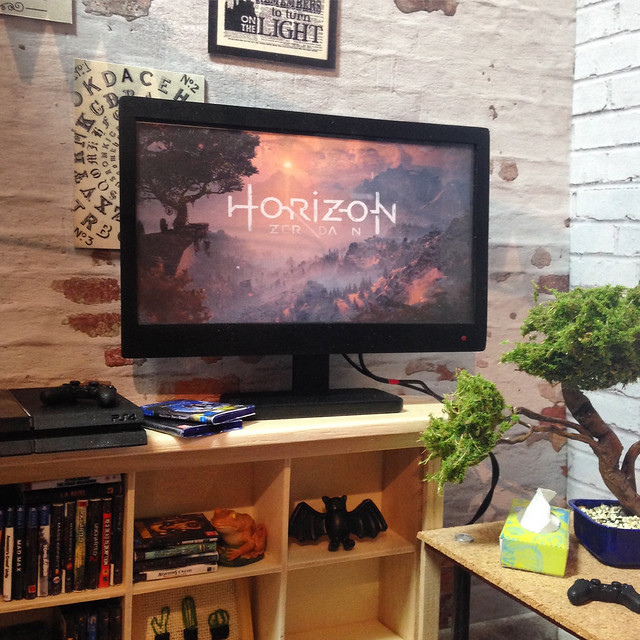
I then cut a rectangle that would fit into the screen from some leftover clear plastic from doll packaging to make the reflective 'glass' part of the screen. Come to think of it, not many TVs these days actually *are* reflective, but never mind, it still looks convincing! I glued that directly onto the back of the screen part (the part with the pencil marks in the above photo, not the strips) with superglue, which I really regret now as it fogged up the acetate at the corners. Thankfully it isn't visible when the TV is 'on' which is something.
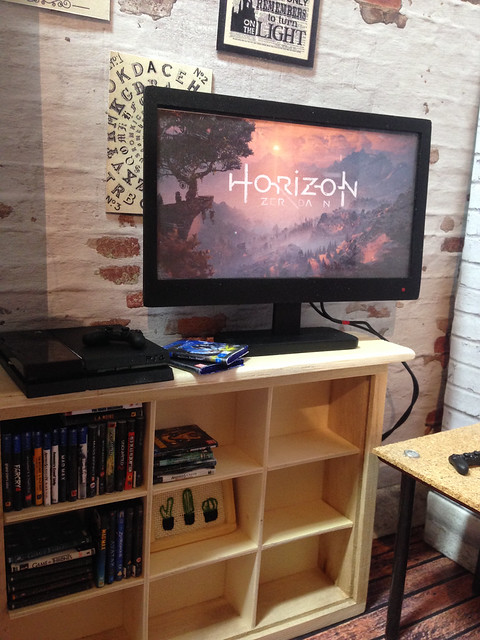
Speaking of it being on, I also needed something for them to watch! I take a frankly obscene number of screenshots on my PS4, so I copied a choice few over to the PC and resized them to fit inside the screen, careful to make them narrow enough that they wouldn't get stuck inside. They were printed out on thin card rather than paper to make them a bit sturdier and I went over the edges with black marker just in case any of the white card became visible from certain angles.
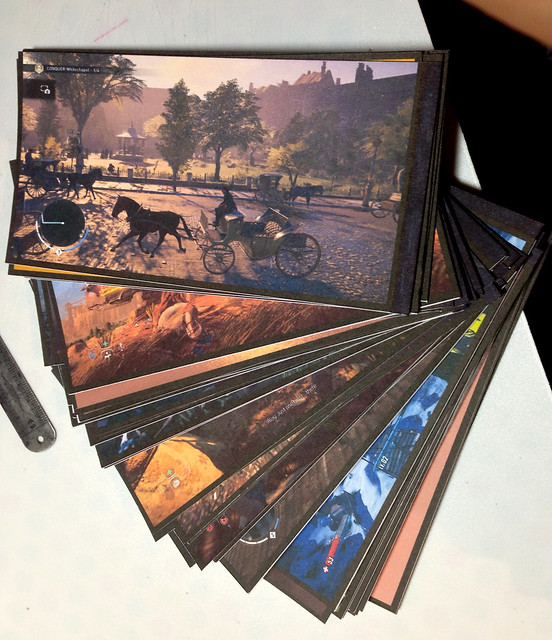 |
| It's possible I may have got a bit carried away... |
After waiting on the screen to dry completely, I then very carefully dichlo'd the strips onto the back part of the TV, making sure to keep some weight on the front so it wasn't tempted to ping upwards as it worked.
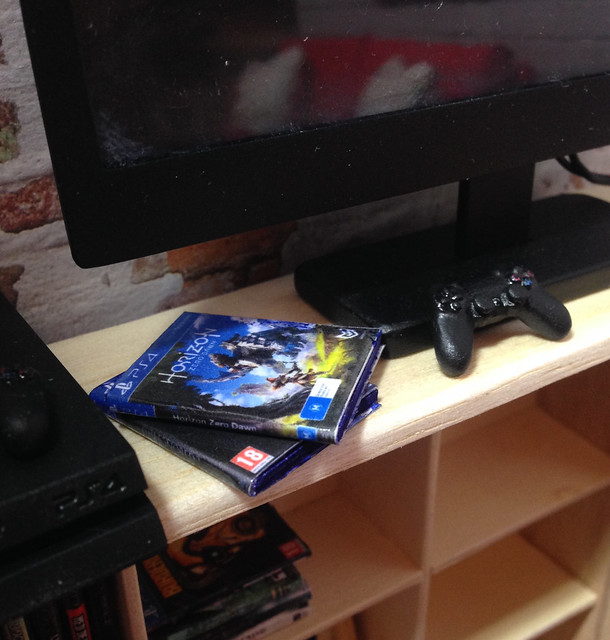
I now had a very serviceable TV, but I couldn't resist making some cables from an old pair of headphones to complete the look.
I really needn't have put in this much detail as it'll likely never be seen in photos, but *I* know it's there, and often that's enough!
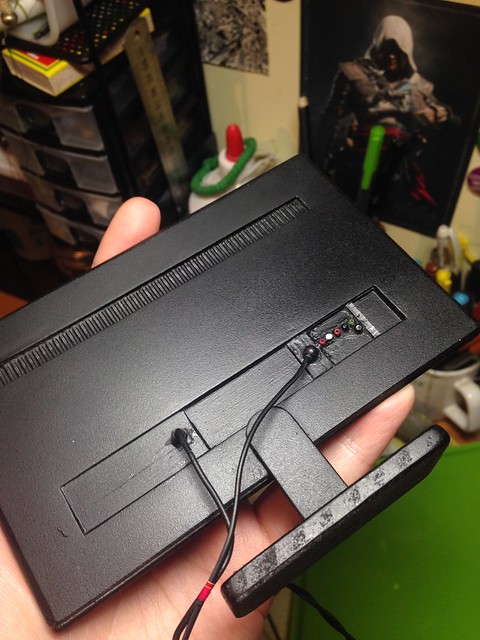 |
| I'm cringing heavily at that badly sanded base. >.< |
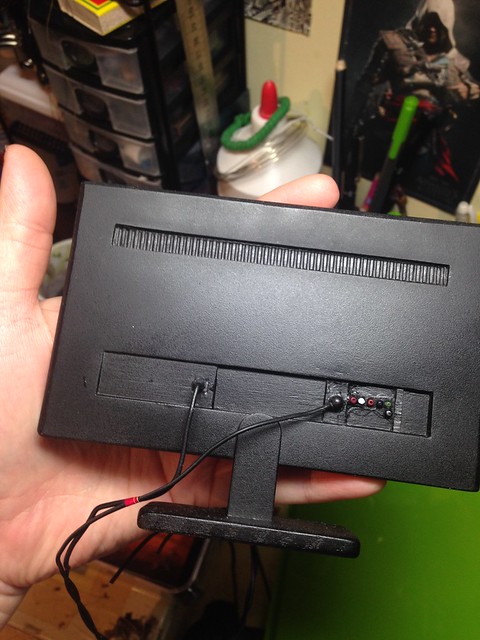
I pulled out a section of the internal wiring from the rubber cable and replaced it with a length of very fine fuse wire that enabled it to be posed slightly. I made two of these, and glued one end of each to a small bead which was then glued into the 'sockets' on the back of the TV. They wouldn't behave so I cut a very narrow piece of electrician's tape and wound it round the pair to keep them together. It's a really subtle thing but it adds SO much to the realism when it's in the room! Another wee detail was the 'on' light at the front, which was nothing more than a tiny blob of red sparkly nail varnish and some gloss over the top. It catches the light and has an eerily convincing 'glow' in real life.
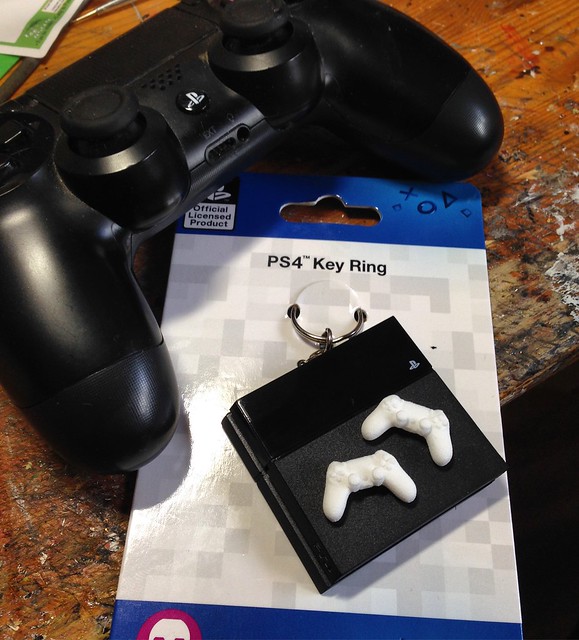
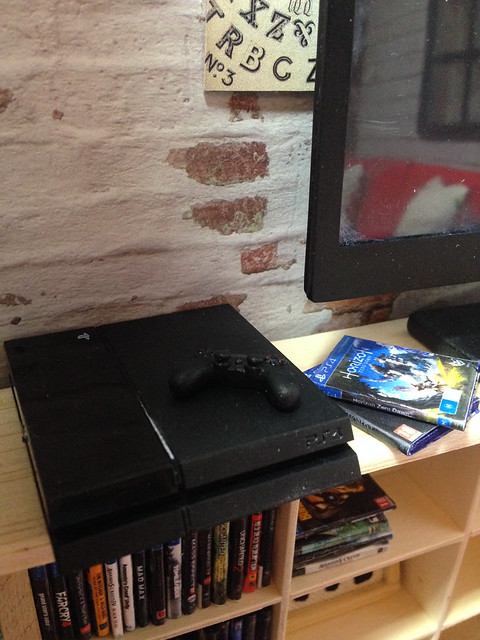
While I knew I could make a pretty decent console myself out of styrene, making the controllers was going to be far trickier, so I always put it off. Seeing this guy on Tumblr's collection of perfectly 1/6 scale consoles spurred me on however, so I ordered up this Numskull keychain the other day for about £4.99. It's absolutely perfect in every detail, and the only changes I made were to remove the keychain part and to paint on a faint white line along the middle, to emulate the light that comes on when the PS4 is working.
I managed to track down a designer on Shapeways who had made some 1/6 controllers to 3D print. (Silverbeam - PS4 Controller Tiny) Obviously the controllers themselves needed sanding and painting as I ordered them in white plastic rather than black to save money (lol) but they were insanely detailed and well worth the money. (and extortionate postage cost *sob*)
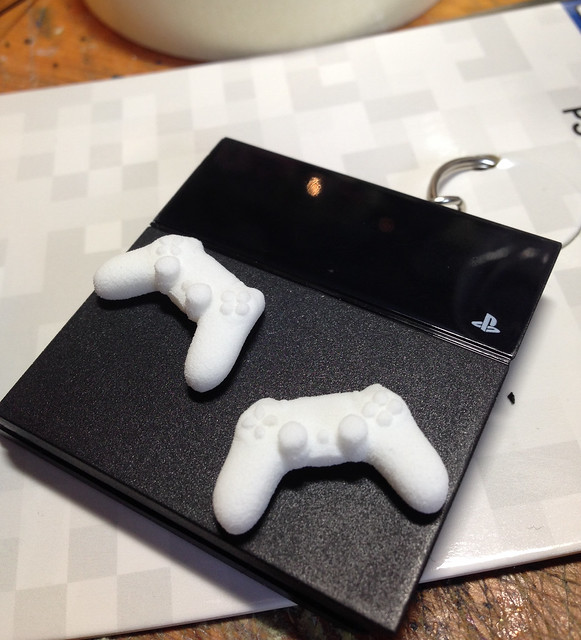
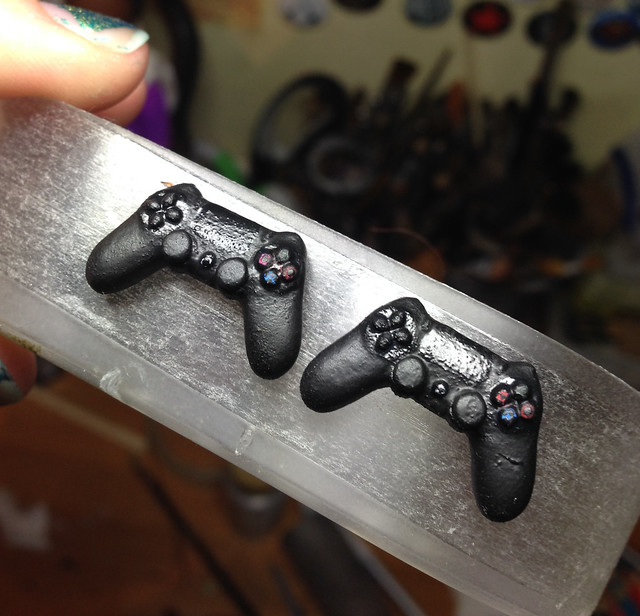
Using a piece of doublesided tape I'd stuck to my jeans a couple of times to take away some of the tackiness, I stuck the controllers onto it lightly, after a good sand, and a thin layer of superglue in places to help smooth out the printed texture. I used acrylics to paint them, and the very tip of a cocktail stick to draw on the symbols on the buttons. I found it easier to just do a blob of colour, then subtract parts of it with black paint rather than try to draw them on perfectly each time.
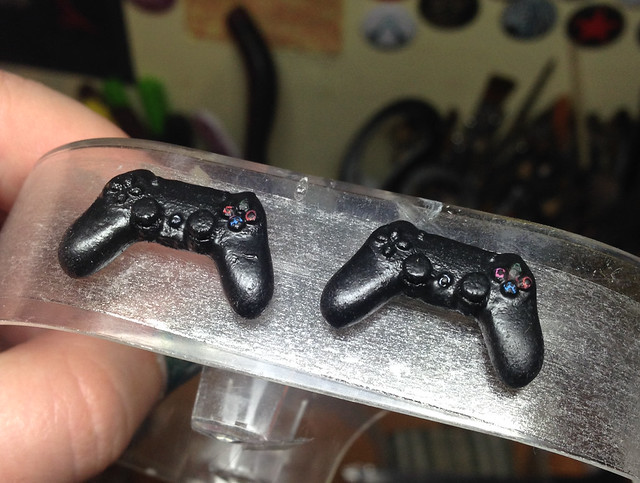
They got a nice coat of matte varnish all over, and a touch of satin in places to represent the areas of smoother plastic.
There was no point in having a console if they had nothing to play, so...
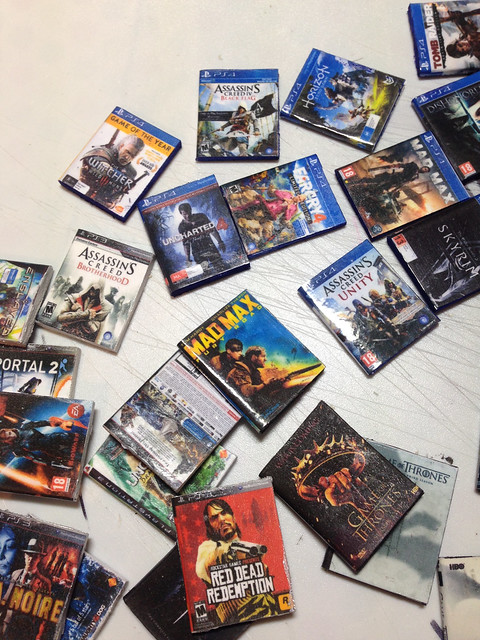
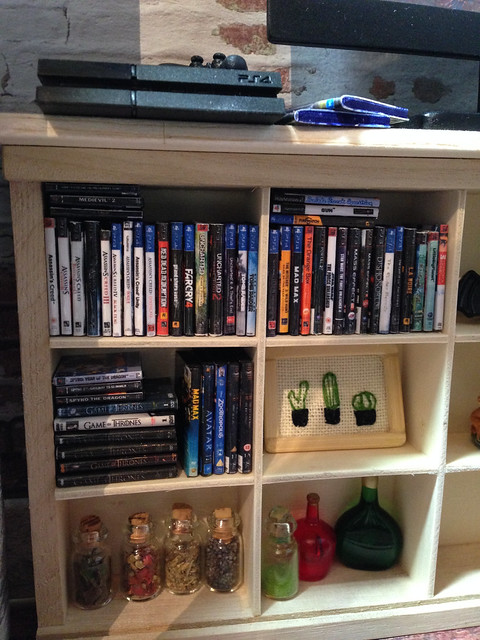
I googled for the box art of all the games I own, including a few from previous generations, along with a selection of DVDs.
(this site is good for DVDs and other consoles, just not the PS4 which I had to look elsewhere for.)
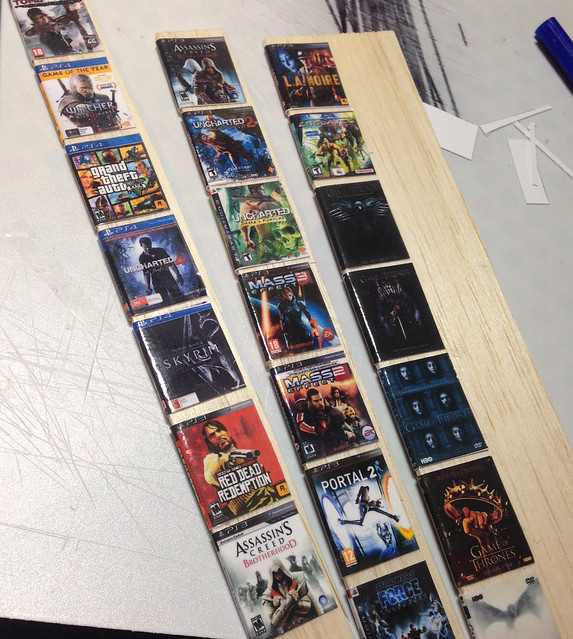
It was important to have the whole wrap-around cover and not just the front and back, as I wanted the spines to be visible for display. Once I'd amassed a pretty good selection, I printed them out at high quality onto more thin card, 'laminated' them with clear tape, then cut each one out. They were then glued onto a thin strip of balsa wood and cut out with a scalpel, with the sides painted to match the appropriate box in real life.
It was important to have the whole wrap-around cover and not just the front and back, as I wanted the spines to be visible for display. Once I'd amassed a pretty good selection, I printed them out at high quality onto more thin card, 'laminated' them with clear tape, then cut each one out. They were then glued onto a thin strip of balsa wood and cut out with a scalpel, with the sides painted to match the appropriate box in real life.
 | |
| I actually haven't got GTA:V, The Witcher III or Uncharted 4 yet, but they're all on my list so it counts, ok! |
The original PS1 Spyro trilogy was my introduction to gaming, and had a huge influence on my childhood so I couldn't not include them too for nostalgia, even if they wouldn't work on a PS4, full scale or otherwise! XD

Arranging them on the shelf (a plain wooden display box I found at the craft shop, originally with a glass front) was ridiculously satisfying. As you all know I'm not exactly the most organised of people (lolololololololololol) but I really do like having a neat game/book/film collection, and everything has to be laid out in a certain order, or theme.
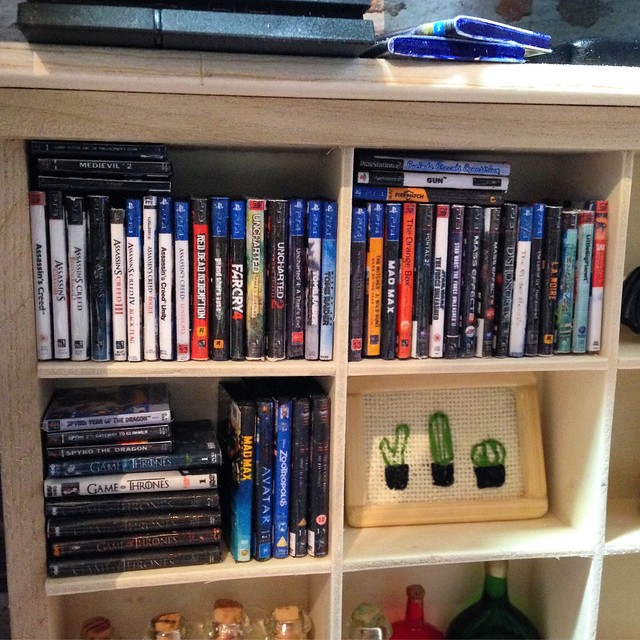
Eventually I'm going to make some more DVDs but as my printer is currently out of ink and making these uses up rather a lot of the stuff, for now the rest of the shelves will just have to be filled with a random assortment of stuff.
So there you have it!
The styrene could easily be substituted for card if you don't have any, and you could use cutouts from magazines for the screens instead. I'm ridiculously pleased with how this turned out, especially as I feel like it's been forever since I last worked with styrene, or indeed, measurements.
Awesome, thank you very much for sharing the tutorial. It all looks very realistic. I absolutely LOVE how you made everything, the back of the TV is just amazing! Thanks also for the link to the DVD covers. I'm starting on a diorama of a living room soon (starting with a sofa), and bought a TV from Mattel, but it needs a DVD collection :-).
ReplyDeleteI love how that looks! So realistic. My husband would go nuts over your game system and controllers.
ReplyDeleteWOWEEE!!!! Your big screen and your new controllers are Super Duper Christine! I love how you have constructed it so that you can change the channels, not to mention the extra detailing at the back of the screen with the cable connections- It ALL looks Sooooo Good! :D
ReplyDeleteThis looks SO good! I especially love the collection of games & dvds. :D And Spyro!! I LOVED that game when I was younger. <3 My brother recently came across a PS1 at a thrift store, so I've been having fun playing all my old games when I have the time. I'm slowly working through Ripto's Rage at the moment... it's funny how quickly everything came back. Muscle memory, I guess? Ha! Video games kind of make me motion sick now so I have to be careful not to overdo it... :P
ReplyDeleteAnyway, love all the detail in everything! Your doll set ups are wonderful. :)
Although I never played these games (I figured out PS stands for Play Station) I absolutely admire your inventiveness! The 'on' light! The game cases like miniature books... and that TV back: your "I know it's there" rings SO true. Kudos!
ReplyDeleteThis comment has been removed by a blog administrator.
ReplyDelete