Yet another late post, this project was actually done in March 2025, but for me that’s still a pretty good timeframe from completion to blog post. 😂
One of my long term hobby goals is to make Max a horse. Not just a static statue, but a fully poseable articulated 1/6th scale horse so she can go out on hacks and jump and gallivant to her heart’s content.
(As per usual, I don’t give myself easy projects!)
I’ve made articulated creatures before (obviously Baxter, and a handful of other art dolls from back in the day) but horses are very different beasts, and something I knew would be considerably trickier, especially considering the fact I’d need it to be sturdy enough to support the weight of a doll and tack, whilst still being able to be posed. Once upon a time I made a 1/6 horse; Inky, whose decidedly wobbly and battered body still leans precariously against one of my shelves; her wire core being far too weak for the rest of her. She was a labour of love, and while I do cringe a bit looking at her now, she was a good first attempt all things considered.
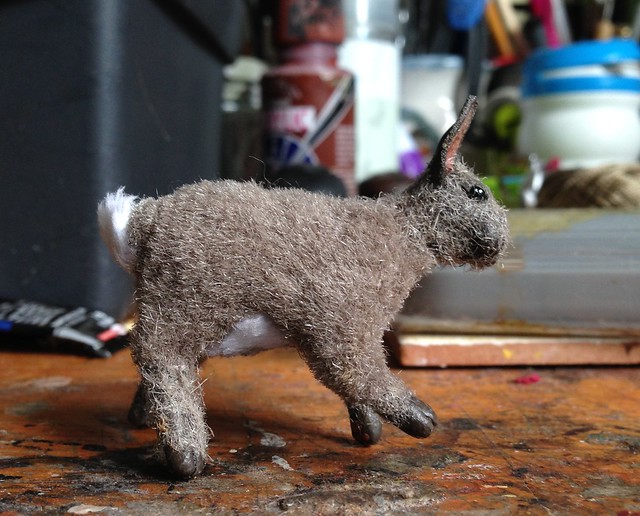
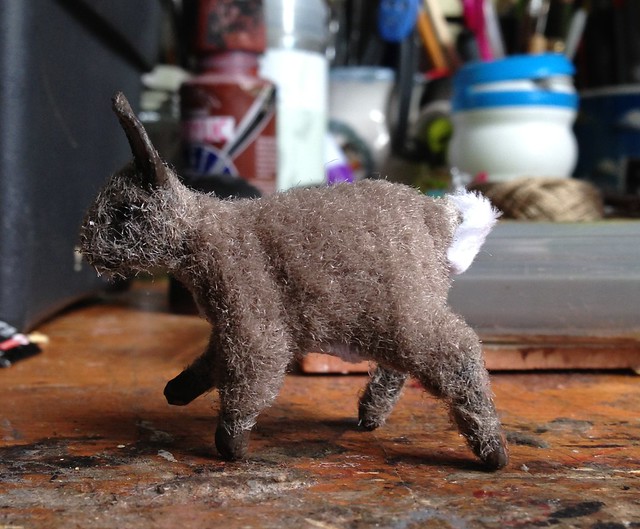
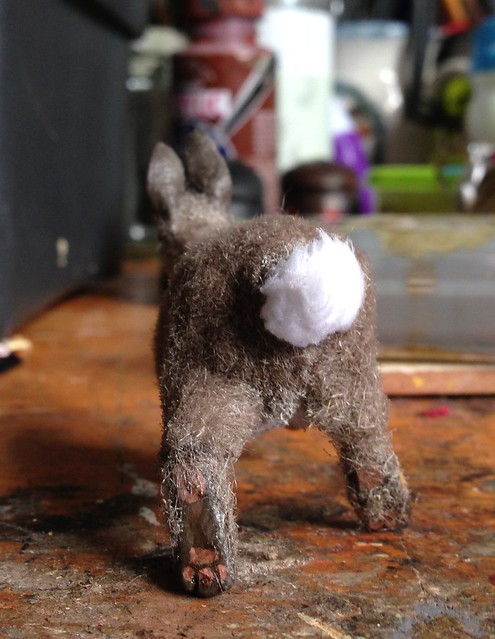
I’ve got lots of ideas for a new horse using much improved techniques, but at the moment I don’t have all the materials to get started the way I want, so in the meantime I thought I’d do a test run and start off with a pony. I’ve got a few 1/6 child dolls, so I thought it would be fun to make a Shetland for them to ride. Unfortunately as you’ll see, it ended up not turning into one so I just dropped down a scale to 1/9th (better known in the model horse hobby as Traditional scale) and decided he could be a crossbreed instead. The irony is that I don’t really do much in trad scale, so he’s become something of a rarity in my collection. 😂
Kirsty has always wanted a dog, and over lockdown finally
decided to take the plunge and adopt from a rescue. As soon as she laid
eyes on Petra the whippet, she knew she’d found her new best friend!
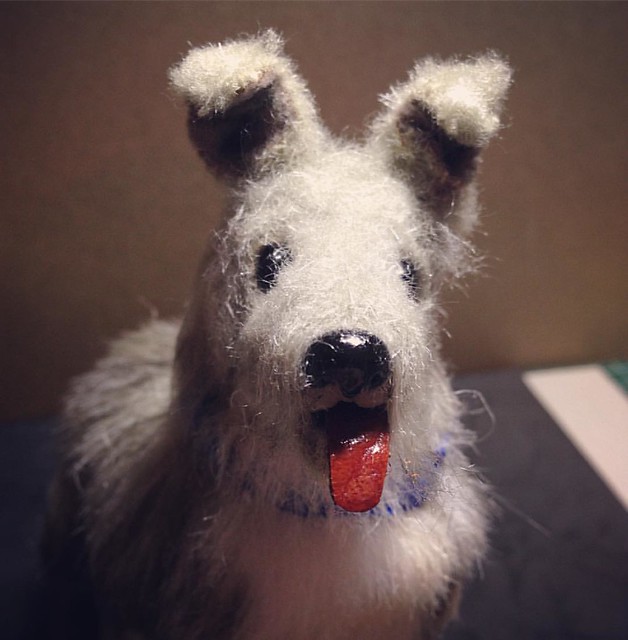
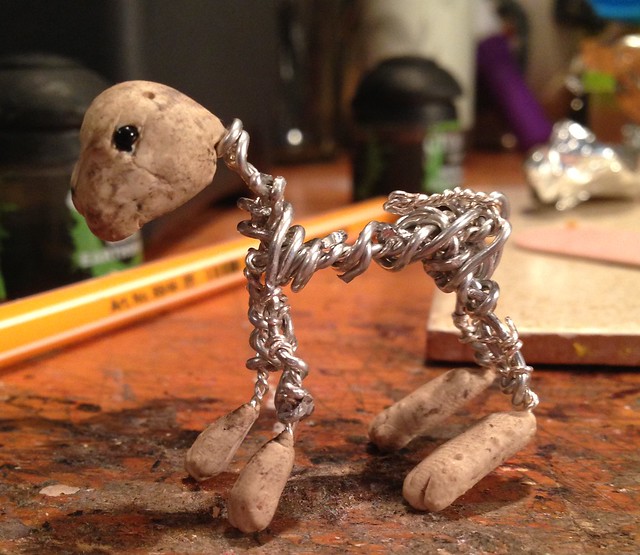
Four years ago I decided Max and Juno needed a dog, so I gathered up some materials and made Baxter.
I love him to bits, but the last few years have taken their toll on him and he's getting a little bit wonky. He's made from mostly wire, and I've been getting worried that they'll eventually snap, not to mention, his fur has got pretty matted and his jaw is getting loose. He's still super cute, but I knew he deserved an upgrade...
I meant to post about him months ago but my blogging habits have been particularly bad recently, so apologies for that! This post is mostly photostory but has a guide to how I made him at the end as well.
I was supposed to be visiting my grandpa in Perthshire this weekend which would have meant that I could have taken some nice photos of Skara and Inky in some nice scenic scenery but my dad wasn't feeling well and as he's the only driver in the family, that ruled that visit out. XD
On the plus side, it did spur me on last night to make a couple of new props...
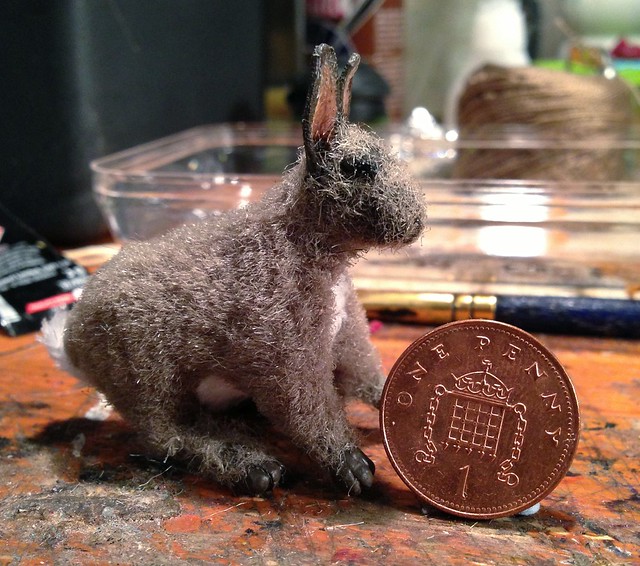
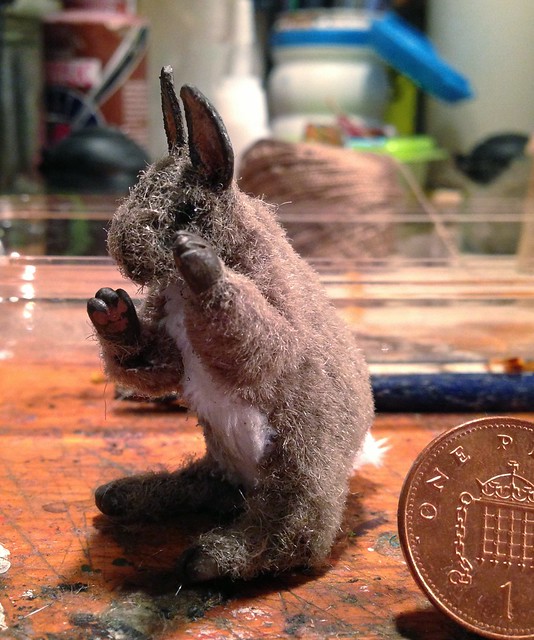
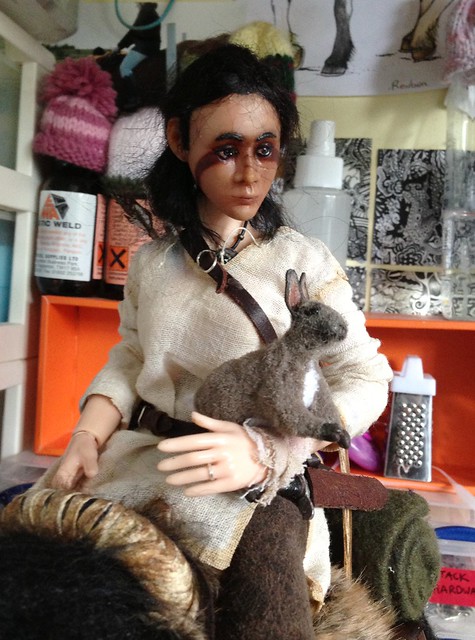
I'm still writing out a photostory for Skara but really wanted to do a hunting scene where she could utilise her bow. I didn't have time last night to make a deer, so I thought I'd aim a little smaller and make a rabbit instead. :P
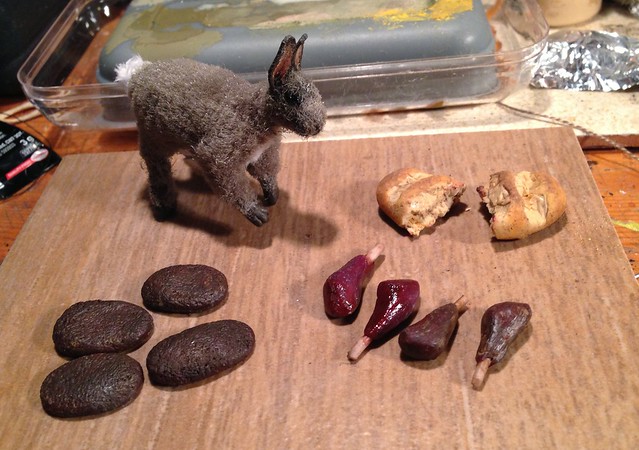
Making an armature that tiny was challenging to say the least but it worked out pretty well in the end. The fur was some really nice coloured faux fur that I trimmed down almost to it's backing. I chopped up some more and glued it onto the head and feet afterwards to blend it into the fimo. His ears are painted leather.
As well as the bunny himself I made some raw and cooked versions of the rabbit legs found in Skyrim along with some (really unconvincing) cooked meat and some bread. All of this was made from fimo.
I kinda don't want her to eat him now! Maybe he'll become a pet...
For anyone who doesn't know what that entails, for shame! You mustn't have read The Edge Chronicles!
The Edge Chronicles are a series of fantasy books; granted, aimed at children, but I first read them when I was 11 and now nearly thirteen years later (bloody hell, I didn't realise it was that long, LOL) at 23 I love them just as much, if not more than I did then. The best part about them, aside from the stories themselves which are interestingly unique in a children's series to not have 'good' and 'evil' characters but a range of those with a decidedly grey morality.
Anyway, straying from the subject somewhat - the other big plus is Chris Riddell's beautiful illustrations which have inspired and influenced my own art style and never fail to amaze me. I mean just look at them!
With an unexpected 11th book being announced this week, (the authors said they were ending it at 10!) my love for the series has been reignited and I couldn't resist making one of my favourite characters from it in 3D: The Gloamglozer!
More photos and a step-by-step guide under the cut!
Another art doll I've had in the works for the best part of a year, I finally got round to finishing Rige this afternoon. I'd sculpted the head AGES ago so it isn't exactly what I'd call fantastic but as he was all armatured up and just needed furred and feathered I decided to finish him off today.
His head and feet were sculpted in Super Sculpey and attached to a wire armature with wadding for padding. He has four different types of fur fabric covering him along with a selection of fancy feathers and acrylic detailing. He's named after the esteemed Dominar Rygel XVI from one of my all time favourite series: Farscape. While he doesn't look anything like him (thankfully, lol) there was just something about his haughty expression that made me instantly think of everybody's favourite Hynerian.(and dammit, now I want to rewatch the entire boxset again!)
I originally intended for him to have wings but I haven't bought any suitable feathers yet so I decided to make him into a little flightless Gryphon instead, one that had adapted to life on the ground rather than the air. I like the idea of them being a very small species too, the kind that would secretly be living in people's gardens, eating pests and never being recognised for all the good work they do.
He's quite tame and hopped onto my hand to pose for a few photos...
Hmm? You want to sit somewhere else?
Oh, ok then, shoulder it is!
He has a truly fantastic derp face which means I can never entirely take him seriously.
So yeah, now that I'm feeling less stressed from college work I feel like I can get back to making fun things in my spare time. (photostories are a priority - my last one was in 2011! O___O)
I wish I could say I've been overwhelmed with work and things but alas, not exactly. Our work at college is still at the 'research' stage so I have yet to make anything modelly and with regards to my home life, I'm afraid to say that Skyrim has taken over. ;D
(with music like this are you surprised?)
For those not familiar with it, The Elder Scrolls V: Skyrim is one of the best games I've ever had the pleasure of playing and I would highly recommend it to anyone. It is set in a vast open world and you have more or less complete freedom to play as you like, from the look of your character to the weapons you wield and who you side with. Plus, there are dragons and hairy cobs, what more do you want? ;)
Here's the trailer if you need further convincing...
Anyway, because of its awesomeness, I have logged over 300 hours playtime (yes, I AM that sad) and have built up quite a backstory and personality for my main character, Skara the Breton thief/archer.
I wanted to immortalise her in 1/6th scale with the intention of doing some photostories and snazzy photoshoots out in the countryside so I bought a suitable figure on ebay and started making her clothes and things. (but that's for another post I think)
ANYWAY, the crux of this post is that in addition to her armour and weapons and whatnot, there is one very crucial element that was missing.
Her horse. (awful screenshots are awful, sorry!)
Say hello Inky!
You can't actually give them names in-game unfortunately but to me, this lovely big fat cob will forever be a mare called Inky and I wanted Skara's 1/6th equivalent to have her too.
Regular readers will know that I sometimes make poseable fantasy creatures from wire, sculpey and fur fabric but as I'd never before attempted to make a real animal, I thought it was about time I gave it a try so here's how I did it!
To start with, I drew out the basic outline of what I wanted to make. Using images from the internet, I was able to scale her to roughly the right size. Normally I'd have printed out things but as our printer died a death a few months back, I have no access to one at home so I just had to improvise.
Once I'd got the basic proportions right (ignore the awfulness that is that drawing - it was just to give the idea!) I started sculpting the head. I used scrunched up tinfoil to create the core, then wrapped it in florist's tape and sewed the eyes on.
The sculpey was layered on afterwards and built up until it started looking horselike. I wanted it to look realistic and yet stylised as Skyrim's horses have a really homely look to them that I like.
I made a hole through the corners of the mouth before baking which enables me to give her an actual mouthpiece. This will be very useful when it comes to making tack for her as I won't have to worry about using sticky wax or the like. I'm particularly pleased with the nose as well.
The lack of ears was intentional as I really wanted to try something I'd been pondering over for a while - ball jointed ears!
Once baked, I hollowed out two small earholes just small enough that the bottom of a plastic drink stirrer (the ones with the ball at the ends) could pop into.
To my delight, they not only fitted perfectly but had a good degree of movement to them as well.
The plastic rods were cut down and sanded til nearly flat, then glued to leather ears which would then be glued to shape once the rest of the horse was assembled. These were later covered with black felt to hide the posts.
^ Grumpy Inky is grumpy. :P
Now that the head was completed, the feet were next. I needed to make these quite big and flat to support the weight of the doll as well as to balance out the head visually. Luckily for me, most big fat cobs have enormous feet anyway so it wasn't too hard to get away with. In hindsight I should really have weighed them down a bit more but hey-ho.
I started out by drawing the footprint, copying it and, using the superglue/bicarb method, attached my wire to them before building up the hooves in Sculpey.
I didn't give her shoes because they don't appear to have them in the game and besides, they don't really have many paved roads in Skyrim and any fast work is done by riverbanks or on dirt tracks so I think she'll be fine without them. :P
So far, so good!
A quick coat of paint and some temporary hair made me so happy - she looked much better than I'd ever imagined she would!
Next, I painted her feet (which turned out a little too dark so I may revisit them at a later stage) and hot-glued them to the twisted wire legs I constructed in accordance with the paper template. I always attach heads and feet in this way, wire to wire as I feel it is a stronger way to attach them than having the clay parts sculpted directly onto the wire. It also means that if something were to go horribly wrong, I could remove them without destroying the entire piece.
The armature was made up of multiple strands of wire (liberated from my grandpa's garage so no, I don't know the gauge or type) twisted together.
I went through rather a lot of glue sticks in my glue-gun for the parts I wanted to stay rigid but I think it paid off.
Next to go on was the wadding. I layered it and then wound thread around it to keep everything together and to build up muscle mass. This next picture does make her look like a mule but I assure you, it's just dodgy perspective! XD
I sewed some wooden craft sticks to her back as I wanted to strengthen it, given that she'd be expected to carry a rider, tack and an assortment of kit in the future. I'm not sure if it made much of a difference but it certainly feels more substantial than it would have been if I hadn't done it. I also hot-glued in a weight inside the hindquarters to counteract the weight of the head so that she wouldn't fall flat on her face. XD
With each layer of wadding, she began to look more like a horse...
...until finally it was time to add the furrrrrrrr!
Now I don't claim to be an expert in pattern-making because I most certainly am not and Inky ended up with plenty of patches where I had to add extra bits in but hopefully it's not too noticeable.
Anyway, I made up some basic patterns using some old felt I had knocking about (I think my mum used it to make me a Robin Hood costume when I was about five so it's been here for donkey's years) and gave it a go.
Unlike my other dolls, I went for el cheapo fur fabric instead of the more expensive and higher quality stuff. This was partly because I was skint and would rather pay the £6 a metre for this rather than the £25 a metre I'd need for something else...and also the fact that it was the only long pile fur fabric the right colour in the shop. XD I know I could have ordered some online but I'm lazy that way and besides, I was going to trim half of it off anyway so it didn't really matter.
With the first layer on, Inky closely resembled a Musk Oxen rather than a cob...
...but with some trimming...
...she turned back into a horse!
Her mane and tail are mohair - the mane was sewn to the neck after one side of fabric was on and the other half hid the seams nicely. The tail on the other hand....god, what a nightmare!
I'm used to hairing Julips which are 1/12th scale and more often than not, have to trim the shanks down to scale - with this however, I needed as much length on the hair as possible! Unfortunately for me, the hair just wasn't co-operating and after faffing about with glue for days I ended up resorting to the glue-gun again. As a result the tail isn't nearly as full or long as I would have liked but at least it's not all falling apart again. It is based on a dock (which I unfortunately made too low, argh!) so I can adjust it if needed. It was at this stage that I realised how massive a neck I'd given her but by then it was too late to change so I'm afraid she's just stuck with a super cresty neck now...
I painted her eyes and gave her a beard - a strip of the fur fabric glued to the underside of her head.
I then coated her head in PVA glue (being careful to cover up the eyes, fur and mohair) and doused her in black flock so that the head wouldn't look out of place with the fur. It's a little lumpy in places but as it's just held on with PVA I can easily take it off and redo if it starts to annoy me. I flocked the outside of her ears too but because the insides were felt glued to the leather they didn't need doing.
I also gave her a little star because although they don't appear to have them in the game, the forelock obscures that part of her head so to my mind, she may well have one, we just can't see it. :P
With a really basic halter made from shoelaces, Skara (with temporary Barbie head) has a sit...
...then it was outside for some shinier photos.
Her balance still isn't perfect - she's definitely more stable on unstable ground for some reason - but she can do a fairly decent trot...
...and a rear, with a little help from some shrubbery. XD
She may not be a flashy warmblood type but her jumping's not half bad either...
Here's a photo to show scale with a 1:9 Breyer Traditional and a 1:12 Julip Cob Stallion just in case you were wondering just how big she actually is.
So yeeeeah, I'm pretty pleased with her all things considered and although there are a number of things I wish I'd done differently, I think I'll leave them til my next attempt...whenever that may be. :P
My next task will be to make her some tack and get Skara sorted out so watch this space! ;)