Four years ago I decided Max and Juno needed a dog, so I gathered up some materials and made
Baxter.
I love him to bits, but the last few years have taken their toll on him and he's getting a little bit wonky. He's made from mostly wire, and I've been getting worried that they'll eventually snap, not to mention, his fur has got pretty matted and his jaw is getting loose. He's still super cute, but I knew he deserved an upgrade...

In the older version I'd used wire, so I was able to pose him pretty
well, having him sit and jump and bend in pretty realistic ways. The
downside of wire however, was that continued bending leads to stress and
can eventually snap. I'd also run unto the issue of the wire reacting
to water when I'd taken him to the beach a few times, and I didn't want
to run the risk of it corroding over time, hence the plastic armature
and joints.
To avoid any potential issues, I decided to try my hand at making an entirely plastic joint system. I bought some 3/32 plastic armature from
Mohair Bear Making Supplies, something I've been meaning to do for months. I know a lot of art dolls have their limbs articulated with this stuff but I only wanted to use it for the spine as I had other plans for the legs. My friend Manda managed to buy me a bag of vintage Action Man wrist pegs at a doll show recently, and I knew they'd be perfect for my plan. I had some plastic tubing exactly the right diameter to fit them, so after a couple of brief sketches I started to assemble everything.
I hoped that putting the joints where they would be in life rather than using a wire or flexible armature would make the movements more accurate but in hindsight I didn't take into account the padding and fabric, so he ended up with less flexibility than I planned.
I
sculpted the bottom of a paw and used some silicone putty to make a
simple push mould so I could reproduce it another few times with Super
Sculpey. I trimmed down the wrist pegs at an angle and attached them to the paws with
epoxy glue, then once that had fully cured, used epoxy clay (Milliput)
to sculpt over the top and build up the rest of the paws.
While that was curing, I moved onto perhaps the most important part of all; the head. I really wanted this iteration of Baxter to have teeth, so that was a priority, in addition to making sure he looked like his previous version.
I started with the lower jaw, blocking out the basic shape in Sculpey, and giving it a blast with the heat gun every once in a while to cure it enough to add more details without smooshing what I'd already done. Out of all the articulation I gave this dog, this is probably the simplest, just a basic hinge using a section of bamboo skewer through the middle. I wanted to make him a little more realistic than before, so I added in teeth and a little bit of lip detail. My reasoning for doing the lower jaw first was that I could cure it, then once I'd sculpted the top part of the mandible, I'd push the two jaws together and the teeth would sink into the unbaked clay, creating a kind of sheath for them to sit into when the mouth was closed.
Getting the face right was tricky and ultimately I think new!Baxter isn't quite as cute as his predecessor sadly.
I accidentally made his eyes super wonky and he's got a slightly crooked snoot too.
At this point he looked less like a dog and more like some kind of rodent but he did get better!
The
original Baxter had a leather tongue that could be tacky waxed in place
for photos, but with this version I wanted to try something a little
different. I baked a tiny magnet into the back of the lower jaw, then
made a selection of different tongues using some of the incredible
(flexible when baked!)
CosClay
into each of which I placed another magnet. Now I can switch out the
tongues for different looks and don't have to worry about them falling
out! Ultimately the magnets weren't quite strong enough to hold them in position for very long, but they stay put for photos.
Once everything was baked it was time to put it all together. I used epoxy glue to secure the plastic armature to the head, followed by lots of Milliput. Where the joints met the spine I used a small section of tubing which was then totally encompassed in Milliput. I wanted the fit to be snug enough that the joints could still spin freely but wouldn't fall out.
I
used more Milliput to go over fragile areas, to seal in the hinge
joint and build up the area around the ears. I took a couple of ball
joints from HobbyLink Japan, smeared them with some vaseline and pushed them into the Milliput
before it set. This ensured they wouldn't get stuck in place and could
still move around comfortably.
He looks super leggy here, but that was intentional, as the fur fabric adds a lot of bulk and I've made the mistake before of not allowing for that and ending up with disproportionate limbs.
At this stage I was in love with the articulation, especially of the paws.
Now that all the sculptural parts were done, it was time to add the floof!
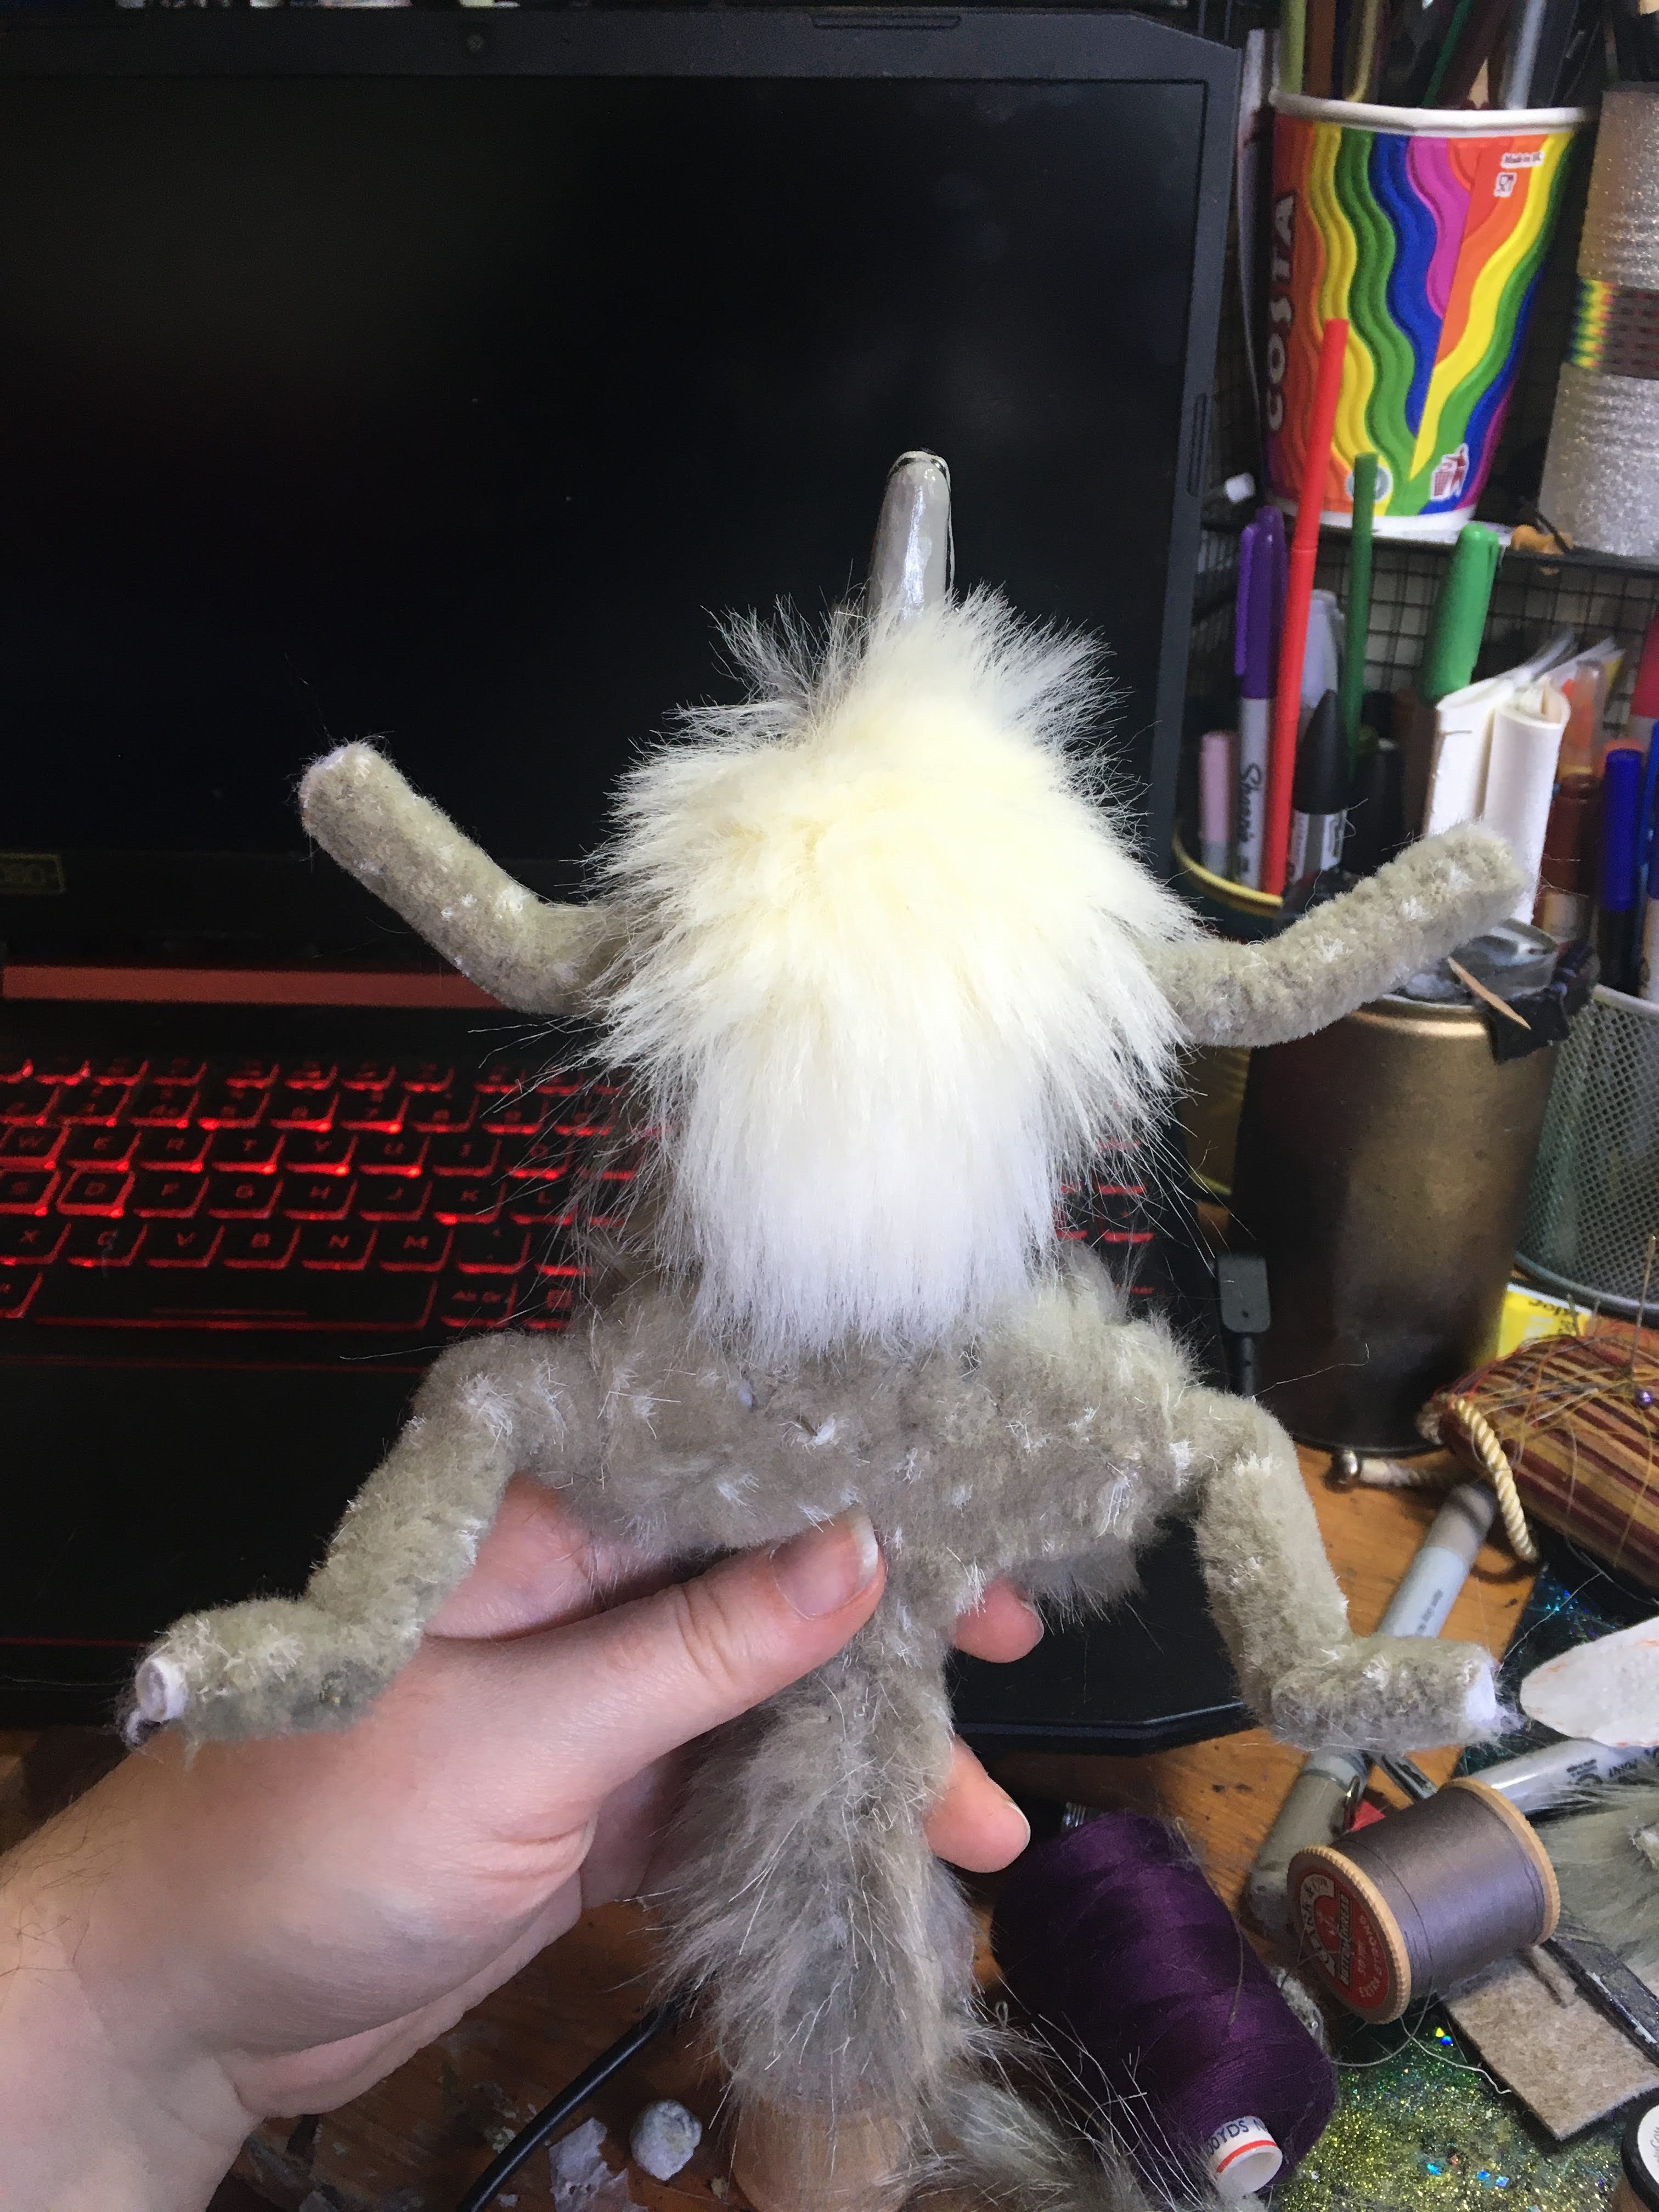
I began by wrapping his skeleton with wadding and then winding thread around that to secure it in place. This also meant it was padded consistently around the whole body.
At this stage he looked like a very unhappy greyhound, but he'd be getting some warmer clothes next!
The fur fabric I used on the previous version was actually a very long piled fur, so I needed to trim it as I went along just so I could see my stitches! I started off with the legs as they were the easiest part, simple tubes I ladder stitched at the seams to disguise them. I sewed the top part onto the thread and wadding just to hold it in place.
The ears really should have been left til the end, but I was impatient, so I sewed up two little ears, fur fabric on one side, grey felt on the other, turned them inside out to hide the seams and glued them over his little ball joint ear nubs. I couldn't find the exact colour I used on the original Baxter, which was regrettable as the cooler grey just didn't look right.
This unfortunately led to him looking like a totally demented bunny rabbit, but it did help with the proportions of his face.
Next came the most undignified stage of all.
I drew around the armature and made a pattern for his back and belly, then handsewed him into it. Every time I make one of these dolls I always question my sanity because the fur fabric gets EVERYWHERE. On your desk, on the carpet, on your clothes, in your mouth, in your eyes - I'm pretty sure I inhaled half of it as well.
I took his feet off while I was doing this so I didn't damage the joints.
After much grumbling and thread related shenanigans, he finally reached a stage where he looked like a recognisable dog. The white spots on his legs were an unfortunate aspect of the fur fabric I used as they had a regular spotting pattern as part of the design, and it's really obvious when trimmed. I later touched them up with some diluted paint and copic markers which helped to disguise them.
His face looked, well, frankly terrifying at this point, like a super low budget werewolf from a 1960s horror movie. Luckily it was an easy enough fix. Before I added the fur, I painted his whole head in acrylics, glossing his eyes and nose and putting a lot of detail into his teeth.
Ok but seriously, he's just a mutant kangaroo here, wtf.
 |
| h e l p m e |
|
I stupidly didn't take any photos while doing this, but for the facial fur I cut sections of the fur fabric and glued them on in layers, going from the bottom of his head to the top. In areas with shorter hair like the muzzle and the mid-face, I chopped up scrap fur and made some flocking, which I applied in layers.
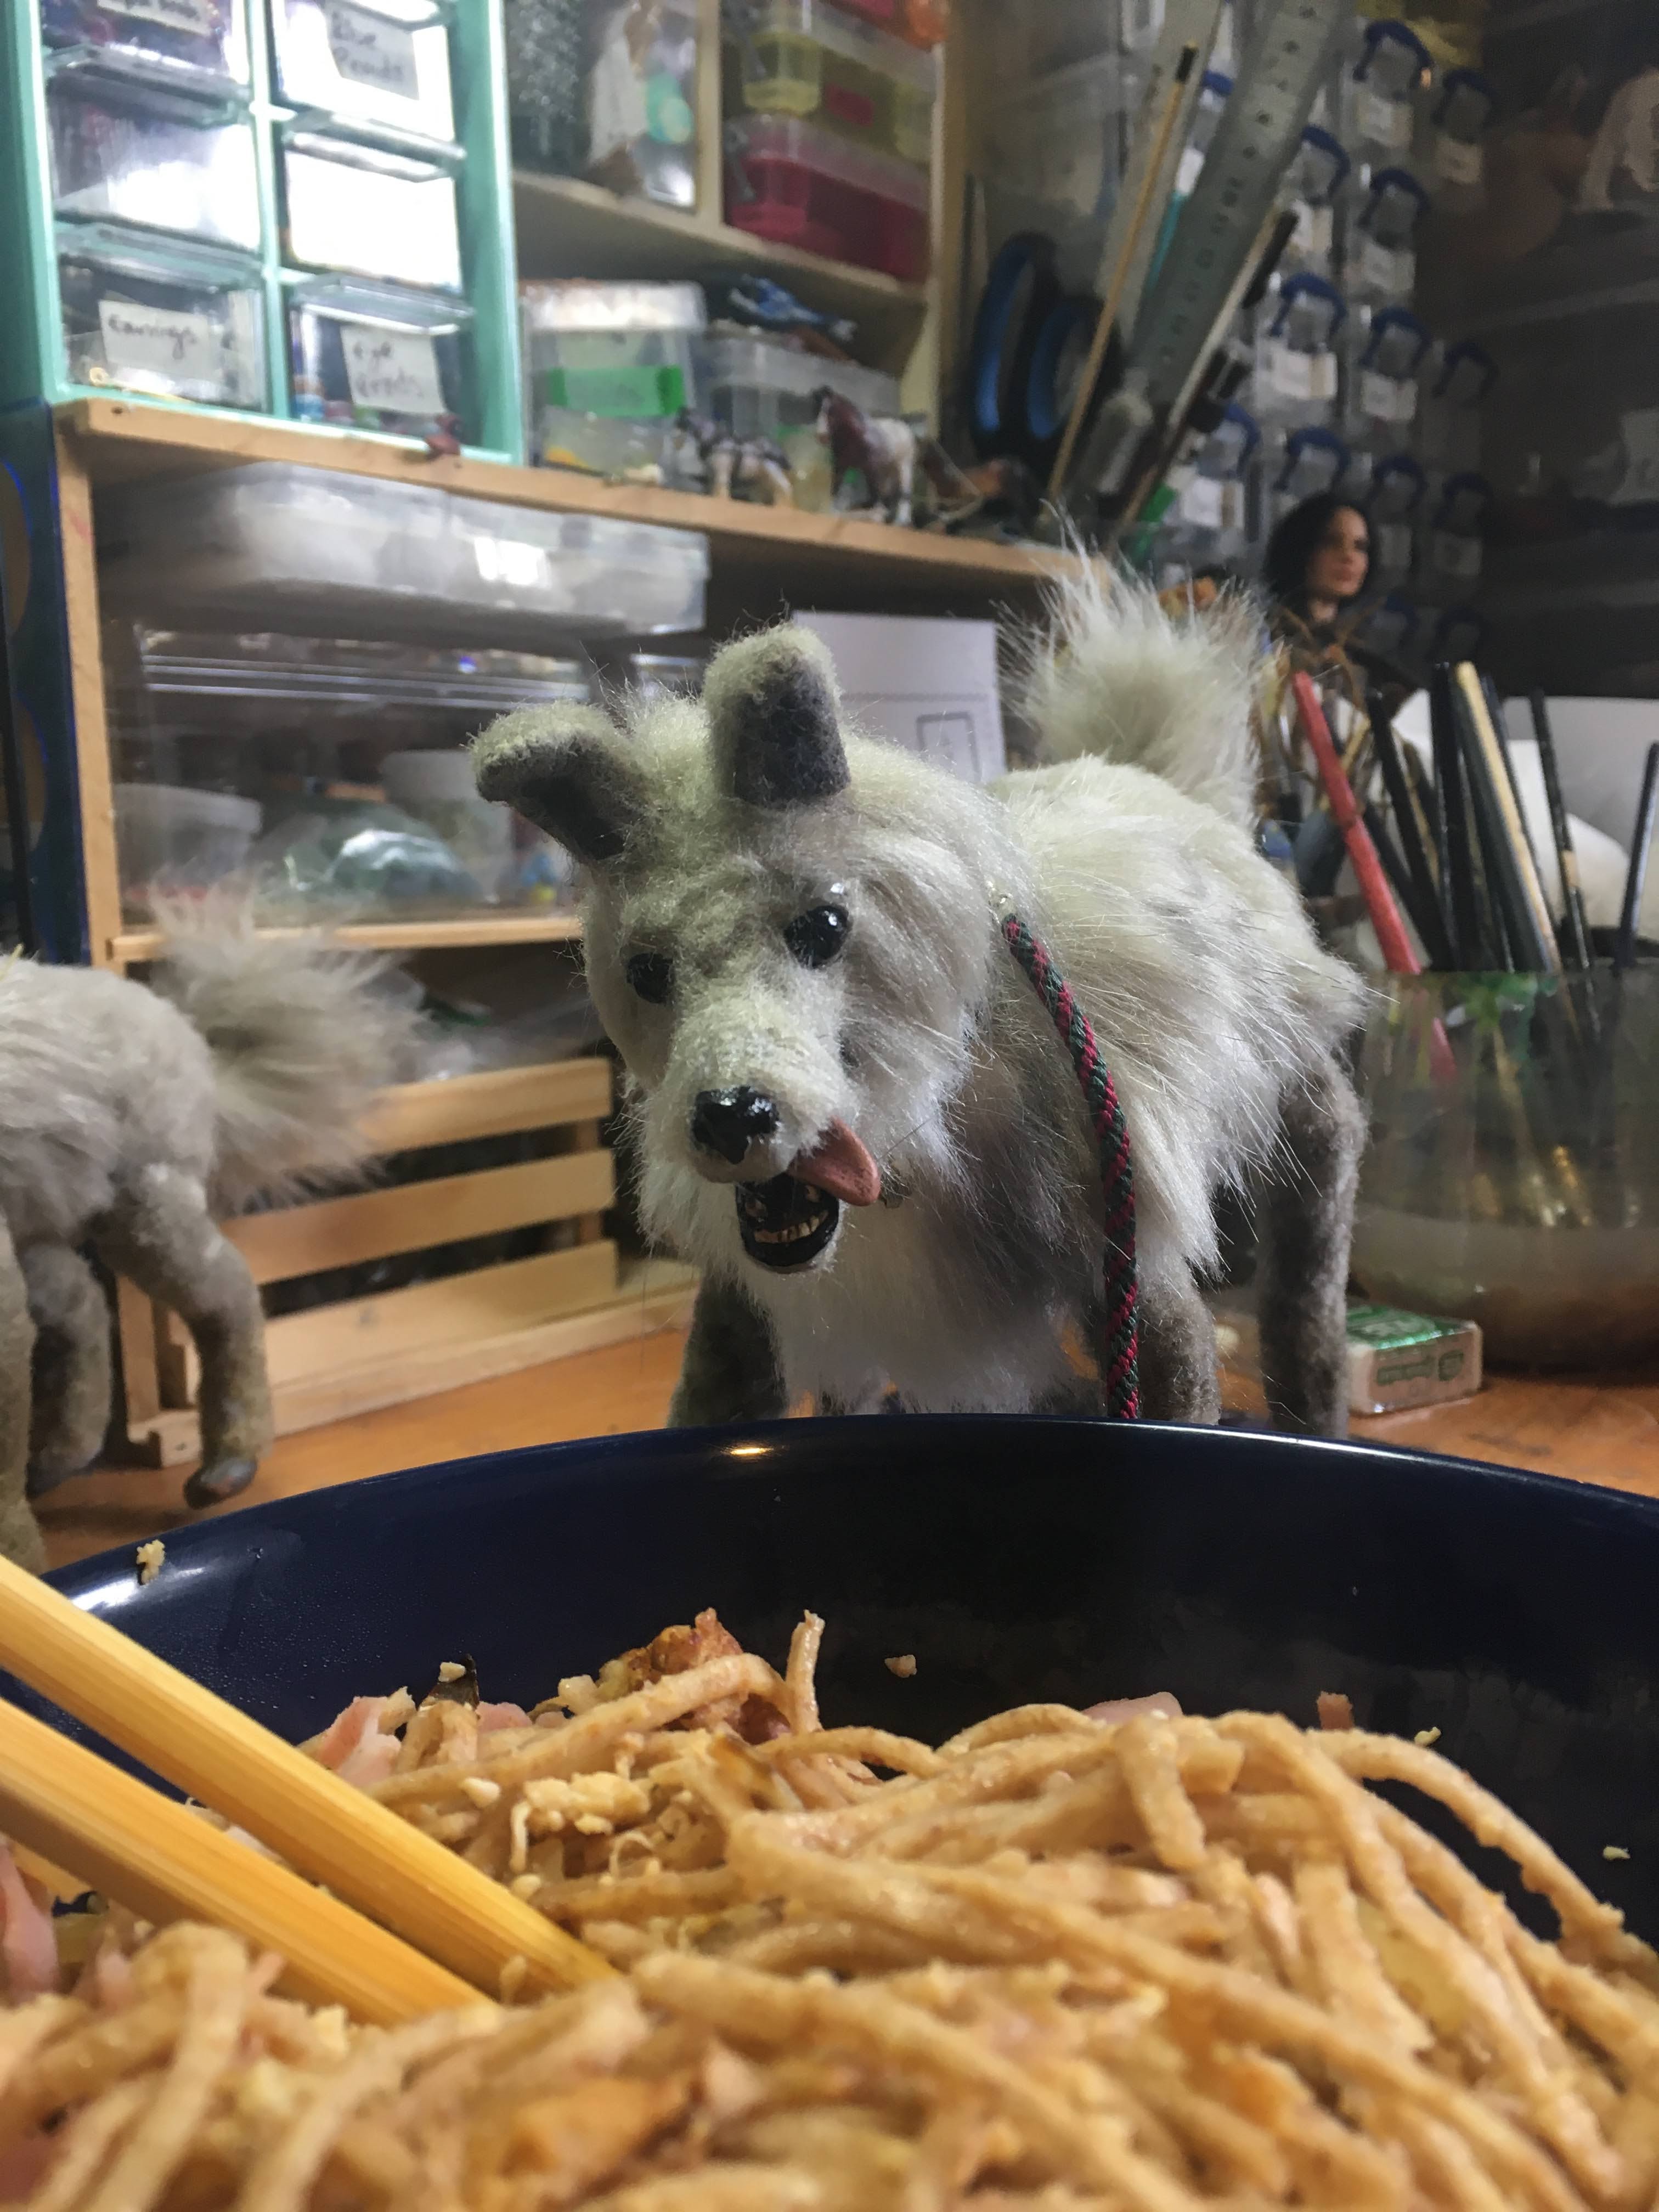
It's hungry work, being a new dog!
At last, Baxter 2.0 was complete!
He wasn't as cute as Baxter 1.0, especially from the front, and I definitely ran into a few issues with the articulation afterwards, but I was still pleased with him!
About a month after I made him, I performed some surgery in an attempt to improve his articulation. When I initially made the armature, the posing was really good, but the addition of padding and fur really limited his manoeuvrability, so I staged an intervention. First I cut him open and carved away some of the milliput and plastic tubing that held his legs in place as it was too thick and gave him a really wide legged stance I didn't like.
(Don't worry, he was well sedated for this!)
Next I exposed the joints in his legs. I'd just used the wrist pegs as they were, a single hinge joint with rotation, but to enable him to do more, I really needed a double joint there. I didn't have any to spare, and I wasn't going to mangle any of my MTM barbies, so I did what I do best and improvised. I chopped two wrist pegs in half, then used epoxy glue to bond them together. It wasn't a very strong adhesion, so I went over the join with Apoxie Sculpt which worked a lot better.
At first I just did this joint, but realised afterwards it wasn't going
to be sufficient, so I did the lower one too using the same technique.
It did increase the articulation, but again, the thickness of the fur really didn't help and the poses just won't hold. Adding in the double joints also made his hind legs a lot longer than I'd originally designed them to be, so his proportions are now pretty off. I also realised around this point that his tail was a little too short as well. 😒
He was always quite a big dog, but this version is even bigger still - I don't have my own dog, and don't spend any time around any, so my sense of scale has always been a bit off when it comes to canines! He's supposed to be a crossbreed anyway, so let's just imagine there's some Great Dane ancestry in there somewhere!
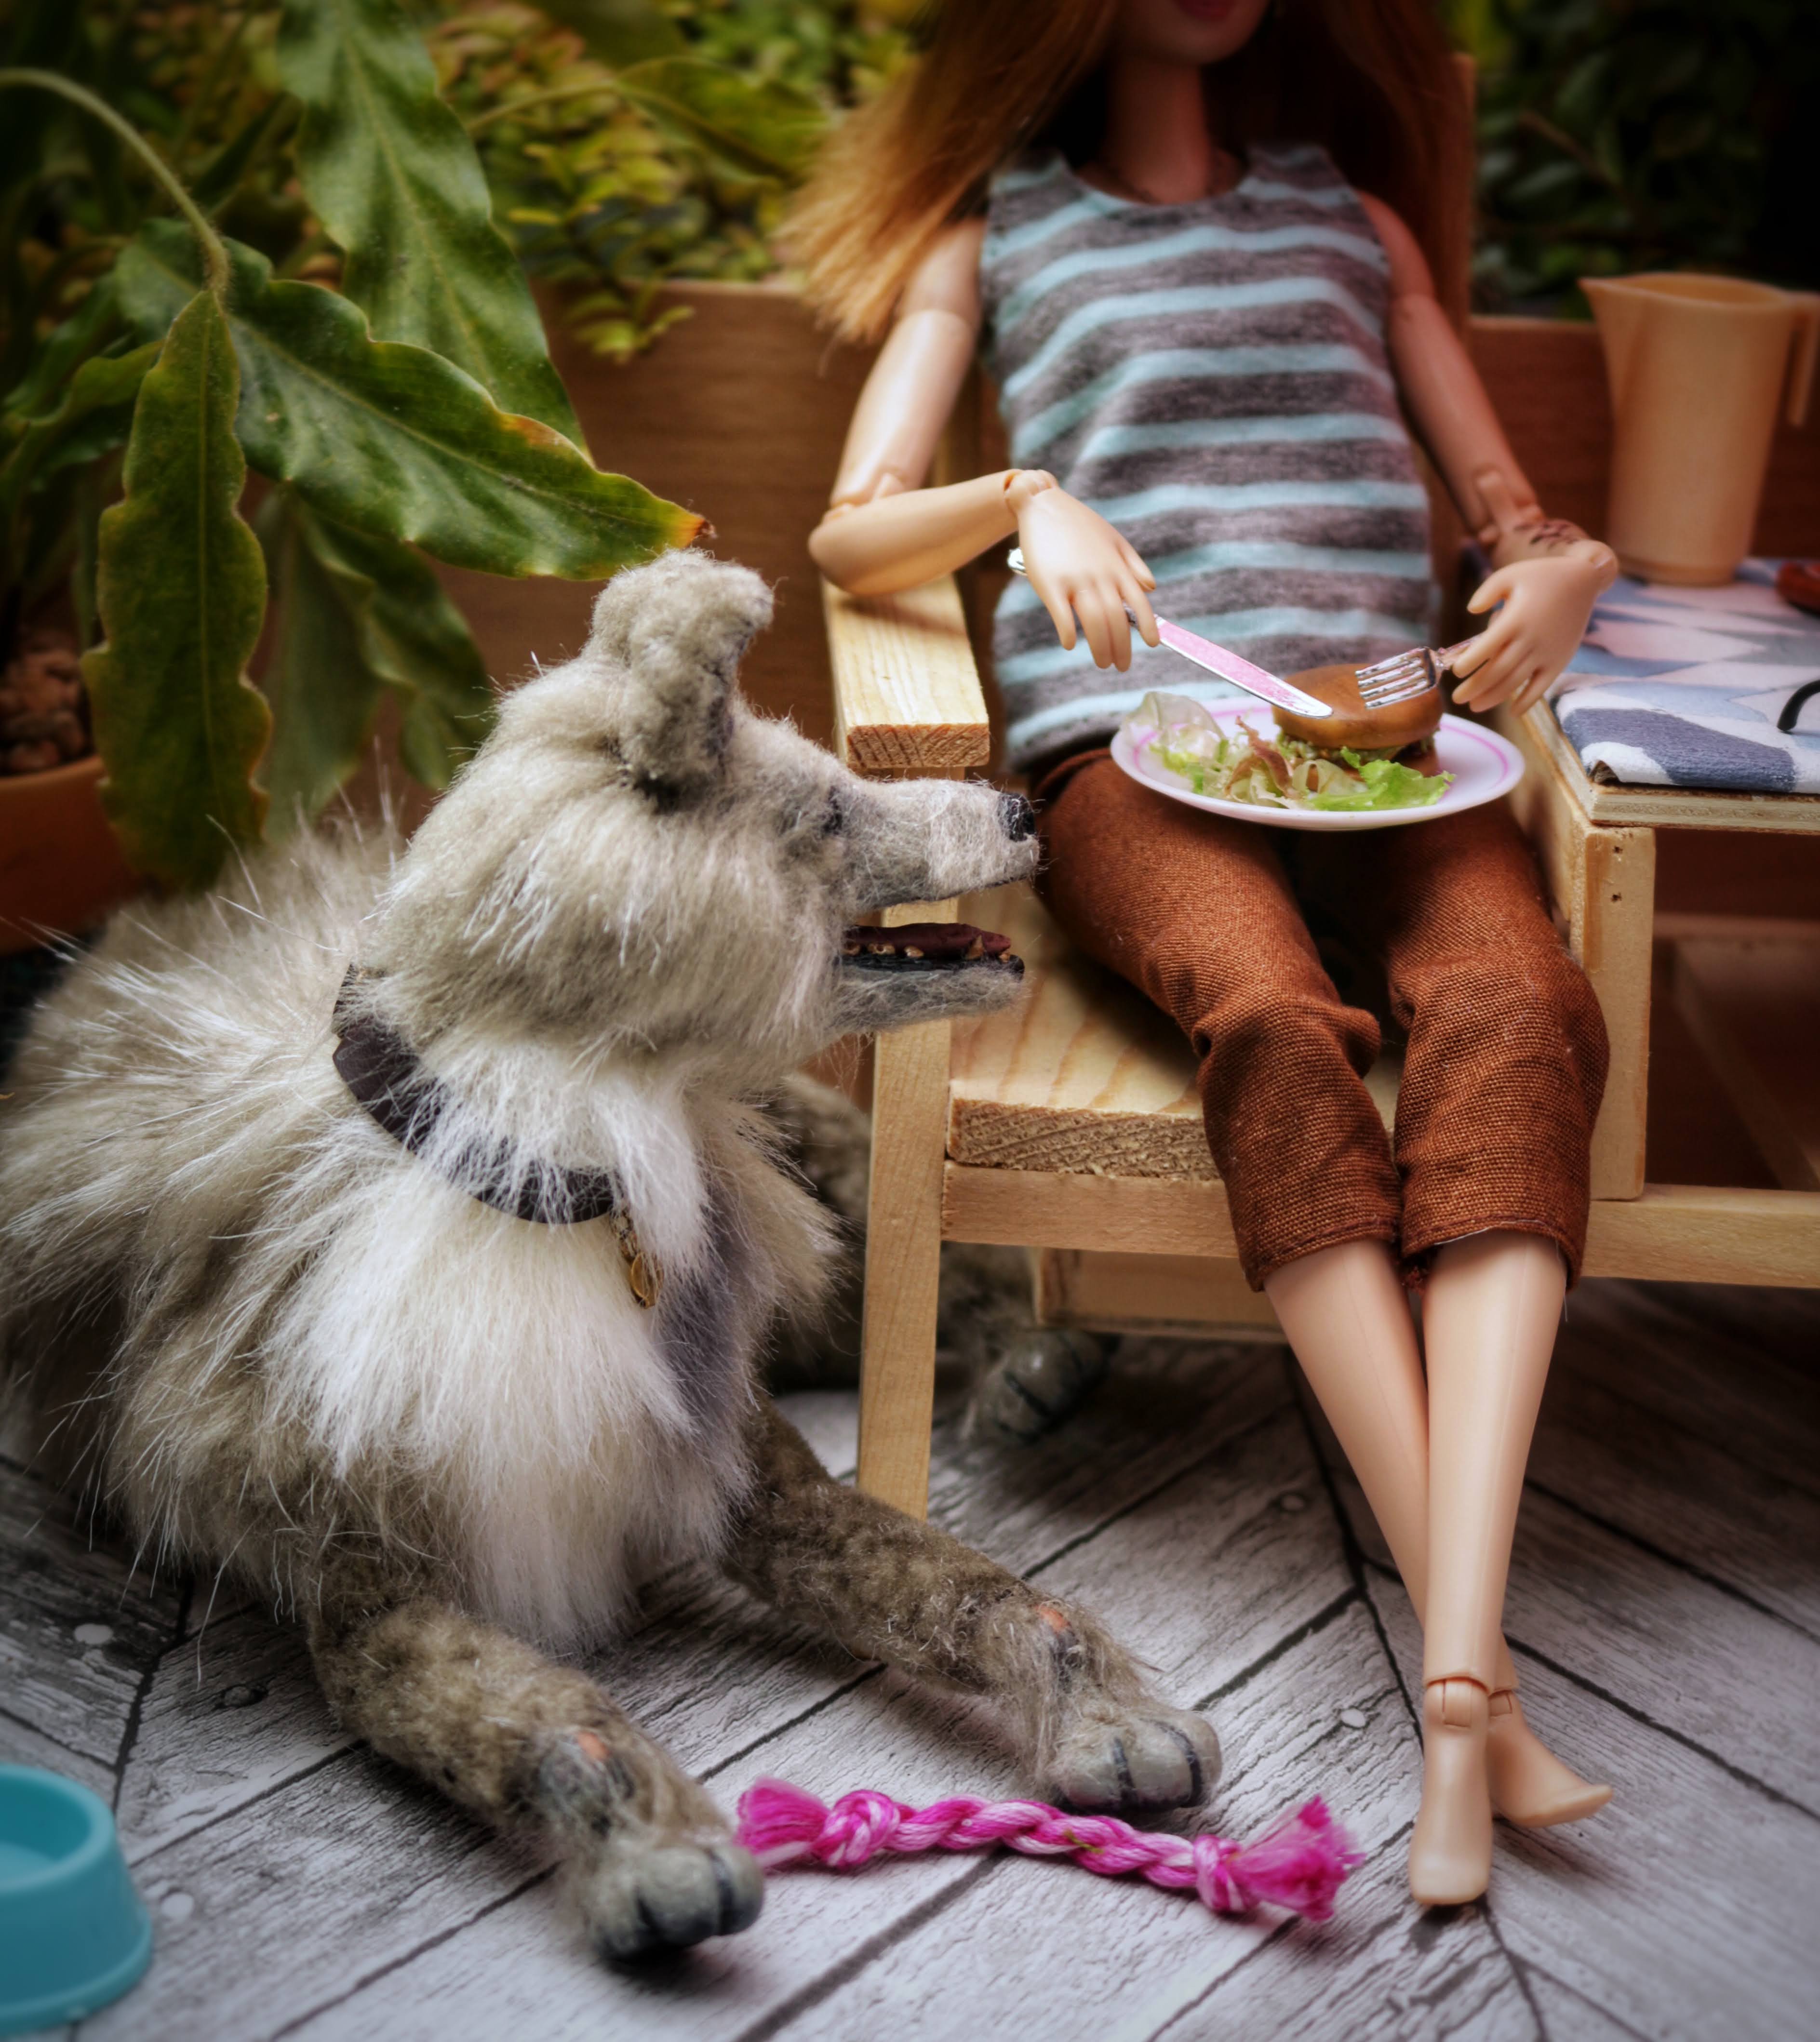
I took these photos before his second surgery, so he's a little less wonky than he is now!
(The garden they're enjoying was a quick outdoor diorama I cobbled together last summer using scrapbook paper, a bamboo table runner, a few scraps of wood and an assortment of real plants!)
All in all, I was pleased with this project, and yet, he just didn't feel like Baxter.
I think it was the eyes, or maybe the ears, but there was just something about him that didn't sit right with me. I first altered him months ago and took him on a couple of photoshoots which I was never happy with. His hind legs looked too spindly, so I added a little stuffing/muscle, but his face just irritated me every time I looked at him and it got to the point I was actively avoiding him when I looked out dolls to photograph.
As I typed up this post a couple of days ago, I just knew something had to be done and well, it was pretty brutal.
I stripped off his face fur and ears, then uh...hacked his eyes out as they'd got all covered in glue and hair, and just didn't look friendly! 🙈
I installed some new eyes at a slightly different position, (more of the same black glass beads with a cocktail stick impaling them through the middle to keep them level) and resculpted his muzzle with apoxie sculpt. I gave him a more pronounced curve to his snoot, a larger nose and chin, and generally broadened the head to match his original a lot more.
To avoid the eyes getting all mucked up this time around, I painted a couple of layers of liquid latex over them before I started sculpting, so after he was finished I could just peel it off to reveal shiny untouched eyes.
Even without hair he looked so much more like his older version which made me incredibly relieved as I worried that I'd end up making him look even worse!
The next day I touched up his paint a little, (mostly around the mouth, as I think giving his lips black edges was a mistake!) though happily the apoxie sculpt's default colour matched his fur perfectly, so I didn't bother painting most of it in the end.
When it came to adding the hair back, I took my time and applied it in layers, working from the bottom to the top, trimming as I went along so I could see which areas needed more or less fur. While the body was sewn together, for the face I cut the fur fabric off close to the backing, then combed it out to get rid of the bulky floofy bits I didn't need, then glued it straight to the head with UHU glue, using a cocktail stick to blend the gluey ends onto the face smoothly.
When I got to the middle of the face, I used the same technique I use on doll partings, as shown beautifully by Mozekyto here -
where you glue a weft on backwards, then fold it over so you get a nice
neat finish. I thought it'd look nicer than just layers of flocking,
which is what I'd done before.
I made some new ears out of trimmed down fur fabric and beigey grey coloured felt - it's the same stuff I used on the original Baxter, but couldn't find when I went to make the new version. The colour match just wasn't right with the cooler grey felt, so I was really pleased to find a big enough scrap to work with. I just cut out two matching ear shapes for each ear, sewed them good side to good side leaving the bottom open, and carefully turned them inside out. I put in a couple of tiny stitches to give them a gently folded look rather that straight up, but I'm not sure how well that part worked, lol. Once the face was all done, I added glue to the inside of the ears and
smooshed them back onto the ball joints.(extended with plastic tubing
for a greater surface area)
After all that he got a little bit of grooming with an old toothbrush
and some water to get rid of any loose hair and to hopefully train the
fur to lie neatly.
Now, finally, he looks like Baxter again!
 |
A definite glow-up!
|
Gone at last was his dead eyed stare (he was starting to remind me of a shark!) and back came the happy, friendly doggo I remembered!
He doesn't sit very well at all, but he can at least lie down reasonably comfortably.
Despite the multiple surgeries, he's still the same cuddly and loyal companion to Max and Juno.
Hopefully this is the last round of surgery he'll need for a good long while and can just continue to do dog related things without worrying if his limbs are going to fall off or that he'll wake up one morning with a different face!
So yeah, the moral of the story is, if you're not happy with a project it's totally ok to go back in and fix things, even if it takes months to pluck up the courage!
Also, it goes without saying, but Original!Baxter is going nowhere, he's just retired from general use - I'd never throw him out!


No comments:
Post a Comment