Tuesday 22 February 2011

Updates on some of the WIPs

As the G1 Arab's neck still wasn't right (too long) I hacked it off again and reset it with superglue/bicarb. of soda this evening. I found quite by accident that a layer of superglue (without the bicarb.) is ideal for smoothing out slight rough patches that don't sand easily. All going well, she's going to be painted a really dark liver chestnut and then haired.

Resculpted neck

Resculpted neck

Mr Vaskal's been resanded to within an inch of his life after the first coat of paint and primer showed up even more rough patches and divots than I thought there were.

Sanding

Sanding

Luckily the aforementioned superglue/bicarb.of soda method proved very useful...

Repair

Repair

His tail cracked in a couple of places at one point so they've now been coated in several layers of glue/soda to keep up the strength.

Repaired tail

When he's nice and smooth once more I'll prime him with handpainted gesso rather than spray primer as even the light skoosh I gave him last week took several days to dry. :/ I don't mind if I end up with brushstrokes - it'll give a nice hair effect.

I made a couple of new bridles for my Julips recently too. One is a plain snaffle with red reins and a matching browband for Fergus and the other is a blue version with a flash for new boy Paddy who I'll introduce properly once he's been rehaired. I gave him laced reins (as per this awesome tutorial) as I wanted to try something a little different and I really like how they've turned out. (even though I realised the 'arrows' were pointing the wrong way. >.<)

Fergus' Snaffle Bridle

Paddy's Snaffle Bridle (with flash)

Paddy's Snaffle Bridle (with flash)

I love the Show Cob mould - so much character and just look at that face! ^^

Oh and on a slightly random note...look what we had in the garden this afternoon!

After the kill

I came into the kitchen and noticed how unnaturally quiet it was outside - especially given just how many Siskins we've had lately. (40+ at once!)
 I spotted a female Siskin hunkered down next to one of the feeders looking rather nervous and was about to turn away when I spotted the Sparrowhawk sitting on the trellis. I managed to grab my cameras and get some footage but unfortunately when she decided to go in for the kill, I wasn't expecting it and I missed it. Once she'd got it however, she plonked it down beside the back window so I got a fantastic view before she flew off with her lunch.

After the kill

Friday 18 February 2011

What's on the workbench!

...or body boxes to be more specific!

As ever, my room's a complete tip but while attempting to tidy up yesterday I decided I'd had enough of the overflowing shoe boxes of half finished/half mangled bodies that would most likely never get finished.

This is how they all looked when I put them all together...

Bodies

...and after sorting them out...(note my rather obvious filing system XD)

Tidied Body Boxes

I've accumulated rather a lot over the years as you can see...

Bodies

Bodies

I'll probably give away the remainder free on MHL as I'm never going to get round to doing anything with them and although they're all pretty awkward to work with, I only paid pennies for them in the first place so it's not like I'll be making a loss.

Anyway, aside from all the mangled corpses in the boxes, I've been working on a select few this week. I hope to get the majority of them finished up in time for the MHL Live in September so I can take them along to show as well as a few repaints to sell on.

Customs in progress

First up is a custom I've been working on for several years, an MBH ('My Beautiful Horses') standing horse to a warmblood stallion. I gave him a sculpted plaited mane and tail, stallion anatomy and tried my best to sort out his seams and rough patches. Once he's had another coat or two of primer I'll be painting him to chestnut - possibly a semi portrait of my friend's horse Cruz's sire - Stonegrove Ace.

MBH Warmblood

A Schleich warmblood this time - he'll probably be for sale once he's finished unless I get really attached to him in the meantime. I've been using nothing but acrylics so far and I think he's looking pretty good.

Schleich Warmblood

Schleich TWH to chestnut sabino. One of my favourite colours, ironically on one of my least favourite breeds! I love the mould though.

Sabino TWH

Sabino TWH

Sabino TWH

Another Schleich now, well, two of them really. Both falabellas are long anticipated commissions that I just haven't been in the mood to paint until now. (curse you artistic muse, curse yoooou!) This one will be silver dapple (I might end up redoing him from scratch as he's not looking great at the moment) and the other, palomino.

Schleich Falabella

I'm also painting the PAPO Thoroughbred to perlino. While I was prepping her it struck me just how much the head reminds me of a Marwari's - an idea for a future custom perhaps?

Perlino Teke

Perlino Teke

I never had any Magpie shetlands until recently when I managed to aquire three in quick succession! It's a lovely little mould and aside from the tiny, tiny eyes is possibly one of the most accurate shetland models out there. This one has been resculpted, funnily enough by the person I'm painting the falabellas for and as I already have a black shetland in my show string, I decided to give him a bit of a makeover and make him piebald. As you can see, he still needs several layers...

Magpie Shetland

I think this was another PAPO mould and I'm rather pleased with her progress so far. Once she's finished she'll be shown as a Dutch Heavy Draught although obviously that's a long way off still.

Dutch Heavy Draught

Dutch Heavy Draught

I've never been all that confident in repositioning so when I had a go at the superglue/bicarbonate of soda trick the other day, to say I was pleased was a rather large understatement. No longer would I have to drag out the horrible milliput to attempt to set a head, I could do it in seconds!
I recieved a box of G1 stablemates a year or so ago and haven't done much with them since then other than repainting one of the Arabs and lopping the head off the solitary Silky Sullivan. When I finally decided to do something about it, for some reason I decided to make her an Arab - probably so I could pair her up with the aforementioned repainted one. I think the neck is now a bit too long so I'd appreciate any feedback...

Repositioned G1 SM

I never used to like flippy tails on arabs but they've really grown on me!

Repositioned G1 SM

Repositioned G1 SM

Another resculpt is this Hong Kong Breyer knockoff - oddly scaled to large stablemate/small Schleich size. One of his legs had snapped off and superglue alone wouldn't seal the break. I tried to pin it but the plastic was so brittle that that didn't work either so I ended up slapping some more superglue/soda on which worked wonders. Instead of the Saddlebred I was originally going for, to hide the join I'm now going to give him feathering and much more hair so he can be a Friesian instead.

Hong Kong plastic to Friesian

Another superglue success was this old Classic Arabian stallion who'd been knocking around the body box with his head taped loosely to his neck for many months. I'll move his eyes down a bit as they're set too highly on his face and probably sculpt him some new ears as well.

Classic Arabian Stallion

Finally, a little stablemate etchie who has become something of a project. When I'm not working on him he lives on my windowsill next to my bed, along with a scalpel with a broken blade. (which I actually find easier to use) Because I've chosen such an awkward and painstaking pattern to etch, I tend only to work on him when I'm waiting for something or can't sleep which probably explains why I've done so little.

SM Etchie

SM etchie

SM etchie

It probably looks really rough and sketchy there but I can assure you, he looks a lot better in person! He'll be a near maximum sabino when I'm finished with him - like this one, only Arab shaped. ;)

Speaking of cobby things, look who arrived in the post this morning? ;D

Mini Haggis

Mini Haggis

Mini Haggis! ^^ I've wanted one of these for AGES so thank you so much for selling him to me Clare! He needs a lot of work and I don't have a clue what colour to paint him eventually but I'm sure something'll come to me...

Anyway, that's it for now - go and have a nice chocolate biscuit for reading all that! :D

Friday 11 February 2011

'Snuggy Hoods'

I was looking through one of my mangled old tack catalogues the other day, pondering over what to attempt to make next when I saw these. I'd always liked the idea of making one for a model but how to do it was another matter! Luckily I had some fluorescent yellow stretchy fabric in my supplies stash and some matching thread, so, the other night I started to make a rough pattern whilst watching repeats of Law and Order.

This, was the result. ;)

Harper's 'hoodie'

It was impossible to make it seamless like the real thing and I know the stitching is very crude here but for a first attempt it isn't all that bad...

Harper's 'hoodie'

Harper's 'hoodie'

Because the fabric is stretchy it can just be pulled over his head and does a great job of keeping his mane down which is normally a bit problematic as I haven't rehaired him yet and his synthetic hair is very err...rebellious to put it one way. XD

Harper's 'hoodie'

Harper's 'hoodie'

I made another which ended up being a little neat on Harper, so Magic the Magpie arab got to wear it instead. It's a little long on his face so I'll need to trim it a bit. This one was stitched up the face and down the neck instead of just around the throat.

Magic's 'hoodie'

Magic's 'hoodie'

I've still got plenty of stripey rainbow fabric left over from making Jazz's rug so I think I'll be making her's next.

Thursday 10 February 2011

Vaskal colour idea

Just a quick mockup of the colour I hope to paint him to. What do you think? He'll be haired with mohair or possibly some nice coloured sheep's wool I've seen on the 'forest fibres' ebay shop.

Sunday 6 February 2011

First foray into the world of sculpting...

I've always been truly envious of those who can sculpt and ever since I got involved with the model horse hobby and watched some of the biggest names in ARs show step by step guides to their latest work I've had a hankering to try it out for myself. I'd used fimo and milliput before for making accessories and things but never an actual model creature so I had a go at a couple last year which, if I'm honest, weren't all that successful.


I made an armature but didn't pad it out with anything so ended up using a lot more clay than I needed to, which led to cracks, wonky legs and odd proportions. By then I'd convinced myself that sculpting was not for me and I needn't bother trying it again. Yet, despite that, I still longed to make something and when I stumbled across this tutorial on a concept art forum (by the man who sculpted Draco from Dragonheart no less which instantly had me interested!) I knew I just had to give it one more shot before admitting defeat. I found a cheap supplier of super sculpey on ebay and ordered some up and while I waited for it to arrive I started work on designing how my creature would look.

That part of it wasn't too difficult as I already knew what I was going to make - a Vaskal - an original species of mine I created for the fantasy novel I'm still in the planning stages of writing. (click the pic for a ref sheet!)

  I've been trying to pad out the world it's set in recently so reference sheets and colour schemes have been top of the agenda whenever I do some drawing. One of the reasons I wanted to sculpt a Vaskal was that I'd be able to use it as a proper reference for when I'm drawing things and would also allow me to make up some appropritate tack for him. (Plus, any questionable anatomy could be passed off as fantasy biomechanics!)
 In essence they are a combination of horse, big cat and dog anatomy (with a bit of Tapier thrown in!) most of which I knew was going to be awkward. (I'm so used to drawing horses that I can't stop giving canines knees!)


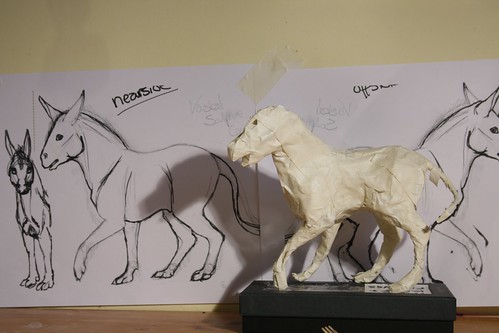
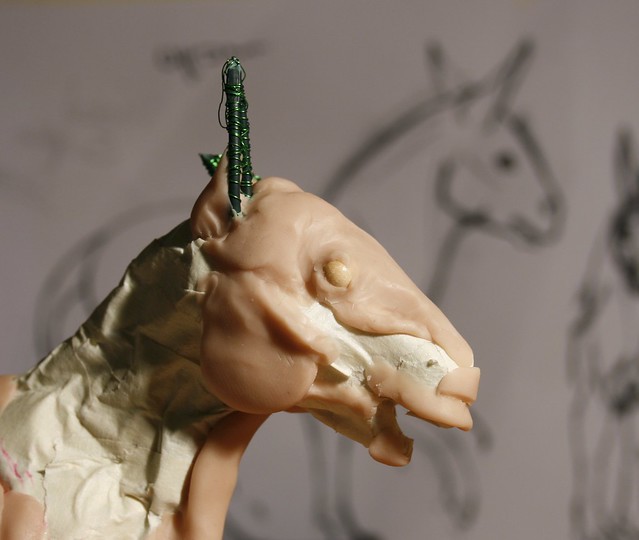
The sculpey arrived yesterday so I got to work fashioning an armature out of garden wire, scrunched up tinfoil and masking tape. Having learned the hard way that more clay = bad sculpture, I made the most of the foil to create muscles and stronger limbs than just the wire alone. It also meant that I could get a feel for how the finished sculpture would look.  I added the ears on a bit later on, once I'd got some clay on the head to hold them in place firmly.

I had a bit of a 'gah, what if it won't stick to the masking tape!?' moment when it came to putting on the first bits of sculpey but I needn't have worried as it went on nice and cleanly.

 Having never worked with Super Sculpey before I have to say that it's wonderful stuff. Really, absolutely brilliant. Unlike the fimo I was used to, it was soft and malleable straight away with no need to spend twenty minutes furiously grinding your hands together just to get it soft enough to do anything with.


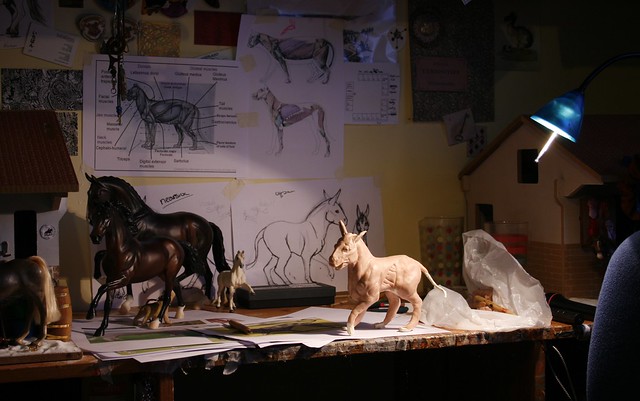
I started off by blocking in the main muscle groups by referring (badly!) to the many reference photos I'd printed out in advance.


I found it really useful as it meant I could actually see how everything would work and what bits would connect to others. I made a bit of a mess of the shoulders mind you but it can't be helped! The eyes are simply wooden beads. I was hoping to use some glass ones but I didn't have any the right size.

I was originally intending to leave the head until last for fear that I'd knock it over and ruin it but I couldn't resist giving him his ears and a few facial features which gave him a lot of personality even this early on in the process.

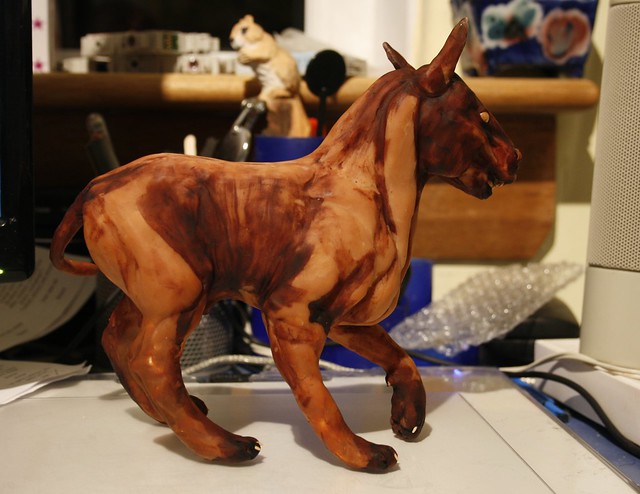
I wanted him to have an open mouth so that when it came to making his tack, I'd be able to give him a proper bit. Compared to my reference drawing (see background) the gape is much wider which I hadn't intended at all, but it all worked out alright in the end...


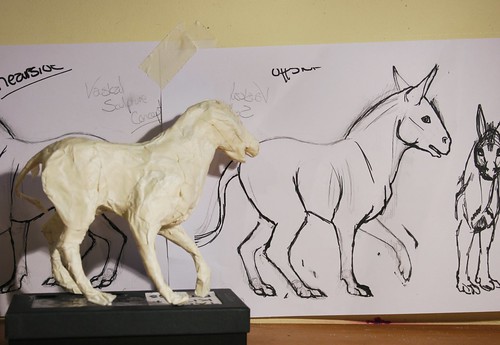
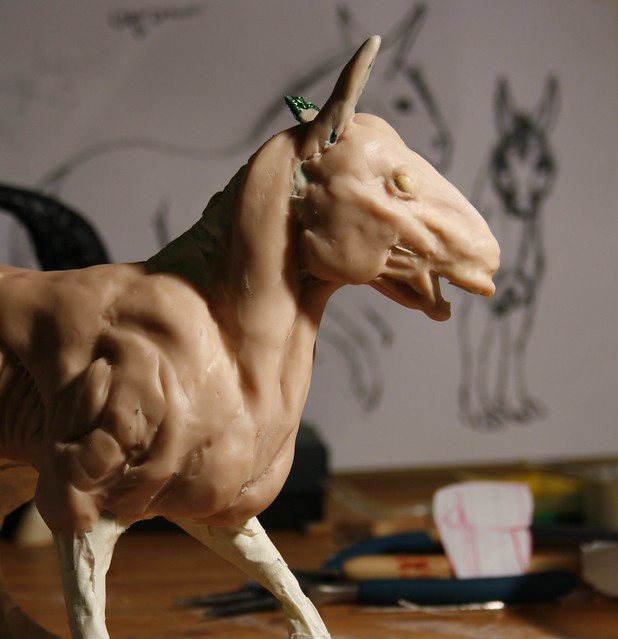
As I added more clay, the creature I'd envisaged started to take shape - literally as well as metaphorically! I'd always pictured them as shortish stocky animals - rather like traditional cobs and M&M ponies - very rotund but muscular with a thick neck.

On Arden (the planet my story's set in) they are the equivalent to our horses so they have a lot of roles to fill; mount, draught and pack animal, food (in some parts!) and of course as a natural part of the ecosystem.


I didn't realise it until that stage how much he reminded me of the Oberon resin! (one of which I've always wanted)

Ooooh, after browsing through the gallery I've rediscovered the one I fell in love with when I first got into the hobby. Drool much? XD

Anyway, back to Mr Vaskal!

The right shoulder was a right pain to get looking reasonable and even now I'm not entirely sure it looks right.
Ho hum.


 Sculpting the ears wasn't quite as tricky as I thought it would be, although the one that's flicked back sits a little too far up on the skull which I only noticed when I was about to bake him which meant I had to do a bit of gentle manouvering to get it looking slightly more feasible.


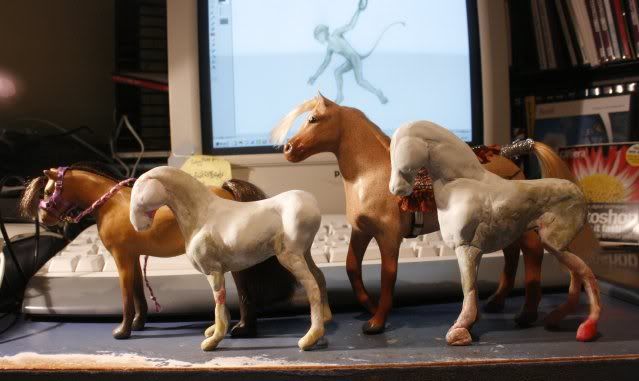
Unusually for me, my desk was reasonably uncluttered, with only the pack of sculpey,a drink for myself and some reference pictures (and models!) getting in my way.

One great thing I noticed about the sculpey was that it didn't crumble like fimo does so there was almost no mess from it at all.


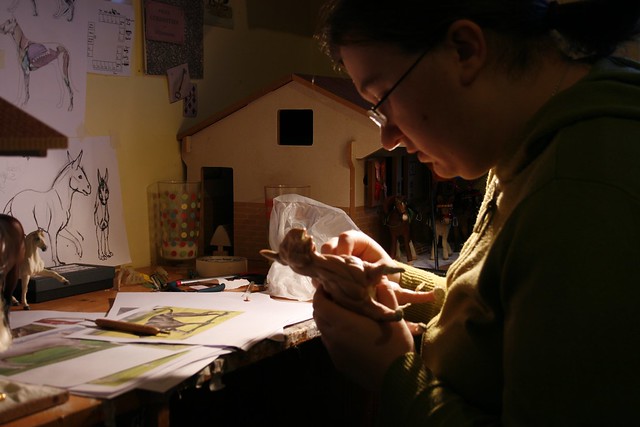
Hard at work!      I'd laid out loads of tools that I might use prior to starting out but I only used three:


1. My fingers!

2. A blunt ended wooden skewer thing I found somewhere - I think it was intended for sculpting actually.

3. A straw! Yep, it was one of those scoop-shaped ones from a coffee shop which came in really handy for removing layers of clay.


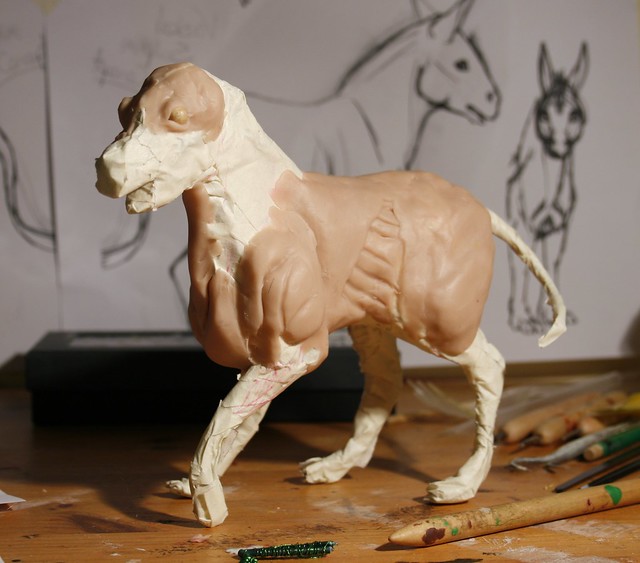
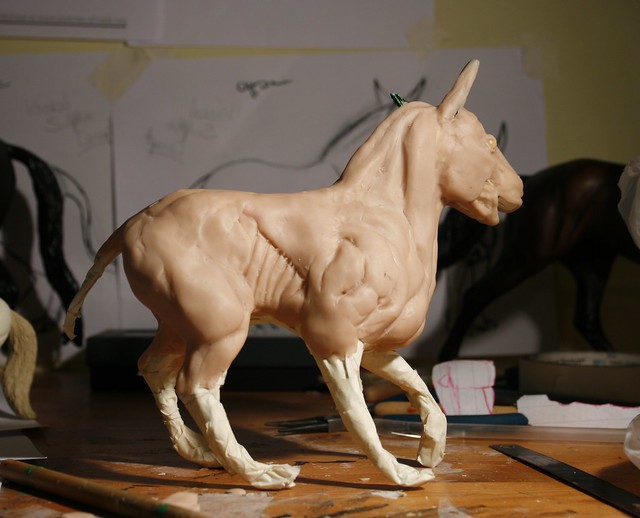
Come the second day, he was looking much more polished and after a few hours work was nearly ready to head into the oven.

 I decided against putting his teeth in until after his first baking as I didn't want to faff about inside his mouth until I was sure I wasn't going to mess up his face!

 One leg (nearhind) bothered me a bit but not enough to want to adjust it before baking.


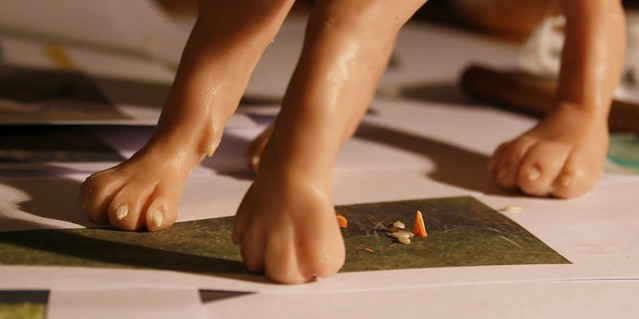
I was quite wary about sculpting the paws as I'm not exactly brilliant at drawing them, let alone creating them in 3D! Luckily a quick google had given me some brilliant reference photos of lion and tiger paws and they turned out to be much better than I'd expected which was a relief!
The claws are a total cheat - sesame seeds! Most of them fell out during baking but that isn't too problematic as I can just glue them back into the depressions they left.

 With all last minute checks done and all his claws in, it was time for Mr Vaskal to head into the oven.

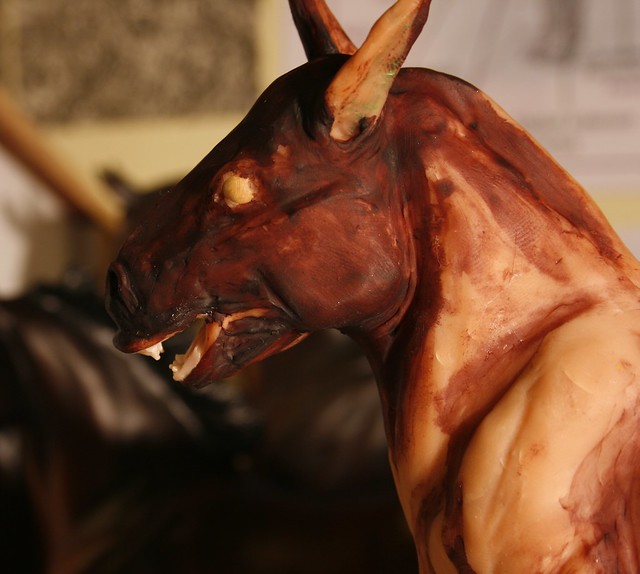
Twenty minutes later, he was out and after he'd cooled down and I'd stopped hugging him, I started work on his dentures. :P When I went to add new sculpey on as gums for his sesame seed teeth to sit in, I found that it wouldn't stick to the cured stuff properly so I had a look on one of the sculpting forums for help and they said to either use liquid sculpey (which I don't have) or some vaseline to help the new clay adhere to the old. I thought that sounded fine so had a look in the bathroom and found...no vaseline. I checked literally every room in the house and couldn't find anything so ended up raiding my mum's makeup bag and used some strawberry lipbalm because I reckoned it was bound to just be flavoured petrolleum jelly after all. XD It actually worked really well - just like glue for clay.


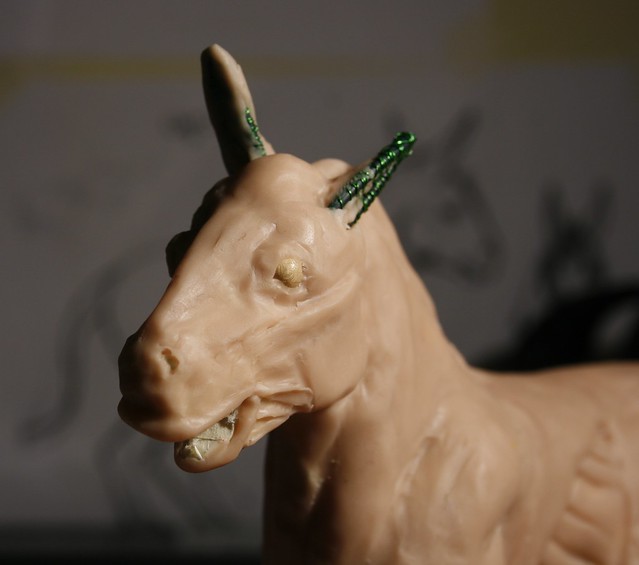
He isn't burnt by the way - I couldn't find any alcohol to smooth out the rough bits so had a rummage around in the bathroom until I found some Savlon liquid stuff which had a high alcohol content and apparently it turns purple in the oven! XD  He also smells like cake which is a bonus. (burnt cake mind, but still...cake.)


As of today he hasn't had much work done other than some sanding and a little tweaking on his ears with the superglue/bicarb of soda trick but I'll keep you updated on his progress!

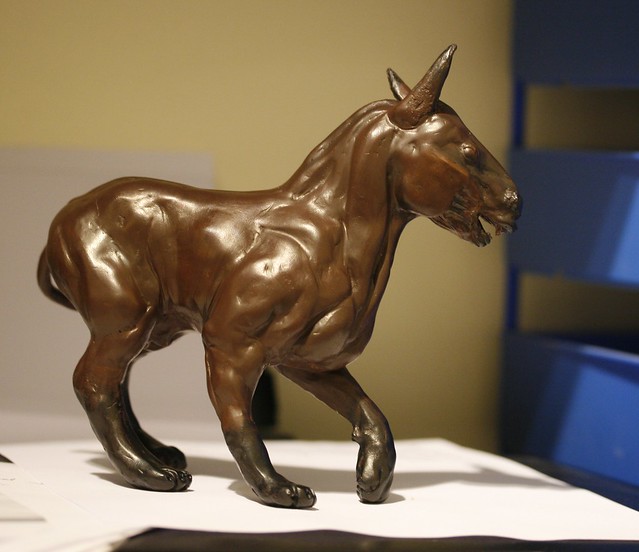
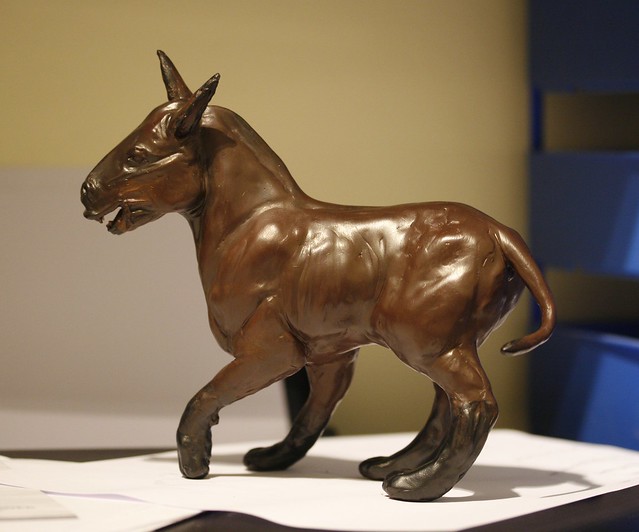
Last night I gave him his first coat of paint and started work on his bridle. He still won't tell me what colour he wants to be but it's so nice to see him in a slightly more 'finished' light.


I still can't believe that I actually sculpted him, seriously. XD