
Here's a quick tutorial for you before we get back to holiday pictures! XD
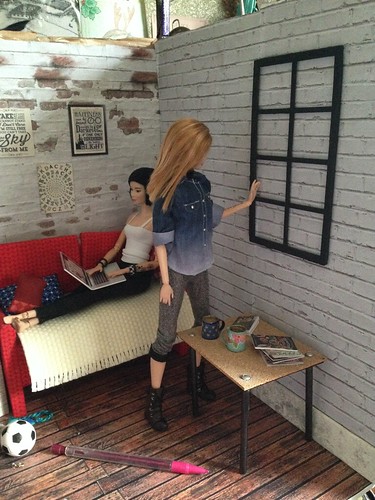
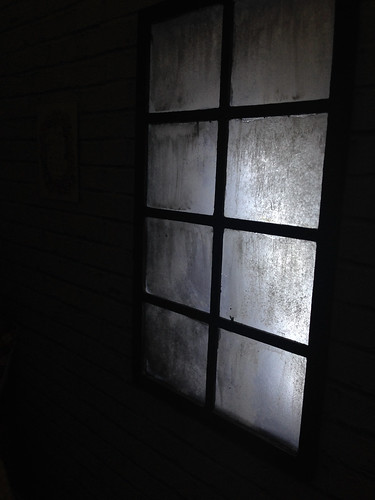
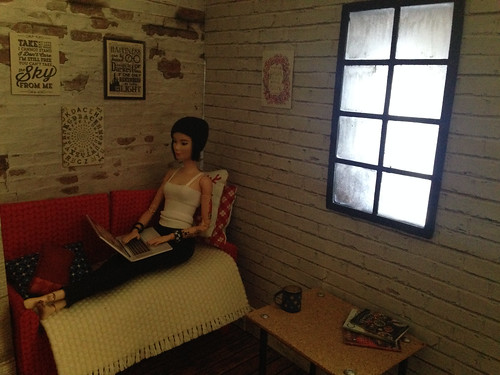
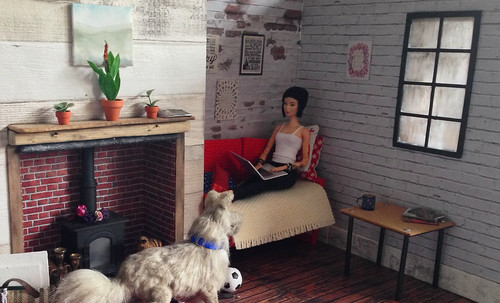
I've been meaning to add an industrial style window to Max and Juno's living room for ages, as I think I've finally settled on their home being a fairly dilapidated old factory/warehouse that's been turned into apartments, and while I could find plenty of tutorials for making windows, or full scale privacy screens I drew a blank at doing the opaque and weathered glass you see so often in those kinds of buildings, so I had to come up with my own methods.
I wanted it to be opaque to disguise the fact that I don't have a background behind the windows and to give it a bit of age and a distressed feel.

I don't have any photos of exactly what I was aiming for that I've taken myself, but if you take a look at my Pinterest inspiration board for Max and Juno's flat -here- you can get a feel for what I was looking for. When I eventually get round to making them a bedroom I want a big window like -this- on the back wall behind the bed.
I like to imagine that they managed to buy the mostly unfurnished flat fairly cheaply, so there'll be lots of original brickwork and metal piping viable, along with the windows and reclaimed furniture. I'm toying with the idea of making them a bit of a roof garden at some point too, as if part of the warehouse had lost its roof and the developers just decided to leave it open to the elements and add some grass, plants and paving. That's a long way off yet though, at the moment my priority is the kitchen and bedroom - both of which I haven't even started planning out yet. XD
Anyway, here's the tutorial!
1. I made up a pattern for the window in PowerPoint and printed it out. I stuck it inside a poly pocket so I didn't have to worry about getting glued to the paper.
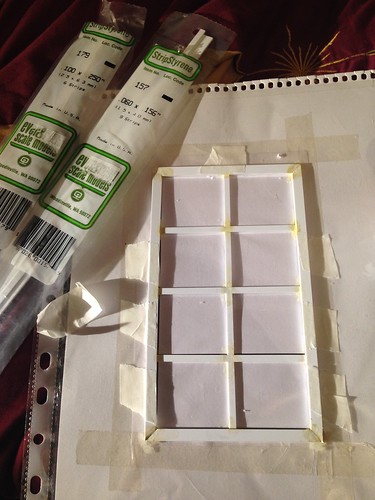
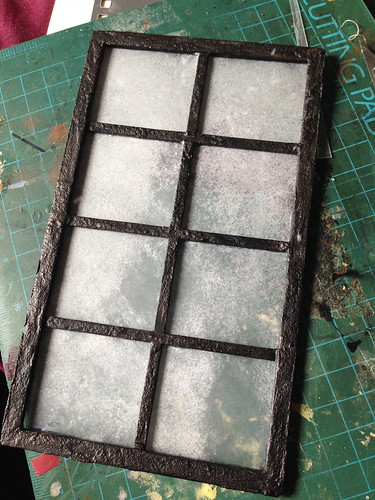
2. Using some Evergreen styrene strips and dichlo, I constructed the basic window frame. After sanding, I did my usual weathering technique of a thin layer of superglue with bicarbonate of soda sprinkled on top for texture. This was then painted black using acrylics.
3. With the window now made, I blue-tacked it to the wall to get an idea of placement, drew around it, then carefully cut it out, though slightly smaller than the outside of the window itself so the frame has something to sit against.
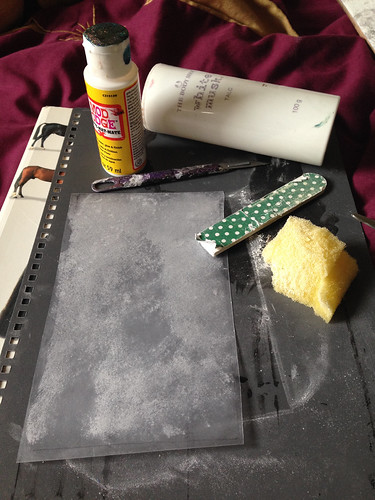
4. Using a sanding sponge and an old nail file, I roughly sanded a thin sheet of clear plastic until it was mostly opaque, then sponged on a thin layer of matte Mod Podge, dabbing at it for texture. Before it dried I sprinkled on some talc at random intervals and used the same sponge to dab it into the Mod Podge.
5. Once this was dry, I glued the window framework onto it.
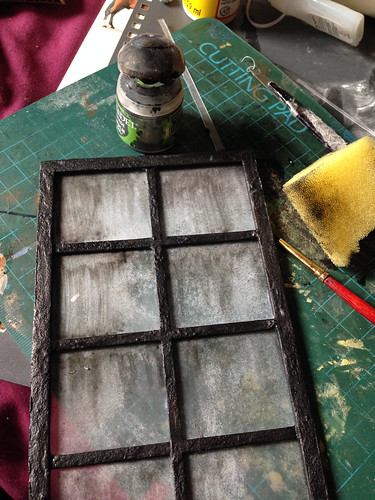
6. Finally, I used a clean bit of sponge and an old paintbrush to add some Citadel 'Nuln Oil' wash to the top of each section of window, then used the sponge to drag it downwards to simulate drips.
7. Once appropriately weathered, it was glued into place and ta-da! Nearly instant window!
This whole project only took about an hour or so to make, as it's nice and simple to put together.
This whole project only took about an hour or so to make, as it's nice and simple to put together.
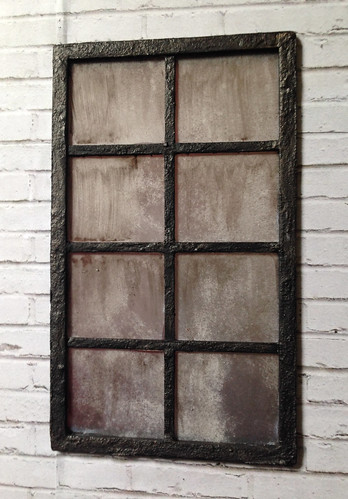
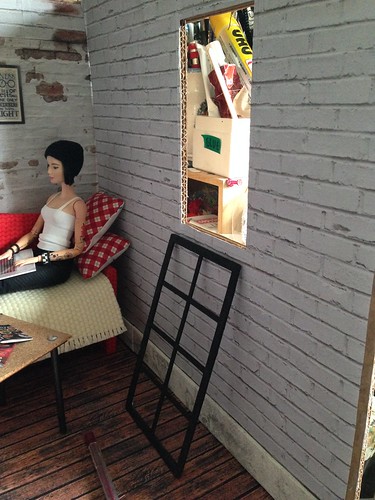
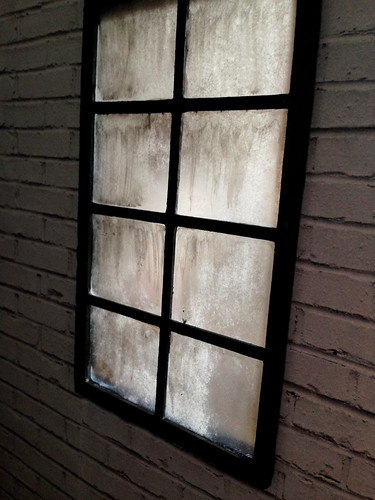
It looks really manky with dark things in the background, but shine a light on it or put some white paper behind it and it really glows.

I'm really pleased with how it turned out and I hope this technique is useful to someone!
Looking at it in situ now though I can't help wishing I'd made it wider, so I may end up ripping it out and making a bigger one. XD
Love your window! Max and Juno's place is really shaping up!
ReplyDeleteThanks! It's so typical, I've got SO many ideas for them but absolutely no space to make anything! XD
DeleteAn excellent and most generous tutorial, Christine. The link to Copperfox Horses was a nice surprise as well.
ReplyDeleteThank you!
You're very welcome! :D I'm primarily a model horse collector, but the dolls are taking over somewhat right now. XD
DeleteI like your window and you've given me inspiration to make my own home for my dolls right now I have a family of them that started with just a mother and a daughter doll anyway thanks for the great window tutorial :)
ReplyDeleteHugs
Marisa
Awww, I'm so glad! It's so much fun making everything look lived in, I hope you enjoy it just as much as I have!
DeleteLove your window! It adds a weathered flair to the flat.
ReplyDeleteLove the window! I'm so impressed with the way the oil layer going downwards looks. All the weathering you did looks so realistic and really fits in with the surrounding brick.
ReplyDeleteSo happy to have found your blog and follow along :)
Great tutorial. Thanks!
ReplyDeleteHi Last Alliance Studios Team,
ReplyDeleteMy name is Anuj Agarwal. I'm Founder of Feedspot.
I would like to personally congratulate you as your blog Last Alliance Studios has been selected by our panelist as one of the Top 100 Miniature Blogs on the web.
http://blog.feedspot.com/miniature_blogs/
I personally give you a high-five and want to thank you for your contribution to this world. This is the most comprehensive list of Top 100 Miniature Blogs on the internet and I’m honored to have you as part of this!
Also, you have the honor of displaying the badge on your blog.
Best,
Anuj
Well Done Christine! I love the way your window turned out, especially method of mixing of the talc with the Mod Podge!
ReplyDeleteI do think that a BIGGER window will serve you better in the long run because the more light, the better!