
I honestly thought I'd already posted this on here before as I'd had it on a few forums about five years ago, but I can't find it anywhere so I suppose it's better late than never!
As it's quite an old tutorial, I make my rugs slightly differently these days, but hopefully this should give you all a simple and relatively easy to follow guide to make your own.
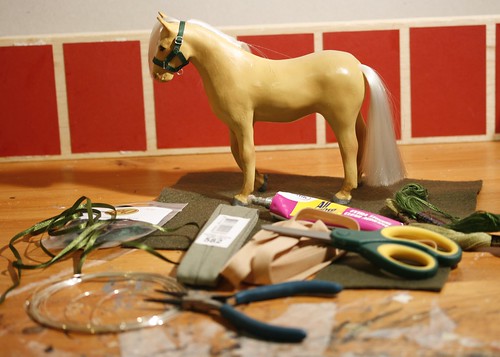
First of all, you will need...
Felt. (I'm only going to be concentrating on felt for this one but you can of course use fabric as well)
Bias Binding. (You can get this from most haberdashery shops or buy online. Wide ribbon works just as well if you don't have any)
Glue. (I use 'Bostik All Purpose')
Ribbon/leather for straps. (I used fake leather ribbon in the end so it's not visible in this pic)
Needle and thread. I used a single strand of embroidery thread as I couldn't find my normal sewing stuff in the right colour. You can of course use a sewing machine but I unfortunately don't have one.
Wire. (for making buckles - disregard if you have premade Rio Rondo ones or alternative fastenings)
Pliers. (for making buckles/holding stuff together etc)
Scissors. (I don't think I need to tell you what those do lol)
A horse to wear it!
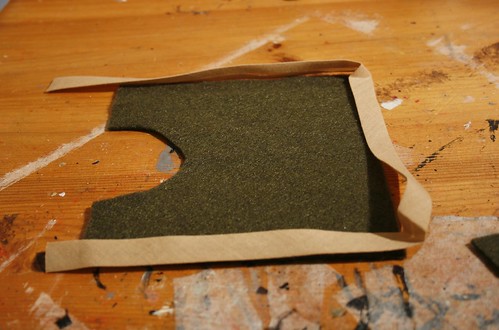
First things first, make a pattern. If you already have a rug which fits well then use that but if not use a scrap of felt or tissue and draw around your model and keep trying it on until it fits snugly.
This is a very basic rug but it's one of my favourites and fits Cally well so it was perfect to use as a reference.
I drew around it and cut it out - ignoring the neck slot as I want to do that again so it looks nicer.
We now have a basic square of felt so after checking that it's wide enough to wrap around her nicely, I cut a new neck for it.
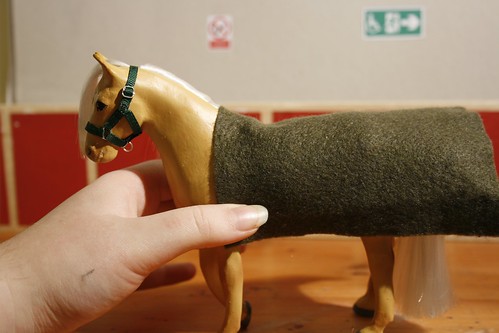
Don't cut it too much or it'll end up really low which looks a bit silly! Make sure there's enough left at the chest and shoulders. (or you'll need to make one of those neck hood things to keep them warm!)
I'd recommend cutting it in a shallower curve than you think you'll need as you can always trim it a bit more if you have to, but you can't add more on!
Perfect!
At this point these days, I usually use the felt as a pattern for some patterned fabric which is tacked onto it and then sewn up at the edges, but there's nothing wrong with using just plain felt.
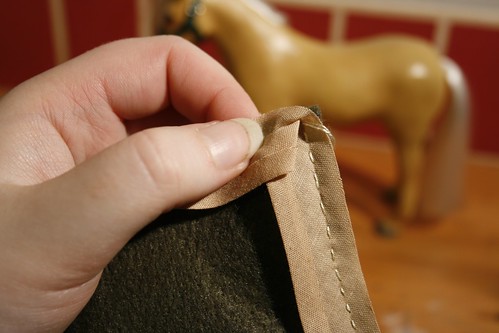
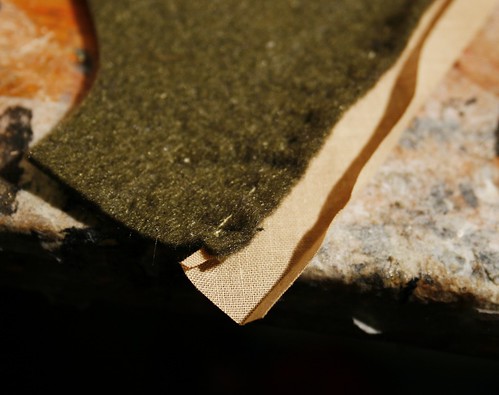
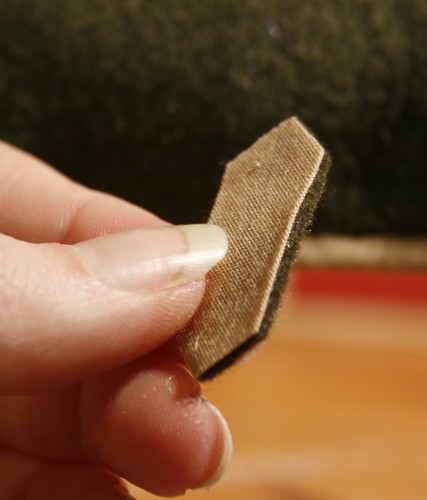
Now we unwind the bias binding and lay out how much we'll need. Always allow more than necessary in case you've measured wrongly!
Bias Binding has two folds on the underside so that when you unfold it it makes a [ shape.
Sewing it on is difficult to explain but basically you want the crease where it's folded to be where you sew.

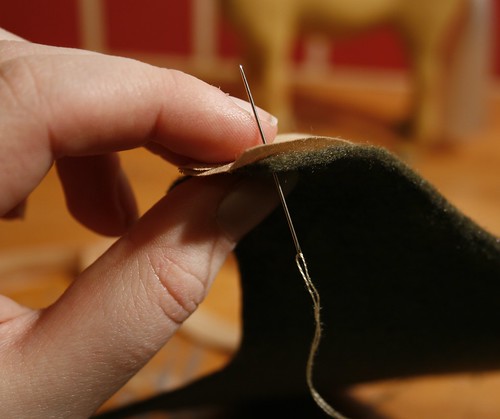
Once you've sewn a little way in, folding the binding over will show you the effect.
Hidden stitches!
Here's the underside, which will hopefully make more sense than my terrible explanations!
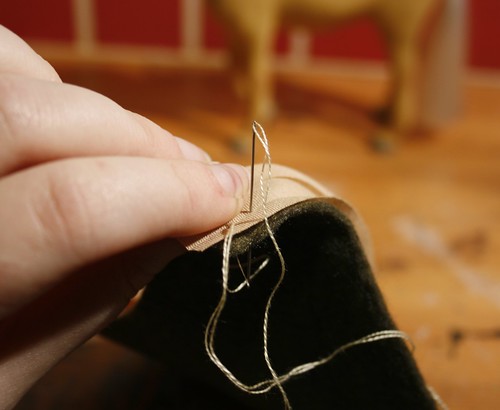
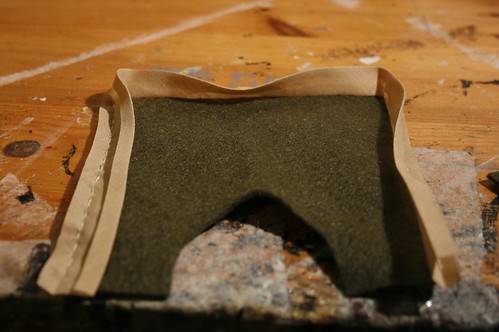
When you get to a corner, keep sewing until nearly the end, then turn the binding at right angles and continue on. It's very tricky to begin with and I've only just managed to get it right!
It looks terribly messy at this stage...
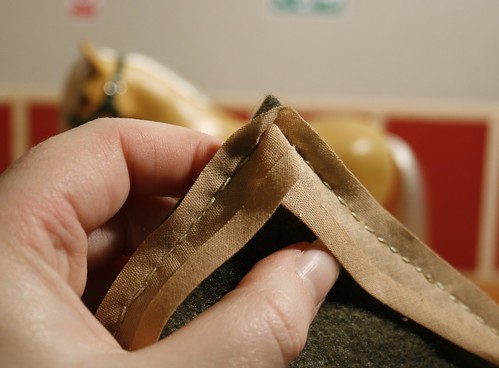
but once you fold it back...
It looks much better!
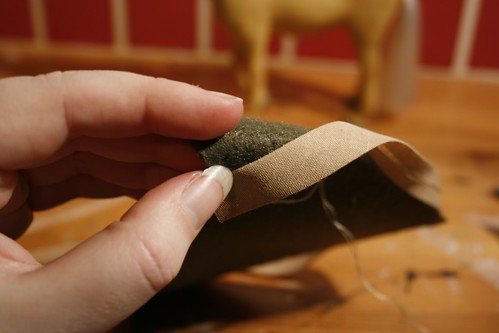
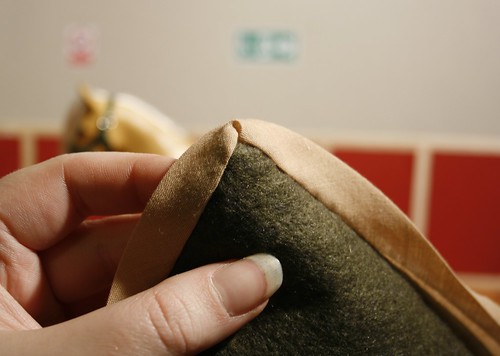
This is what it should look like from the back.
 |
| This is the top side. |
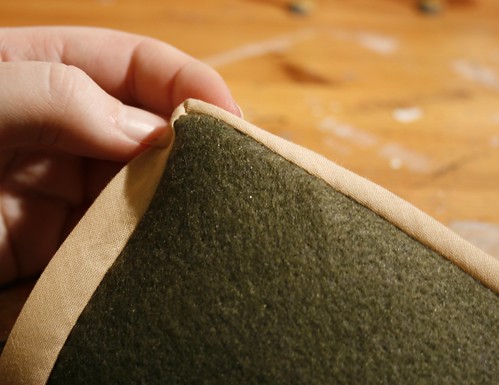
Now comes the really tricky bit, folding the other side over and stitching it in such a way that you can't see how it's held together. I sewed this particular rug in a really complicated way which I've since stopped doing - now I fold over the excess bias binding and loosely tack it into the felt which not only holds it in place nicely but looks quite neat too.
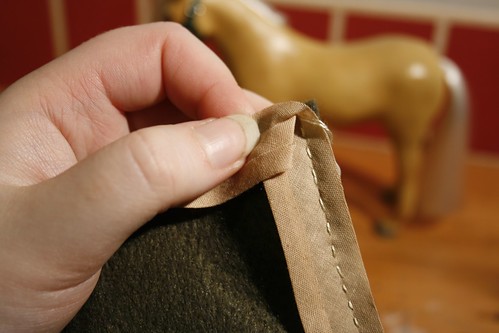
As you can see I wasn't quite as neat as I'd have liked with this one but it'll do!

When doing curved bits like the neck I find it easiest to keep the fold part parallel to the edge of the felt - that way you won't go off course and end up with randomly thick/thin edges.
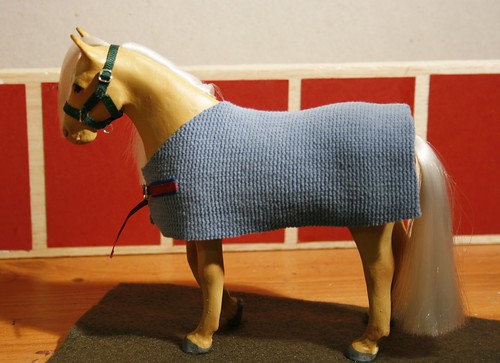
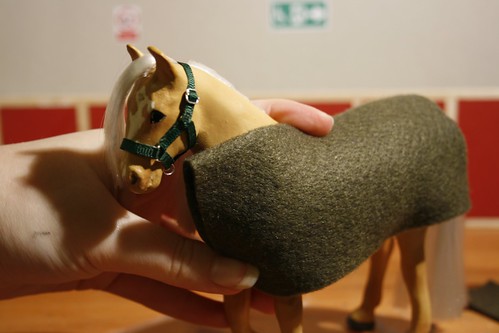
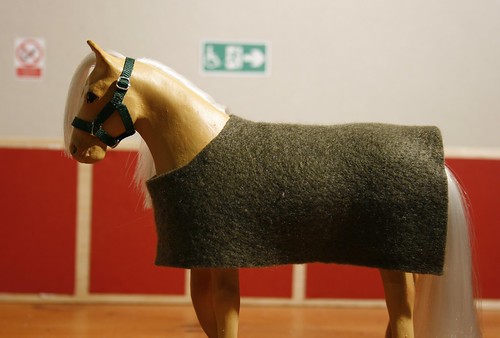
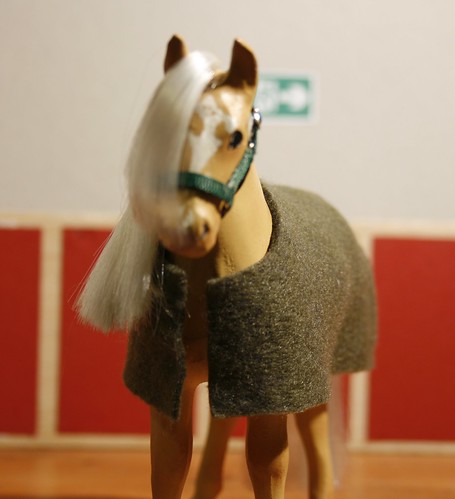
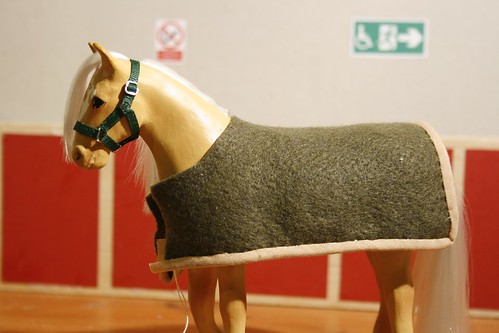
Last minute fitting to make sure it's not too tight or loose.
Yup, everything's looking good so far!
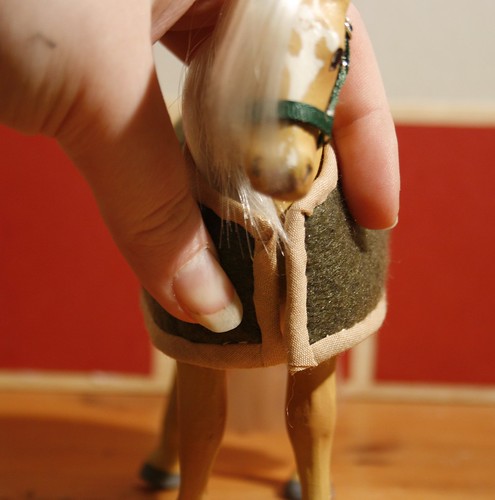
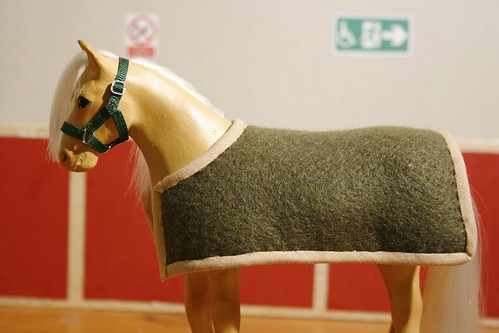
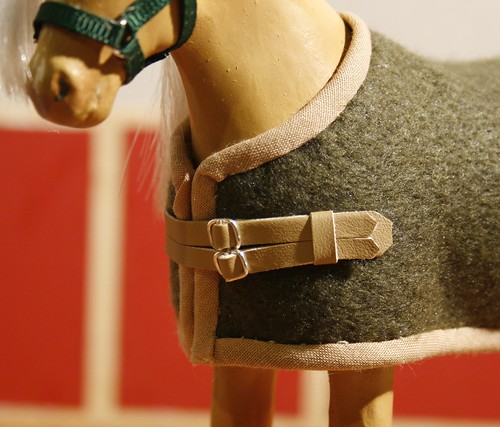
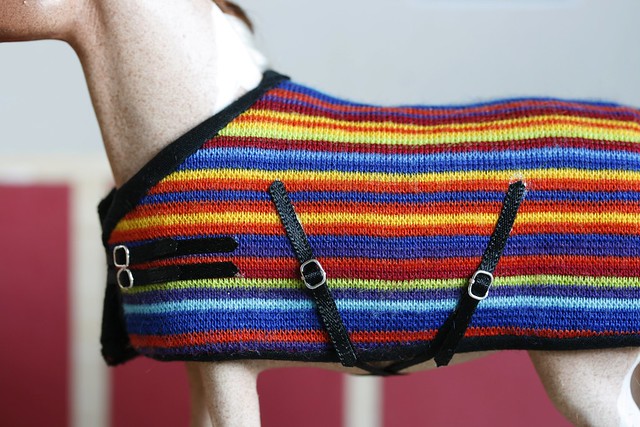
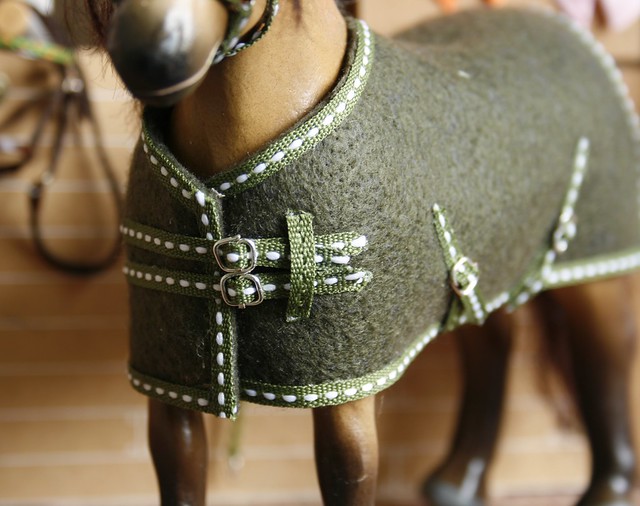
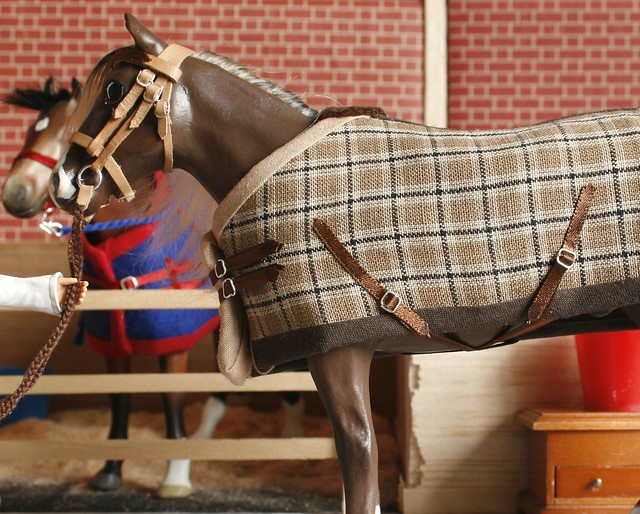
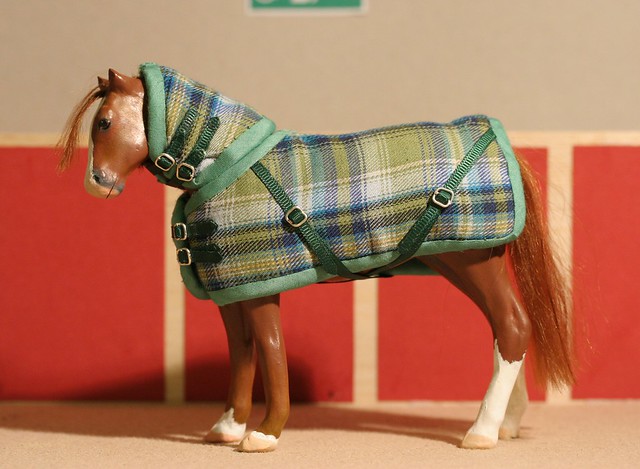
Now onto my favourite part - the fastenings!
I use buckles or clasps as I can make them really easily with pliers but you could use poppers or velcro if you prefer. I made the chest straps from some fake leather ribbon I bought recently. Normally I have two separate straps but I fancied doing something a bit different.
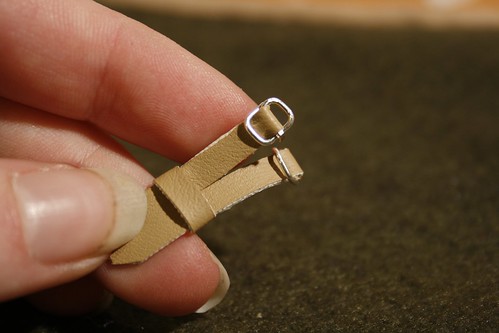
Always make the straps longer than you think you'll need as there's nothing worse than spending ages making and gluing them on, only to find that they won't reach the buckles! 
To avoid that, I run the straps through the buckles first, glue on the buckle part, then the strap part so I know that everything's the right length. You can always trim the straps a little afterwards but you can't add more on!

The keeper is just a thinner bit of leather glued behind the other part. It's just a little detail but I think it adds to the overall look.
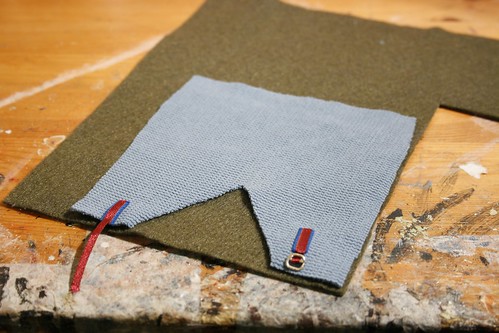
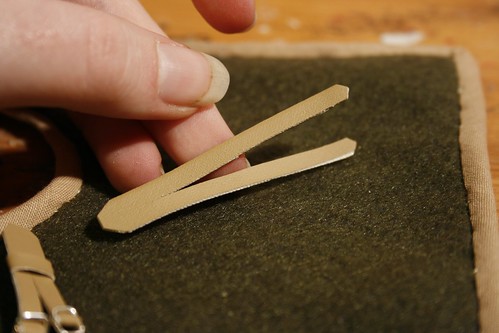
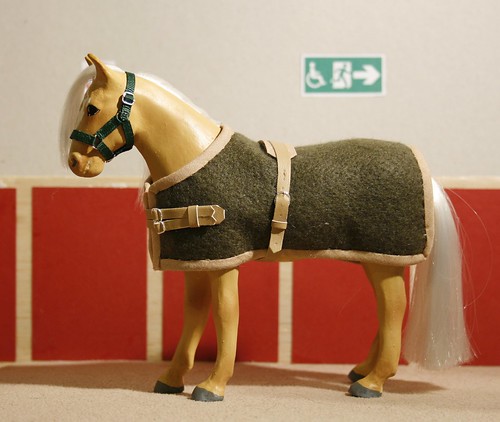
As this is going to be a stable rug, I thought I'd make it with a surcingle instead of the usual cross straps. I used a little section of bias binding glued onto some spare felt for this. I always notch it at the ends just because...well, I think it looks nice.
The girthy part is just another long section of ribbon with a buckle glued on at one end. I felt like being a little different again so this one fastens with an actual proper working tongued buckle. (Which I wouldn't recommend on small things as it's a right faff!)

Once I've got it arranged in the right place I marked off where it sat on the pad and glued it on. You don't need to glue it but as I always lose the pads I did it out of practicality!
And that's it! 
If you want cross straps instead then make two long straps with buckles/fastenings and two longer ones and glue them on at a slight angle so they point towards the opposite side of the rug.
 |
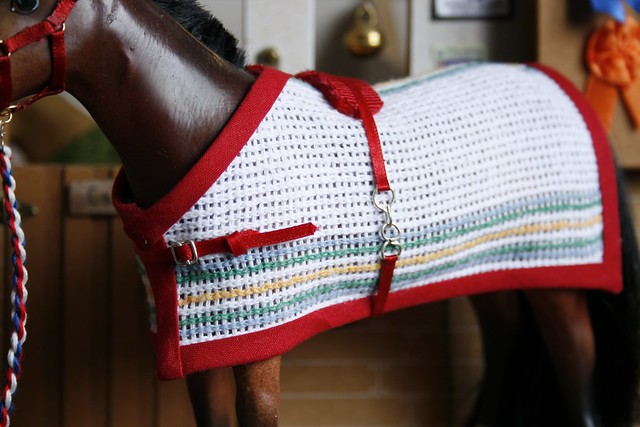
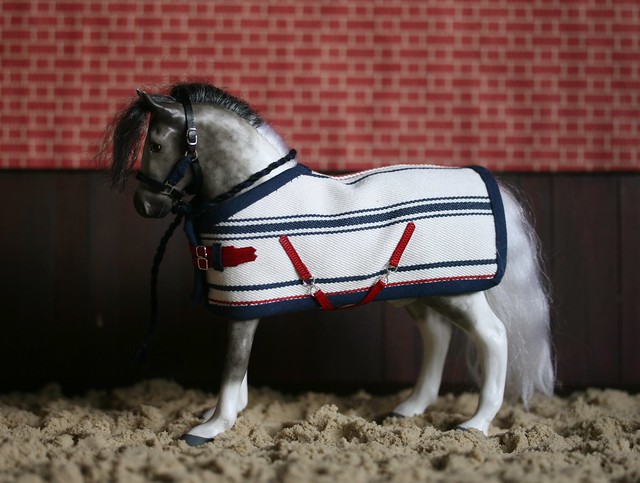
| This one uses 'stitched' ribbon instead of bias binding and I was able to hide my stitches in the white stitchmarks as part of the design. |
Look at the real thing as much as you can and consult tack catalogues for new ideas. There's so many different styles and designs out there that you can get away with practically any colour/pattern combination!
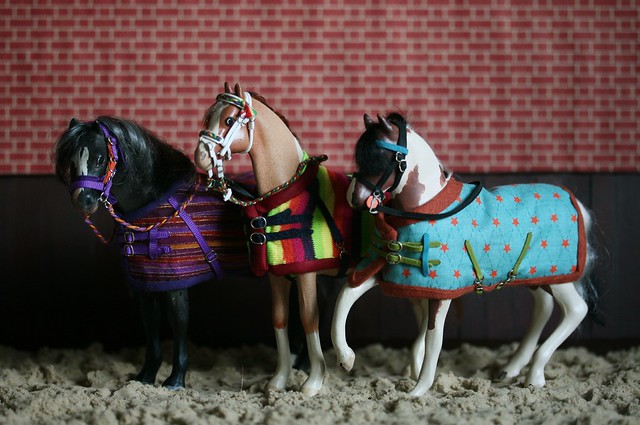
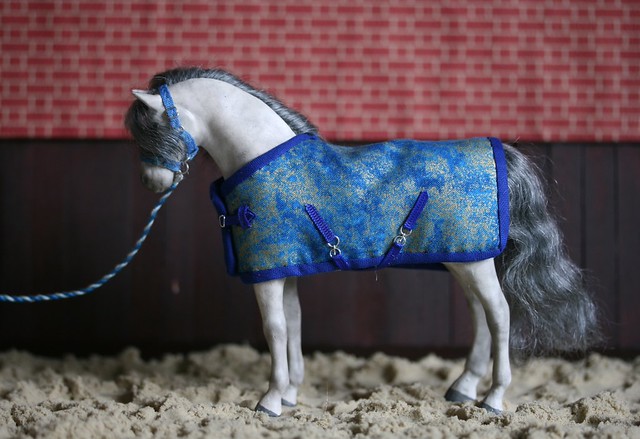
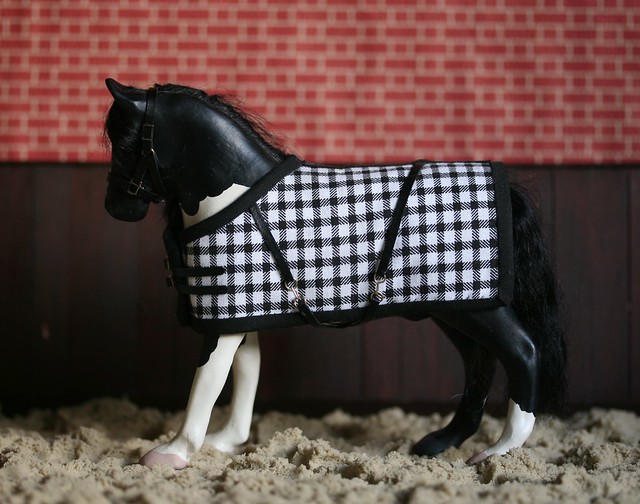
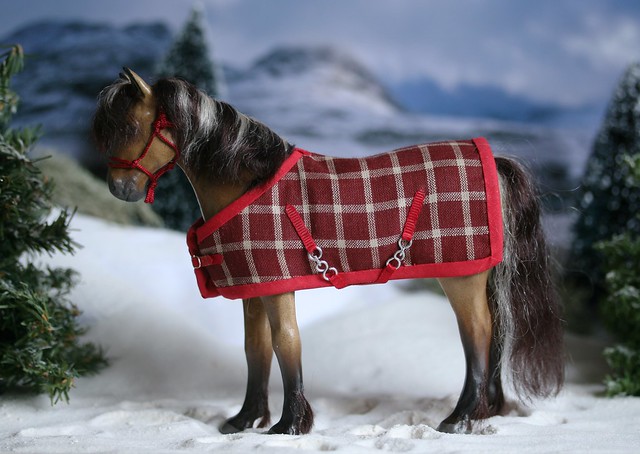
Here's a few examples of what I've come up with for my lot to give you some ideas.
 |
| Matching bias binding. |
 |
| This sweat sheet is actually made from a dishcloth! |

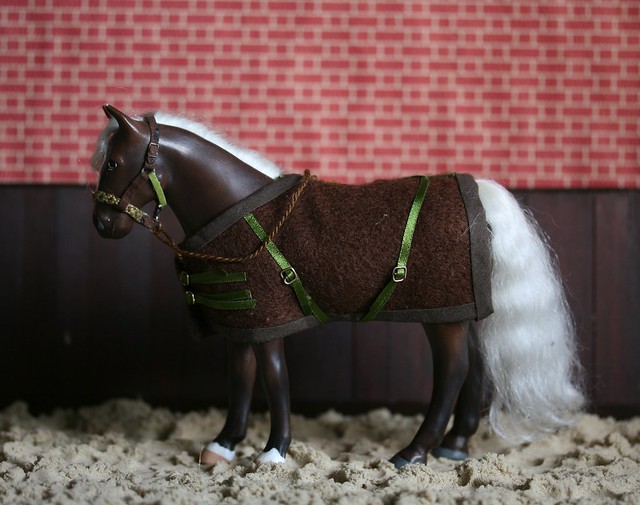
Because Julips are so stylised, my rugs are too and slightly old-fashioned looking.
I've switched to using homemade clasps rather than buckles for the main straps purely from a practical viewpoint - its far easy to rug them up for transport after a show when you aren't foutering about with tiny buckles!
 |
| Tegan managed to get herself a nice cosy winter rug complete with neck hood, made in exactly the same way as the rug. |
So there you go!
I hope its helpful and I'd love to see what you can come up with for your own models!
WOW! :)
ReplyDeleteThank you, thank you, thank you [. . . ] Thank you! You do a tutorial on belt buckles?
ReplyDelete:D
DeleteI haven't done a tutorial but years ago I did do a super crappy video of me making an equally crappy buckle if that's any help? XD
https://m.youtube.com/watch?v=rrLiZsmxggM
This comment has been removed by the author.
ReplyDeleteThank you for making this tutorial! I followed all the steps in making my own Julip one and I think it worked out really well (http://wollepluis.bromandcompany.nl/cosy-old-stable-blanket/)!
ReplyDeleteThanks for giving such a great information about horses
ReplyDeleteHorse rugs looks unique and beautiful on your horse and they are quite comfortable
I'm very crazy about horses.
keep doing well.
horse rugs
At Payless Saddlery we plan to make horse ridding affordable. With this site we attempt to connect directly to the end user . ( We call it connecting Horsemanship and expanding our kingdom) With years of intensive knowledge in saddlery product we are here to offer you best of products at best of prices
ReplyDeleteWe are sure with our elaborate range of designs , Down to earth Prices and royal customer service you are bound to feel like a KING!
Please follow us on Facebook and like Our Page . We have interactive Facebook page with monthly promotional campaign or competition ( with free Gifts ) and discount vouchers for our royal and Loyal army
Best Quality Horse Rugs
Best Quality Horse Saddle
Best Quality BREASTPLATE
This is a great inspiring article.I am pretty much pleased with your good work.You put really very helpful information. Keep it up. Keep blogging. Looking to reading your next post. bedroom area rugs
ReplyDelete