
Contuining on from my last post as it was getting long, I've been having great fun coming up with things for my Skyrim crew, and especially Brenn.
While he tends to model his yellow-green tunic when indoors and in warmer climes...

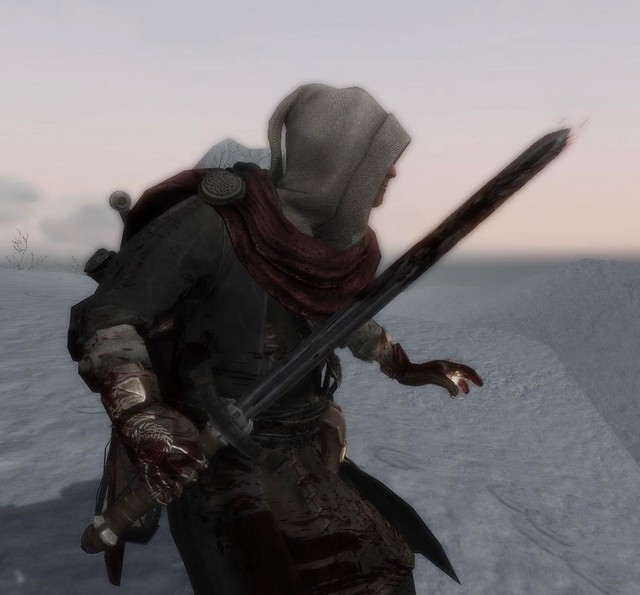
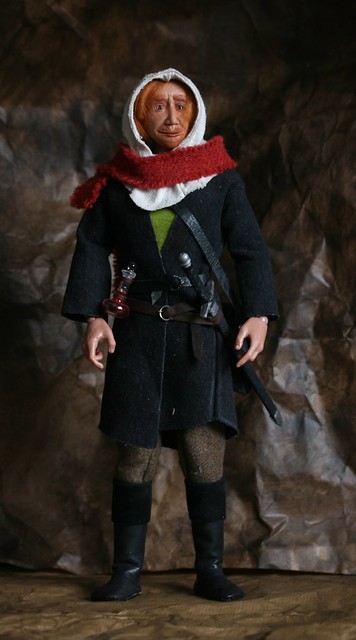
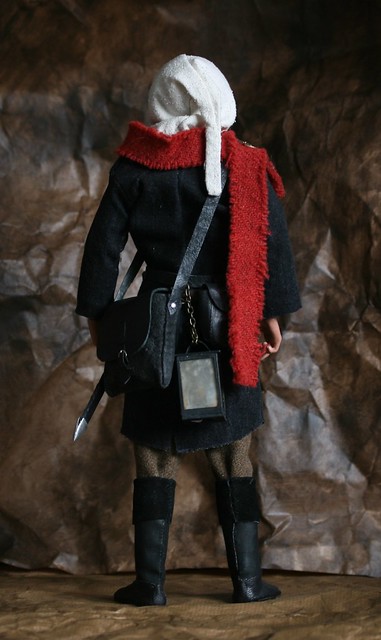
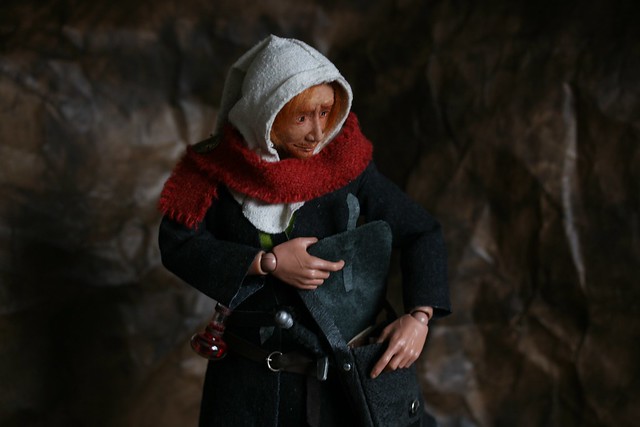
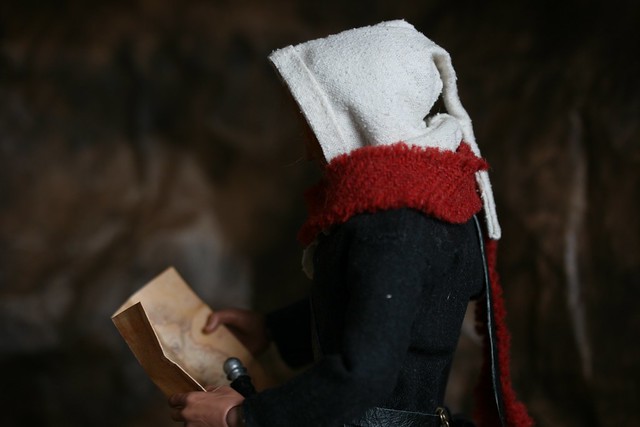
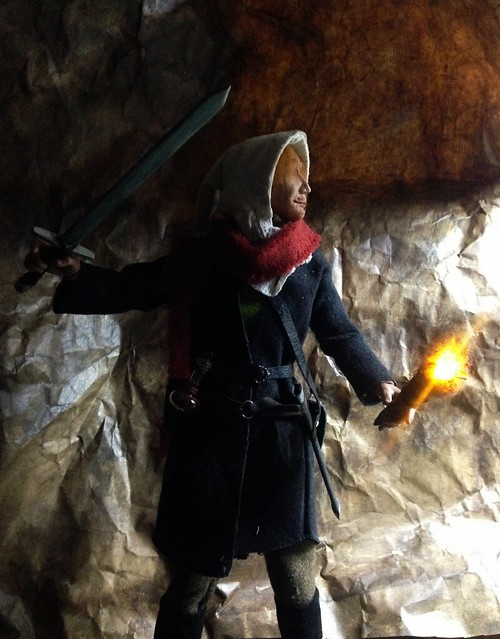
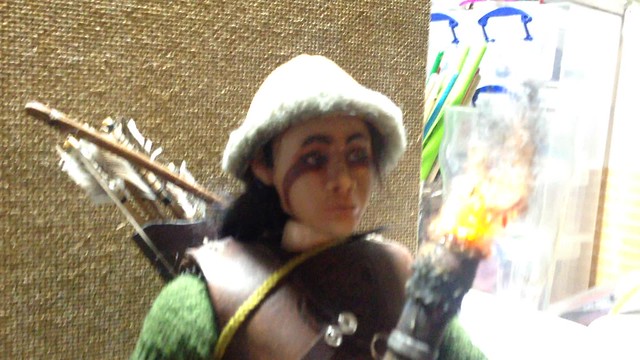
...when out and about in the colder regions, he favours this look, with strong and durable coat, a chunky knitted scarf and a sturdy hood with liripipe.
I couldn't resist, I just had to make my own version. XD
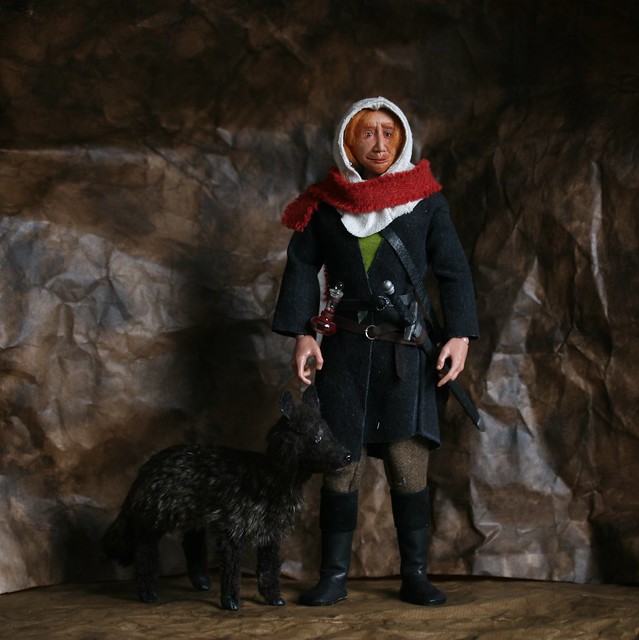
It's hardly a faithful copy, the coat (which is a bit short in the arm really) needs fastenings and the scarf is just a placeholder for now until I can find a fabric with a better drape (or convince my mum to knit me one XD) but I really like the hood.
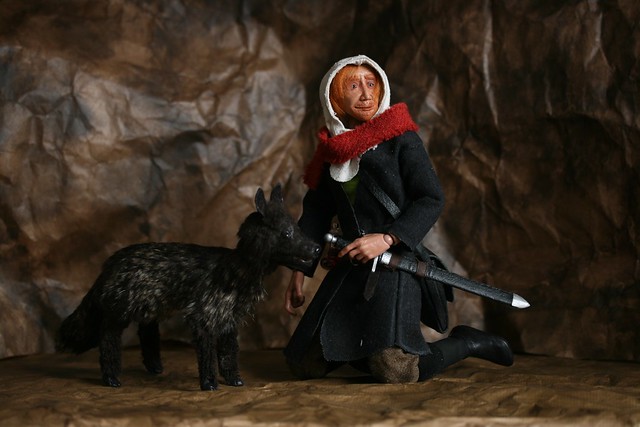
He gained a sword at last, made from wood with a leather and styrene scabbard.
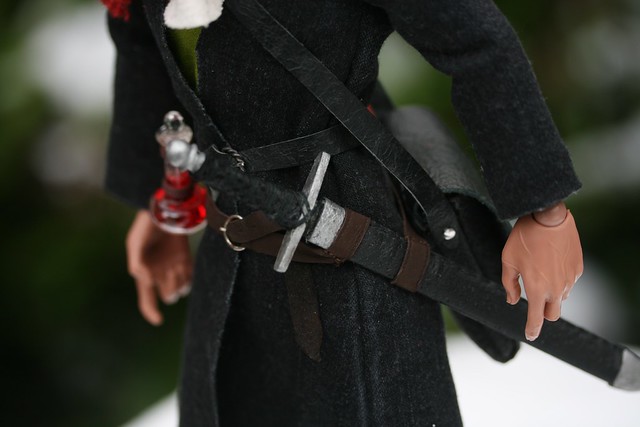

He can't hold it very well as he's only got a choice of open palms or pistol-grip hands at the moment, but he manages somehow.
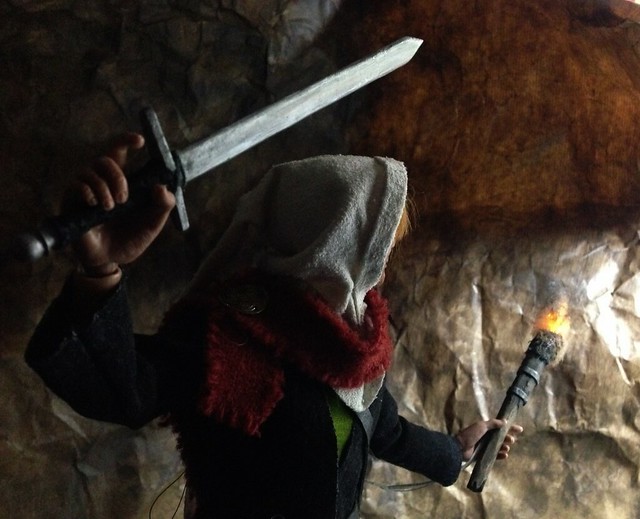
Hey, wait, you may be wondering. Is that...fire?!
 |
| No photoshopping either! |
Indeed it is!
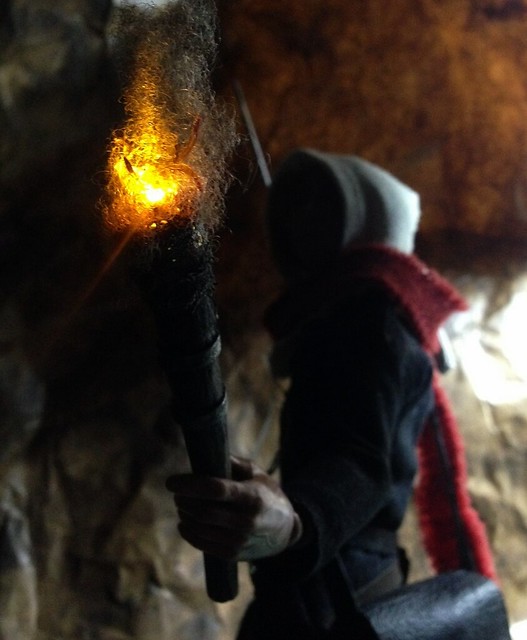
One of my other goals for this project was to push myself into making things that look incredibly tricky, and a flaming torch was definitely one of those things. A real flame wouldn't scale well and ran the risk of falling over and setting all my hard work alight, so that was ruled out fairly sharpish. LEDs were the logical solution, but finding somewhere to store the often bulky batteries was going to be more difficult. In true Christine fashion, I bodged it and it turned out surprisingly well!
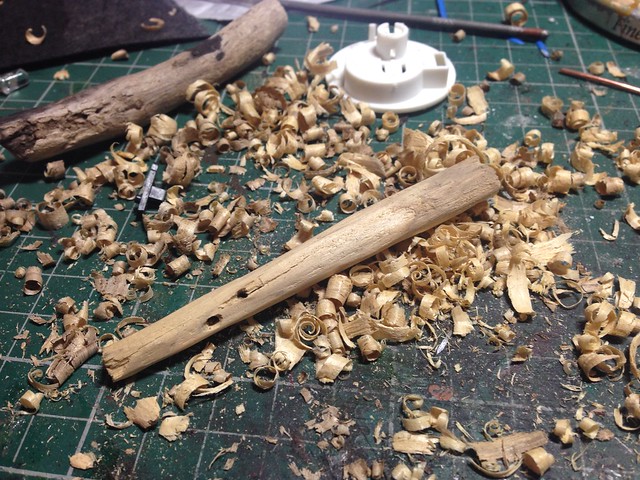
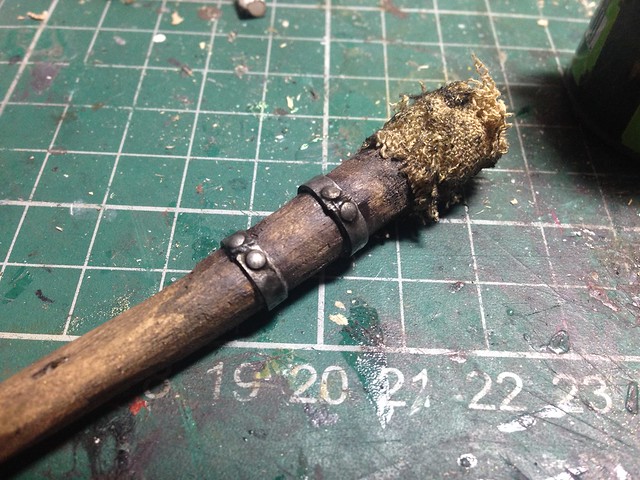
I found a suitable twig in my stick-stash and using a new scalpel blade, whittled it into a vaguely torch shaped object.
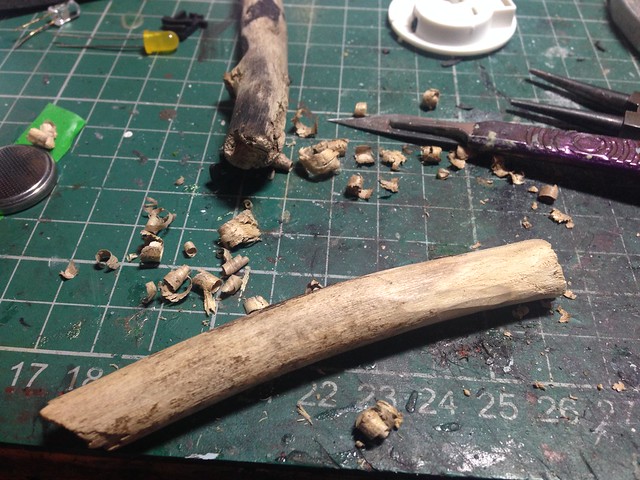
I used a combination of metal files and scalpels to carve out the inside (I didn't have a drill at the time) so it was hollow all the way through, as well as making a couple of small holes near the bottom, just under and around where the figure's hand would be holding it.
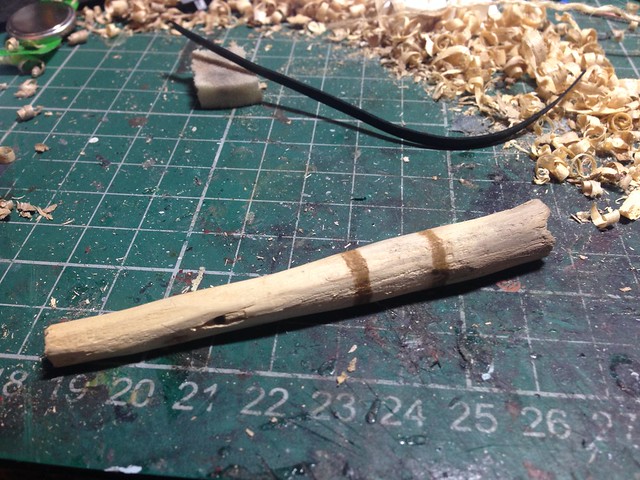
The Skyrim torches have metal rings around them, presumably to stop the wood from splitting or something, so I marked out their positions then glued on some leather lace which would be painted and weathered afterwards.
Some tiny gold nail art decorations were superglued on for the rivets and the whole thing was given a few coats of Citadel acrylic washes to bring out the grain of the wood and weather it down.
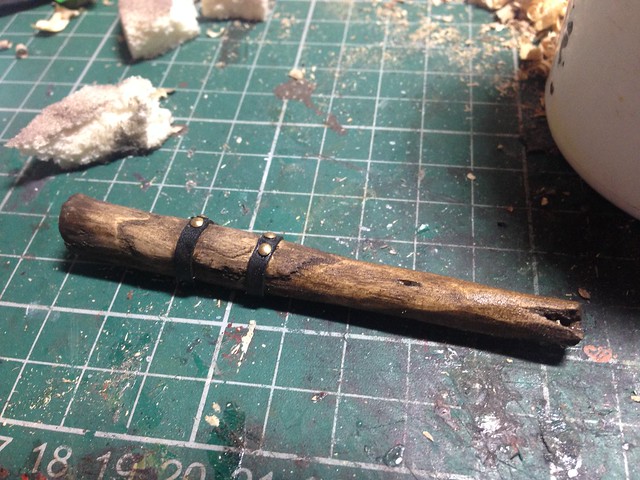
Fully painted up it looks quite convincing I reckon! I glued in some 'burnt rags' at the top as well - just some stained cheesecloth fabric with some dabs of black acrylic for burnt bits.
A flickering LED from my favourite £1 shop tealights fitted in rather nicely.
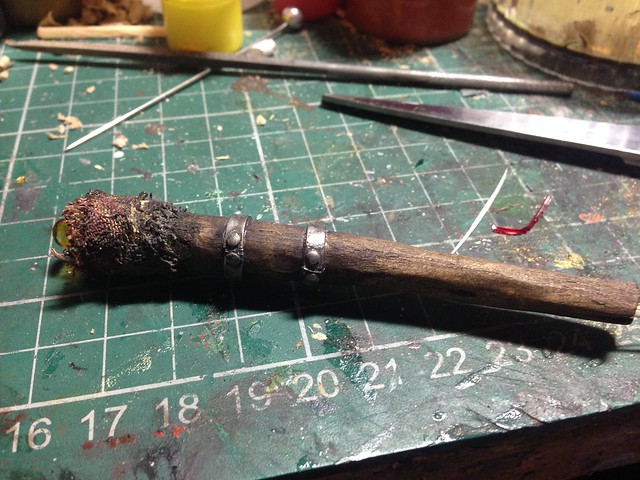
I extended the reach of the bulb's 'legs' with some fine fuse wire (one length insulated with micropore tape as I don't have any shrink tubing, lol) and carefully threaded it through the torch. It came out the bottom easily but I wanted it to protrude from the small hole I made in the side earlier, so I could hide the wires up a sleeve and pop the battery in an inside pocket. It took a bit of wrangling, but I eventually managed it! For the photos earlier I just taped the wires to the coat sleeves as it was really just a test rather than a proper photoshoot ,and you can actually see them in a couple of shots.
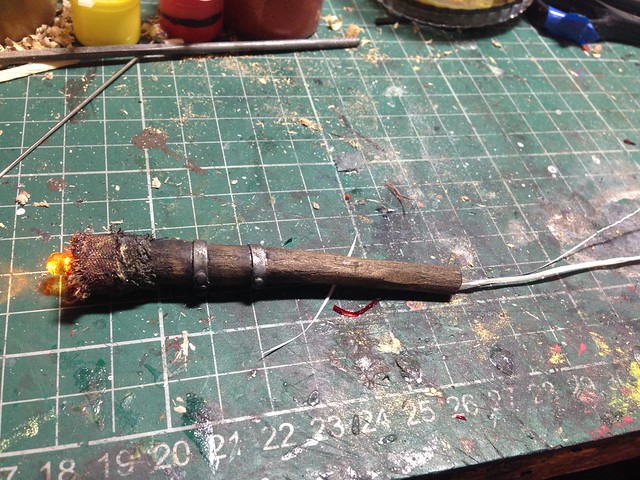
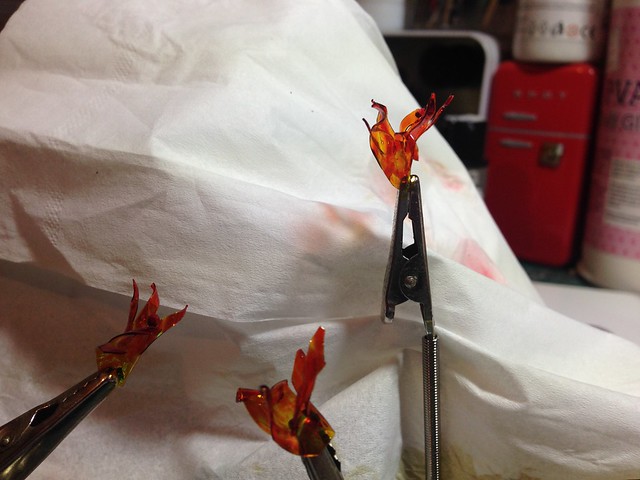
Some clear plastic sequins were chopped up and melted - ironically over a candle flame - then coloured with glass paints. They slotted around the LED bulb snugly and helped disguise it, as well as diffusing the light.
I added a little wisp of 'smoke' afterwards, courtesy of some teased out and lightly painted wadding which finished it off nicely. Because of the flickering bulb, its really rather convincing in the right light. In fact, none of the photos of it above were edited at all, other than a crop and a slight darkening as they were taken on my phone. I really couldn't be happier with it!
 |
| Skara models the finished model in a truly terrible iPhone video. |
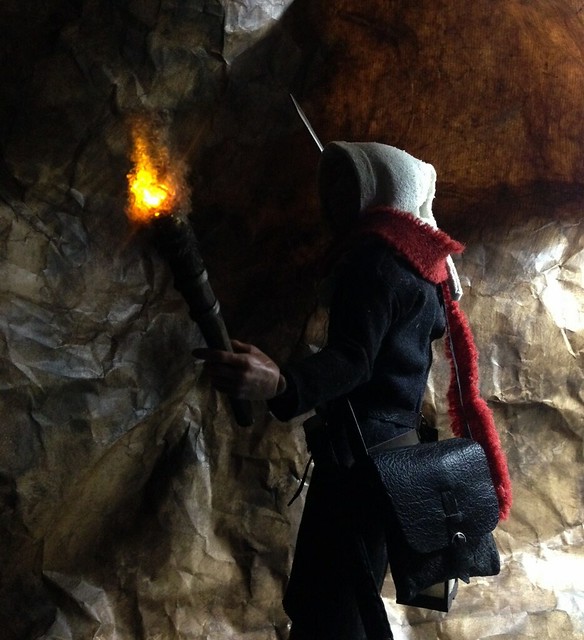
Torches are all well and good when out and about in the dark, but what if it's windy?
Then, you need a lantern!
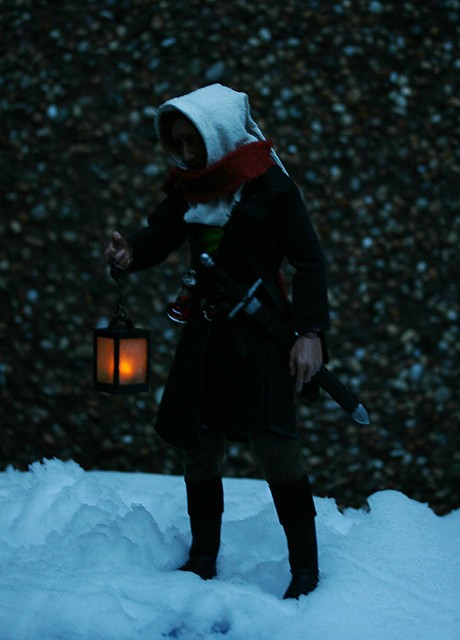

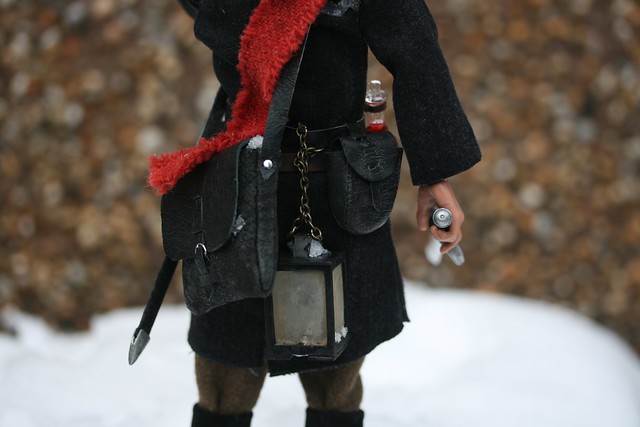
The coin battery is hidden inside the lantern this time which, while making it a completely standalone piece, does make it rather heavy. I haven't fully mastered the 'on' switch though, so it has a habit of staying on just long enough for me to get the camera in position, then promptly losing connection and going off!
The main body of the lantern was 2mm styrene, with sanded and stained clear plastic from the front of a notebook for the sides. I'd seen an episode of Time Team where they recreated a medieval lantern using thin slices of horn and I loved the effect it had, as the light seemed to glow from within in a very pleasing way. That was my inspiration, but it was also handy from a practical point of view, as it would have been hard to hide the bulb if I'd left the sides open like the in-game version.
Next post will be dedicated entirely to snow photos! It was orginally part of this one but it was getting massive. XD
No comments:
Post a Comment