
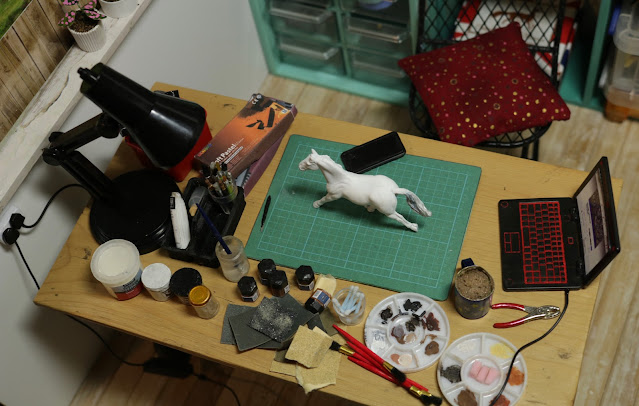
Considering the complexity, it actually didn't take all that long to put together!

...and now you'll find out why!
I can't embed this properly because Blogger is a pain in the arse, but I recorded a stupidly long video tour of this on Instagram the other day whilst answering questions and stuff so if that sounds like something that interests you, it can be viewed -here-
As with many of my dios, I began gathering furniture and accessories for this build long before the actual room came into being, and as a result this post is going to have things a little out of order!
The walls are made from sheets of 3mm foamboard I purchased on ebay. I like working with foamboard as it's lightweight and easy to store, but strong enough to hold up shelves and things. Obviously it's still more fragile than something like wood, but for my purposes it's fine, especially if you;re careful with it.
I like to fix some things on permanently, so the shelves and peg board are hot-glued in place, though the paintings are just held on with blue tack.

With previous dioramas I've had to put heavy objects behind the walls to hold everything up which really isn't a great idea, so I've recently started using velcro to hold the walls together.

Basically I positioned the walls at right angles, then hot glued strips of velcro around the corner, which I then trimmed to separate the walls. The other side of the velcro can then be placed on top and pulled loose when you want to dismantle the room. I used three bits as I thought it'd be more structurally sound that way and so far I've had no problems. The walls can support their own weight like this so I don't need anything propping them up!


The floorboards were a lucky charity shop find - a bamboo table runner! It's got a really nice weathered wood finish and the whole thing rolls up as well which makes storage considerably easier.
I knew I wanted a big window somewhere as you can't have a good studio without a lot of natural light, so once I'd laid out the basic furniture to get an idea of the layout I wanted, I measured out a suitably sized rectangle and cut it out carefully with a scalpel.

I ended up lowering the window a little after I took this photo as seeing a doll next to it showed me that it was a little high. I used one of the offcuts to make a windowsill, which I later covered in weathered wood effect wallpaper and glued into place with some cocktail sticks stabbed in for support.


The curtain rod is just a painted kebab skewer with beads at the ends, held to the wall with wire loops I stuck through the foamboard and glued on the other side. The drapes themselves are some nice thin cheesecloth type material with ribbon loops to hold them up and a couple of hooks made from paperclips at the sides for the embroidery floss ropes to attach to,

The outdoors is a photo from an old calendar, with a strip of wood
effect paper at the bottom to look like a fence. It's not ideal, so the
view may change eventually but it'll do for now.

The teal set of shelves at the back were another charity shop find -
just an MDF storage box thing I painted and glued some cross stitch
backing fabric to for a little detail. The horses are mostly micro mini
artist resins and pewters I've accumulated over the years, along with a
couple of other brands.


One
part of the room I'm not all that happy with is the two shelves above
this - I made them from scraps of foamboard which I covered in wood
effect paper and then hot glued directly onto the walls with some
cocktail sticks stabbed through the back for extra stability. They're
pretty sturdy and I like the look of them, but my hand slipped when I
was holding them steady for the glue to dry and the bottom one ended up a
little squint. It isn't too noticeable in photos but it really bugs me!

The other set of shelves I am most definitely pleased with!


They
started out life as a wooden perfume box I found at a car boot sale for
around 50p. It had a sliding lid and that was it, no internal
compartments or anything, so I made some more shelves with foamboard and
wood paper, then glued in wooden supports underneath. I didn't need to
glue the shelves themselves in as they fit so snugly I could just slide
them in.


The wood effect paper I bought years ago when my favourite art shop was
closing down and I really wish I'd bought more as I've been struggling
to find any more online that doesn't cost a fortune! It matched the pine
of the wooden box perfectly and it's really difficult to tell the
shelves aren't real!

The
books were just book covers printed off the internet and glued onto a
strip of foamboard then cut out. The organisers were printed too.
The
shelf above it originally contained little laser-cut wooden Christmas
shapes I bought from a craft shop. I got them mostly for the container
if I'm honest! I stained it with a little watered down paint and filled
with accessories.
The little ringwraith
statue at the top was from an old LOTR Risk game we played once and then
relegated to the loft, but not before I 'liberated' a few of the pieces
for miniature use!
The ammonite is the real deal, and was the first
one I ever found on holiday down on the Jurassic coast a number of years
ago. Sadly it was stored badly for years and ended up with pyrite decay
so it isn't as beautiful as it was when I first found it.

The vintage pulp novels were printed from facsimile
covers I found online and glued onto thick card. The 'Dolls are Deadly' one I just had to keep on display!

I
made the little glass jars out of UV resin using moulds I bought on Ali
Express. I haven't quite perfected the technique yet so they all have a
few imperfections here and there but I really love the fact they're
actually hollow and I can put things in them. I gathered up some of my
tiniest beachcombing finds, including teeny weeny shells, seaglass and
pottery, along with a fish vertebrae just because it looked cool. If I
ever make a bathroom diorama these will probably end up in there, I just
needed to fill these shelves with *something*!
The white shelves on the back wall are actually genuine IKEA furniture! They do a set of doll's house furniture which is for the most part, grossly underscale for my purposes, but the shelves are generic enough to work for just about any scale. I didn't want to buy the full set just for them though, so I assumed I'd never own them. Imagine my surprise when I found them in a charity shop along with a handful of vintage Barbies and accessories a few months ago! They ended up throwing it in for free because the till was being awkward, so I think I definitely scored big there!
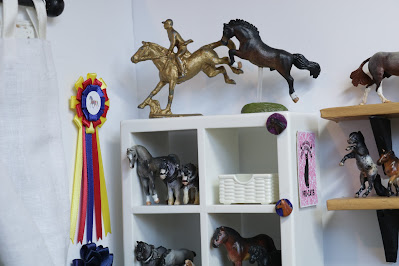
The rosettes were prizes from both the Bridle Tree Barn Raising Challenge earlier this year and from last year's NaMoPaiMo - I think all prizes should be miniature, I'd much rather have a few of these than full size rosettes!
The plant was made from masking tape, wire and paint, plus a rather nice pot made by Playmobil.

While I already had one desk I'd made for the living room, I really wanted this space to accommodate both Max and Juno at the same time and knowing Max's propensity for disorganisation I didn't want to force them to share a desk, so a new table was definitely in order!
I started off with a sheet of very thick card and some fantastic pine effect paper. The blue and clear things are novelty 'pipe' drinking straws that I've found make perfect industrial furniture legs!

Using a combination of glues, I stuck the paper to the card base and carefully folded it over the edges, trying to keep it as neat as possible so it didn't look like a badly wrapped christmas present.


Next I assembled the table legs and glued on some metal snaps to the bottom to help spread the weight out and also to add to the industrial vibe.

I added a a few layers of gesso to prime them.

...then painted them black with acrylics before going in with some eyeshadows to give them some subtle metallic weathering. They were then given a couple of coats of matte varnish to seal everything in.
At this point I realised the new legs looked a little small for the tabletop, so I did a swap with the legs on the older desk which worked surprisingly well.


The new/old legs got a fresh coat of primer and paint treatment, as well as an extra supportive layer of foamboard to add stability.


I was worried about the sides warping a little so I added in some extra supports in the form of bamboo skewers hot glued and painted in place.
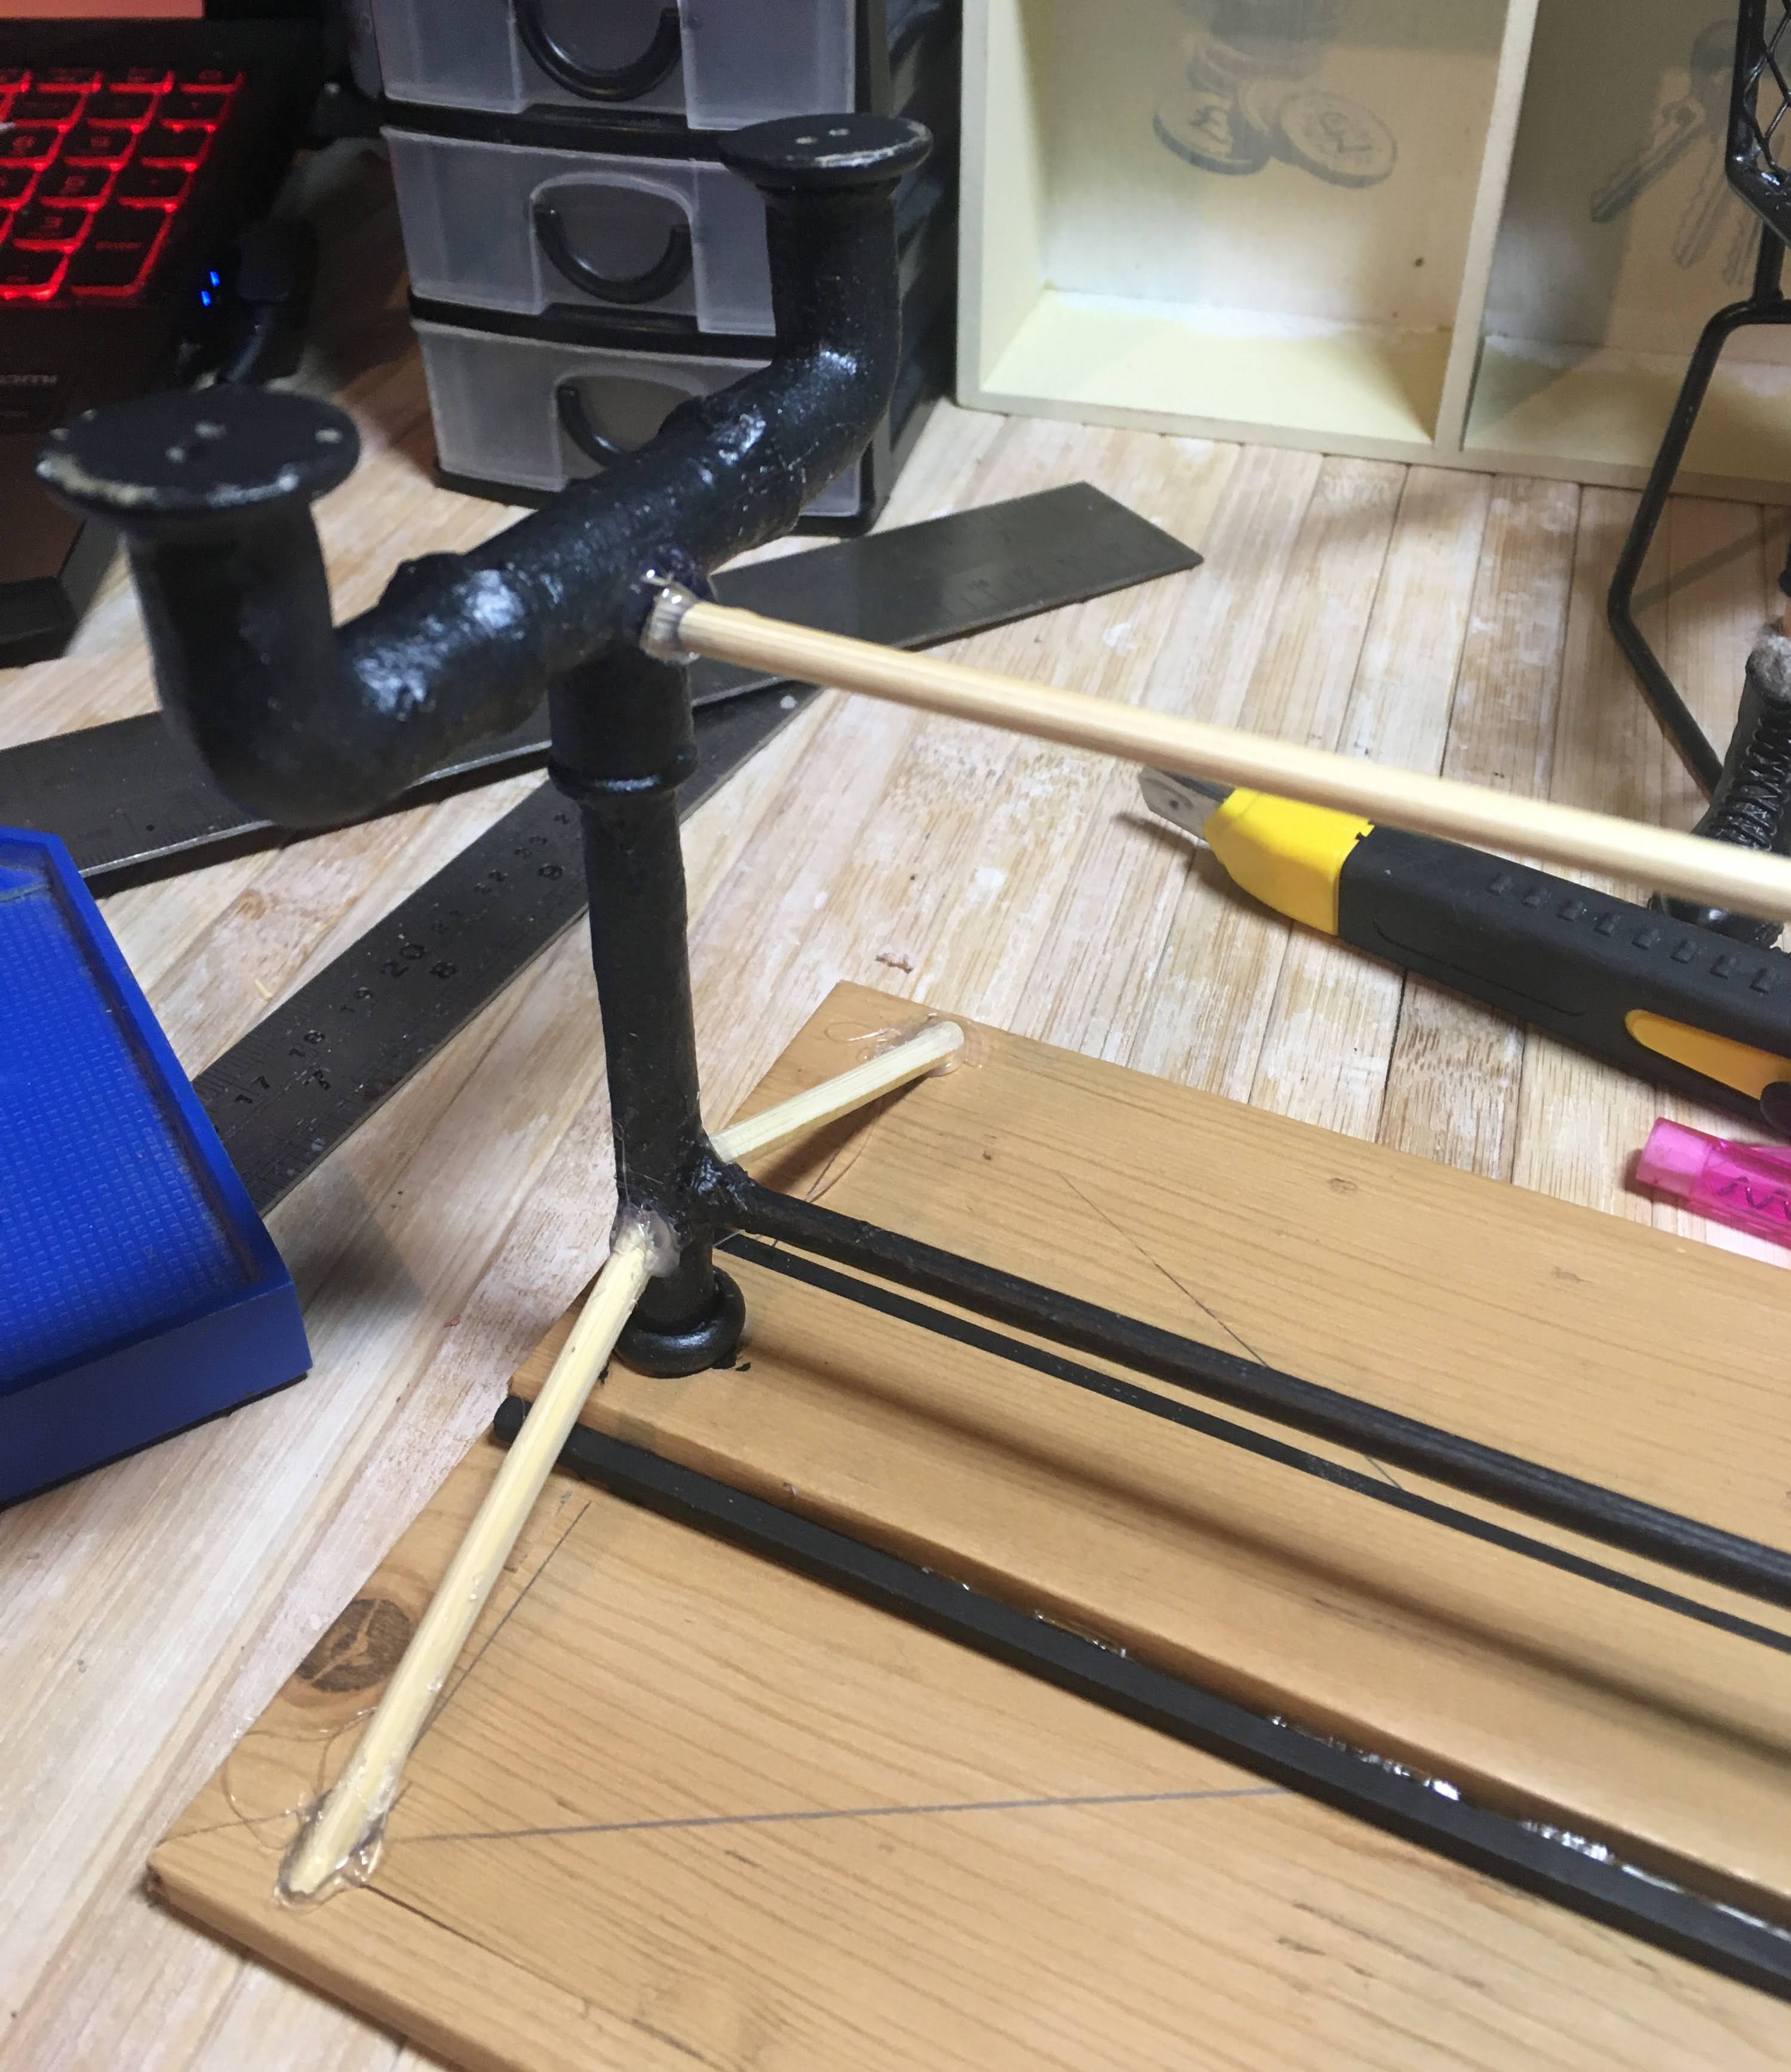


It's not the most attractive looking solution but the lumpy bits are only really visible from underneath so you don't really notice.


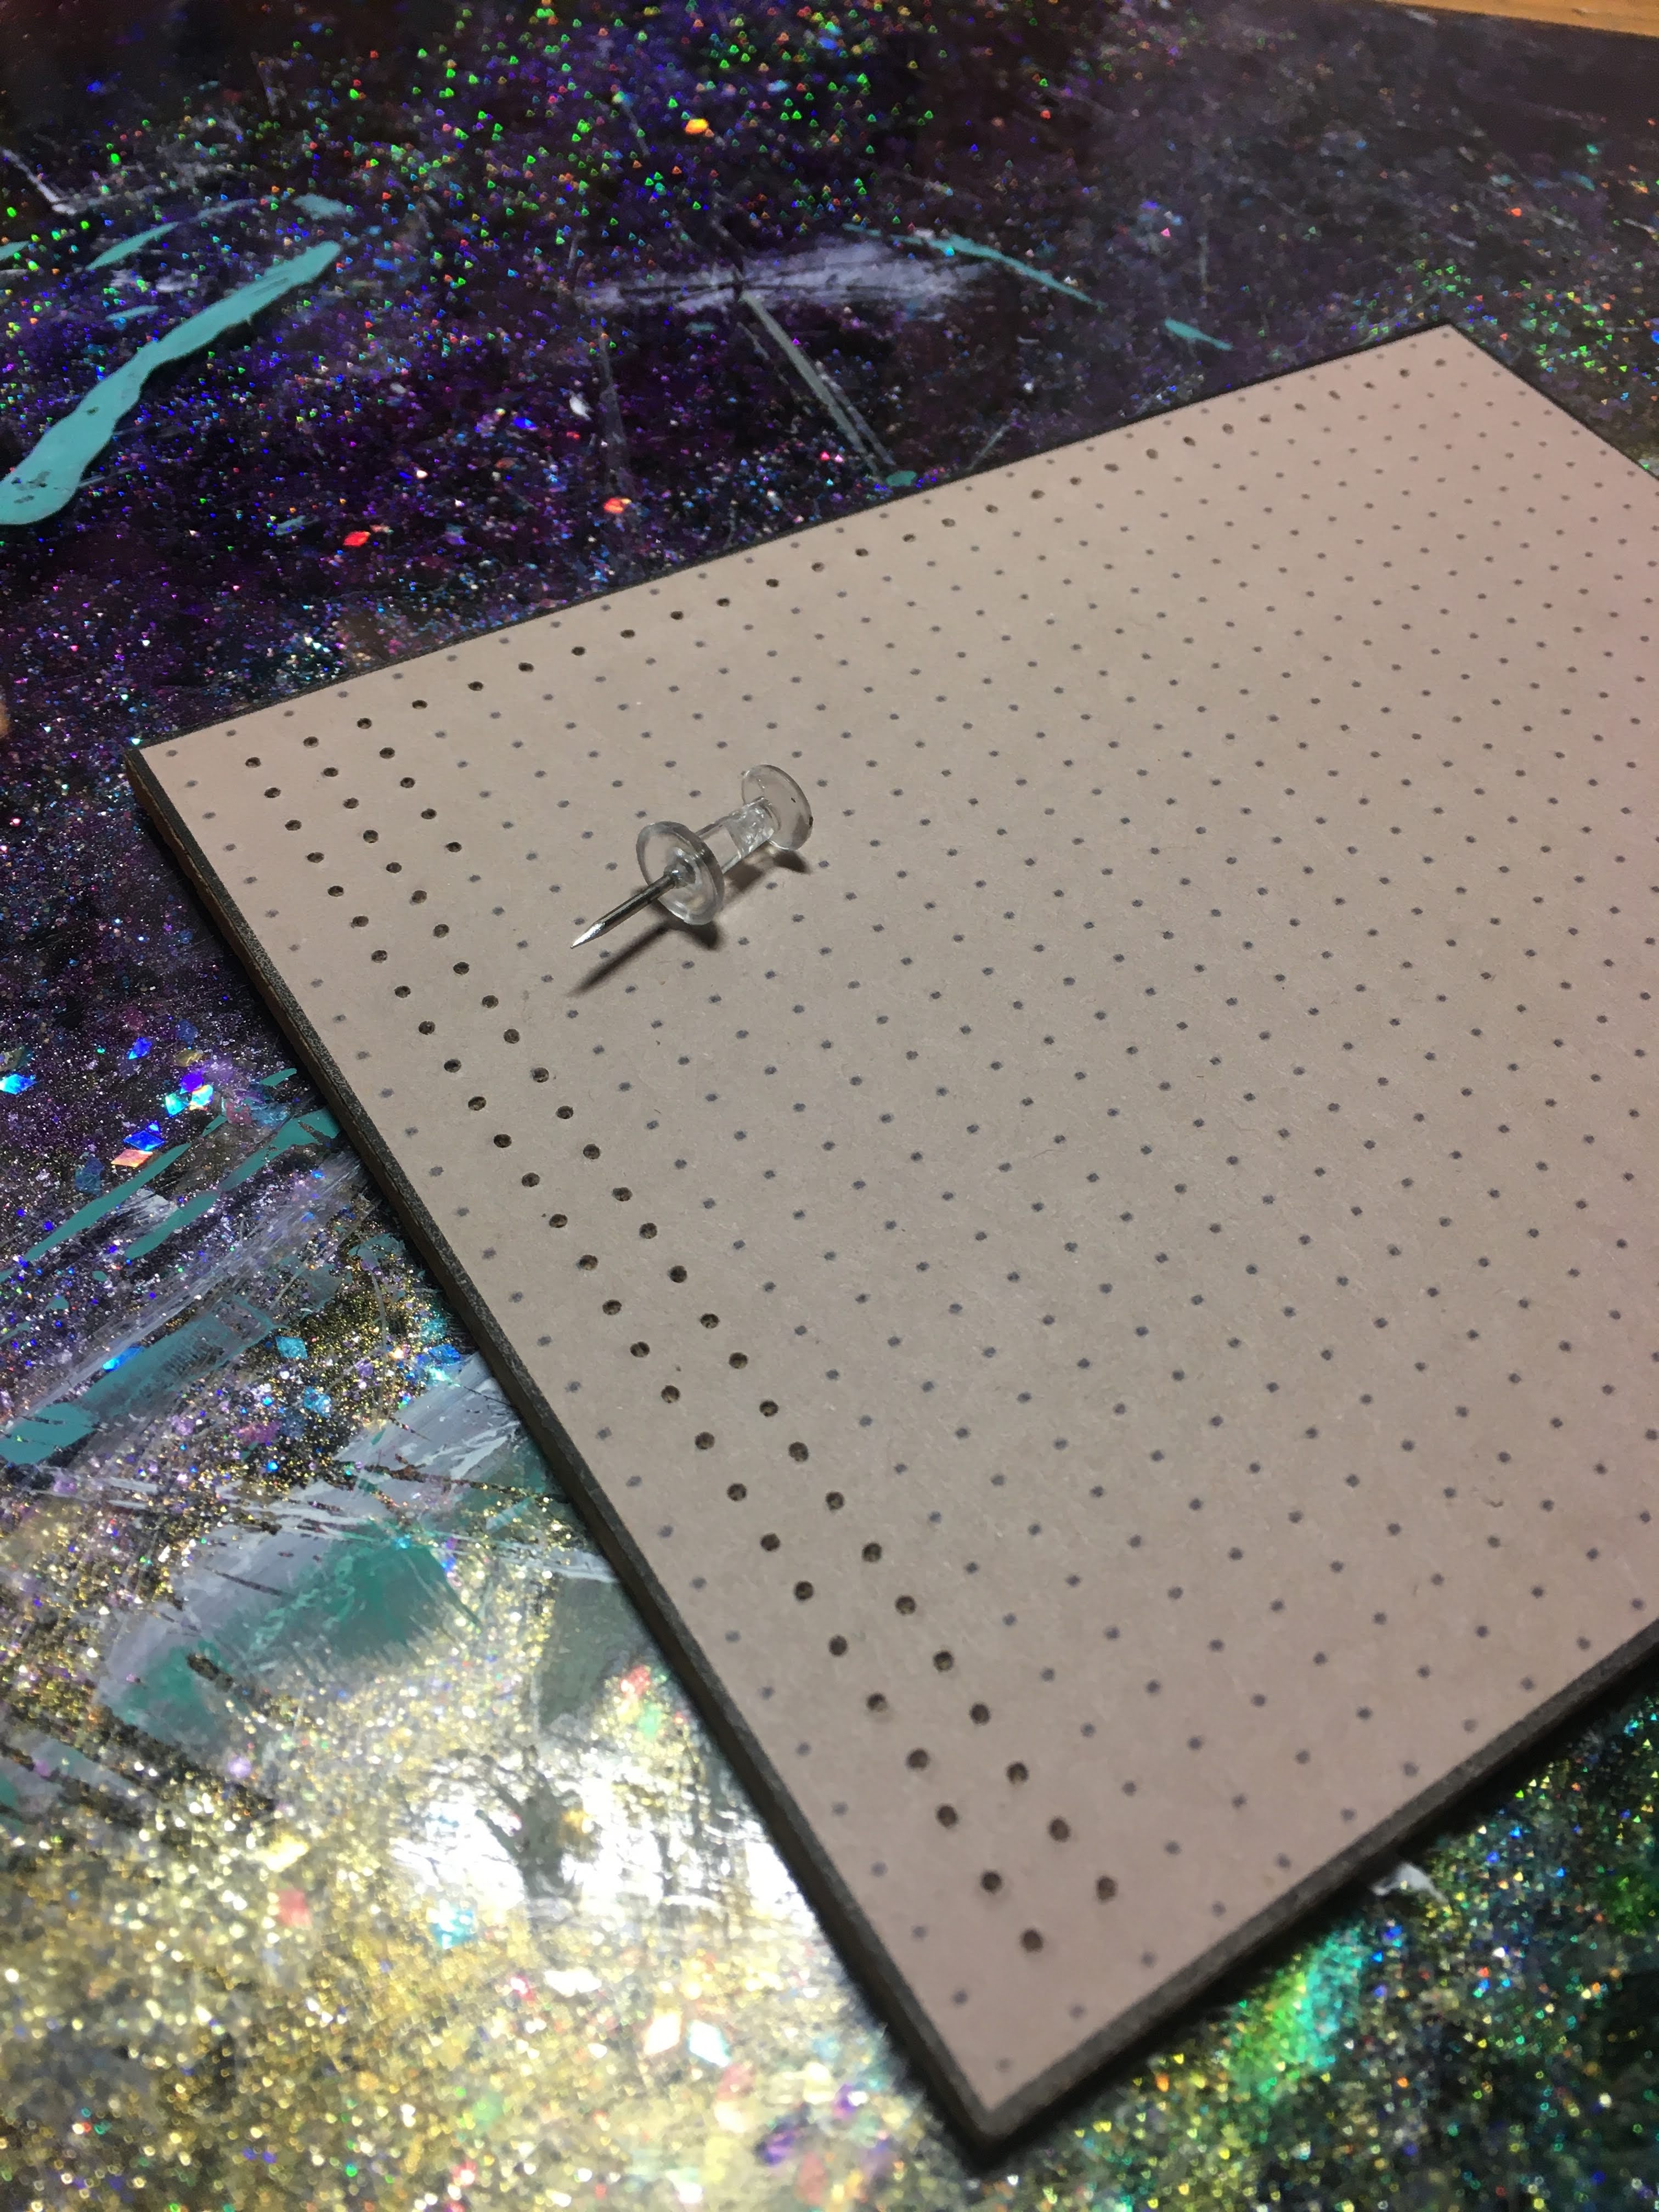
While it's not my kind of thing, from browsing craft room inspiration on Pinterest, I just knew Juno would want a pegboard to hang things from. As I didn't have any perforated surface suitable for one, I cheated, and printed out a box with a dotted grid pattern, glued it onto a cork floor tile and spent half an hour with a push pin, making tiny holes on each dot. The hooks were bent out of paperclips.

The little polaroids are some of my own photos with a vintage filter applied and printed out extra tiny. The red handled scissors are a metal charm I painted with nail polish and the blue ones are made by Playmobil with nail polish additions too

I made the laptop yeeeears ago and tbh I could really do with updating it. It's just two pieces of styrene with Macbook Pro images glued on. I printed out a few with different screenshots of my own desktop for some variety. One new thing I added in this time was Juno's Wacom drawing tablet, copied from my own one in real life. I hate using a mouse, and much prefer using a tablet pen for everything. The mini version is just a piece of black styrene with silver painted details, a little ribbon at the back and some wire from my LED stash for the USB cable. The pen was a piece of cocktail stick that I sanded to shape and added 3D details to. It's one of my very favourite accessories!


To change the screens I printed out more of my desktop screenshots, but instead of having the whole screen, I just cut out the individual windows and attached them with a little tacky wax so I could swap them out as needed. This was ridiculously effective and I'm definitely going to have some fun with this in the future.


Max's laptop came with one of my Fresh Dolls a couple of years back. It's really nicely detailed and although it's perhaps a little small, it makes a good notebook or something. I added red paint into the crevices to emulate the lit up keyboard my own laptop has because I thought it looked cool. XD
While I made most of the accessories, there were some I just HAD to buy!
I've been doing a lot of shopping on Ali Express recently, and if you don't mind waiting to get things, there's some absolute bargains on there. I use these iconic bird sewing scissors a lot in real life, so when I saw one on there in miniature for like 20p, I just needed it! It doesn't open or anything but it's an absolutely perfect copy of the real thing otherwise!


The same seller also had a batch of these little IKEA inspired storage carts for under £4 so of course I just had to get one of them as well! The wheels even turn! They had them in a whole range of colours but you know me and teal, so it was a no brainer. I might paint the wheels black eventually.

They also had these little LED desk lamps in a range of colours. I've got a few of these in black I've picked up over the years, but these ones had a much more interesting shape and actually turned out to have a far superior quality of light as well so I think I'll be buying a few more. Again, I saw the teal one and had to have it, though I was super tempted with the orange and red too.

A while ago I discovered that IKEA sells tiny coin purses that look exactly like their iconic big bags but alas, not here in the UK. A very kind friend sent me a couple from their country and I thought one would be perfect to hold all of Juno's canvases. As it was originally a purse it did have a little zipper, but it was easy enough to unpick the stitches and remove it.
Once lockdown is over, I really want to go to IKEA and take M&J for some sneaky photos with them!
Onto art supplies now!
I made the watercolour palette years ago from .05mm styrene and some smooshed up watercolour pencil leads, so it can technically be used as real paint! The brushes and pencils are cocktail sticks painted with nail polish. The brush tips are a combination of acrylic yarn, fur fabric and old paintbrush bristles glued on. The sketchbooks are paper and card with printed out covers and the spray cans are wooden beads with a coat of paint and printed out labels.
I got a little carried away when it came to making the Copic Markers you can just make out in the background. I've got a modest selection of them myself but not many as they're so expensive. As Max and Juno live in the Dollyverse where two self employed creatives can apparently afford a big snazzy house and a dog, money is clearly no object, so she got a whole range!
They're just cocktail sticks with, you've guessed it, printed out labels. I had to make the printables myself and they're a little iffy but they'll do. The ends of the pens are a bit rough, although I did sand them, but if I were to make them again I'd make sure I sealed them with something so they didn't look so obviously wooden.
I'm a natural hoarder of potentially useful things, so whenever a pen runs out of ink or gets damaged, it goes into a box until I can find a use for it. Amongst the usual biros and gel pens were two of my old graphics tablet pens. The tablets themselves died a death long ago, but the actual pens could still be useful.

A sawblade later...

Lots of useful bottley things!
My new favourite craft material is Apoxie Sculpt, so I had to make some in miniature! They were sections of the old tablet pen that I filled with hot glue and painted to look like clay. The lids can be removed, though I might make new ones at some point because these are super rough.

One of my absolutely favourite things I made for this build are these tiny Citadel paint pots, based on the old hexagonal design I loved. The gel pen was six sided and clear, so it was the absolute perfect material for them!


I cut them out and painted the insides with the appropriate colour. This was harder than expected because since switching over to the new designs, they've also changed paint formula so many of my current colours didn't match the old ones. Once the paint had dried I masked off the bottom half with tape and painted the top part black for the lid. Most of them then had a black sequin glued on to close them off, but a couple I glued open, so they'd look like they were being used.

Now, I could easily have just made a mockup that looked vaguely similar and left it at that, but no, I wanted mine to look as close to the real thing as possible, so I spent an afternoon googling for photos of the old pots which were surprisingly difficult to find! In the end I had to make my own labels from scratch.

The rug on the floor was cut out from a sheet of fancy wallpaper and stuck to some card.


I didn't take any decent close ups but the power sockets are just foamboard covered in white paper, with the plug holes drawn on. The plugs themselves are more foamboard painted and sealed with some Dovecraft '3D Pearl Effect' stuff. I'm not quite sure how to describe it, but it's really useful for adding small 3D details to things.
I also made the battery pack thing on the laptop cable - another piece of foamboard, this time covered in black paper. You can just make it out at the bottom left of the next picture.
Not really a step by step here, just a few photos of Juno's side of the room that I really liked. :)


So, there you have it! Sorry this post is a bit all over the place - I really meant to organise it better and upload stuff as I went along but it didn't quite work out that way, lol Also, Blogger's formatting is awful and I couldn't get everything positioned as I wanted which was rather frustrating.
Our internet has been absolutely abysmal for the last couple of years but I'm hoping we'll be able to upgrade to fibre soon which will hopefully mean that I can finally start making video tutorials and things soon! No promises, but if there's anything you'd like to see, do let me know!
thank you so much! Did not realize this was one 6th scale, but so much will work for 1/9th. It is just really, really wondrful!
ReplyDeleteThis is just so fascinating to look through, all the tiny details. Cos I used to do a lot of mini stuff as well, I look at this in the same frame of mind as looking at a really, really great artist's painted work and it being so far beyond anything I could ever hope to do that, it's just a case of awed appreciation rather than feeling bad that I never got this good, hahah
ReplyDeleteYour micro mini horse collection is highly impressive, too, I enjoyed peering at the shelves to figure out what everything is, the tiny Collectas are especially good-looking for being so cheap!
I really like the fact you made old design Citadel pots - you could've asked me for photos cos I have loads of them - when the remains of paint got too dry to use, I redeployed the pots for under wobbly-model feet (things like Hucks and Salineros on those forever untrustworthy disc bases), so I've got as many old pots as current ones. Well actually, not-even-current-any-more ones, my last batch I tracked down the most recently obsolete ones from when I still knew what type and colours were what, they redesign them SO OFTEN, heh
A room to live in. My jaw dropped several times: a potted plant made of Masking Tape?! A pen barrel for those incredible cute tiny pearlex, I mean Citadel, paint jars! That fabulous wood-and-metal table -- I love all the frame details. The pegboard!! so real-looking I never realized it wasn't. But I was absolutely pleased to discover I'd guessed right about how Max's laptop screen scrolled so well and looked so real. You're onto something.
ReplyDeleteSo many amazing details - such an inspiration!
ReplyDeleteI know this is far from a late question, but do you have any of these printables? I really dig the apoxie sculpt label!🙂
ReplyDelete