
As with so many of my projects, I started this one without a plan.
I've always loved cyborgs/androids and the concept of artificial intelligence and sapient robots is one of my absolute favourite sci-fi concepts. I've got a host of characters I'm intending on making dolls of, one of which has a cybernetic arm, so I've been meaning to practice making one before committing to the final design. I knew I wanted to preserve as much articulation as possible, so moving joints was super important, and if I could surpass the original figure's range of movement, all the better.
I had a rummage in one of my many body boxes and pulled out this gal. I bought her on ebay ages ago for a couple of quid as I was curious about the articulation and the size, which turned out to be smaller than your average Barbie. The plastic is really cheap and lightweight and well, she's also got some rather...obvious...features. 🙈

I found their lack of adherence to the laws of gravity somewhat troubling, but as this was just going to be an experiment, it didn't really matter.
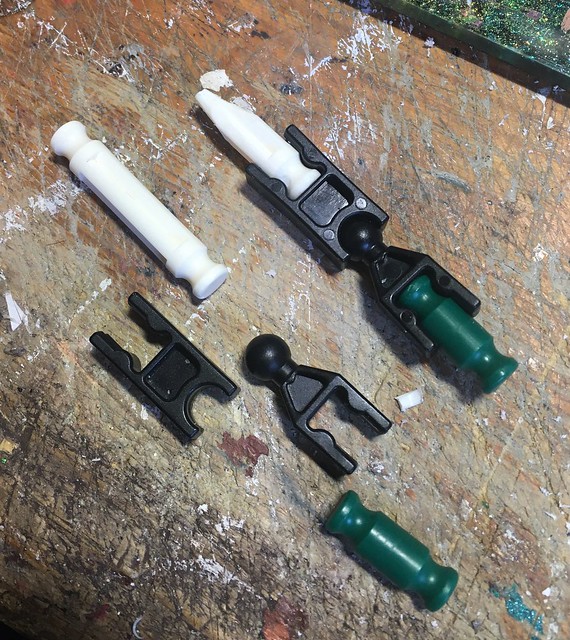
In terms of articulation, I wanted elbow and bicep rotation if possible, as well as the wrist joint from the original arm. To achieve this, I rummaged through the bags of random LEGO Bionicle pieces I was lucky enough to find in a charity shop a while ago. I bought some extra joints on ebay as I knew they'd be perfect for a project like this and I didn't have quite enough beforehand. They're kind of simplified ball joints which have a really nice range of movement.
I got the hacksaw out and pop, off came her arm just below the shoulder joint. Some careful drilling and carving with the dremel, and I could easily slot one of the green rods into the upper arm. I decided it would be easiest to keep the lower arm area intact and sink another of the rods into the forearm so I could keep the wrist joint in place.


It was still pretty bulky, so I very carefully sanded the sides with the dremel to make things a little slimmer and more streamlined. In hindsight I shouldn't have done it quite so thoroughly as it left the sides very thin and fragile. I also carved the hand down with the scalpel to look a bit less fleshy so when I painted it it'd look more like actual weathered metal.


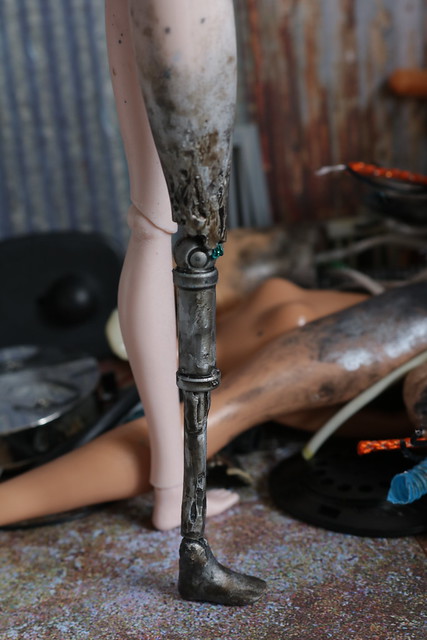
At this point things were going so well I thought, what the hell, let's give her a robot leg too, so I pulled the lower leg off at the joint and started making a replacement.
This one came courtesy of a vintage Action Man wrist peg, (thanks Manda!) some styrene tubes and a bit of wooden skewer for stability.

I thought perhaps she'd been in an explosion or something, so she'd have lots of twisted flesh and deep scarring. The more I added however, the more I liked it.


Soon I stopped thinking about her as a cyborg, and instead as an android; a machine in human form. These weren't replacement limbs or prosthetics, this was just what she looked like on the inside. This appealed to me far more, and opened up many more options for customisation.
I did a quick paint test with some silver spray paint and citadel washes which I really liked...


...but...there was just something about the whole look that just didn't work.


The limbs looked great...


...and I liked the weathered metal finish but there was just...
...something I wasn't happy with.

Hmmm...
Dremel time!


MUCH better! 😆
As bad as I felt giving her such extreme surgery, I couldn't help but find it incredibly satisfying, and it really makes me want to do a zombie custom at some point!
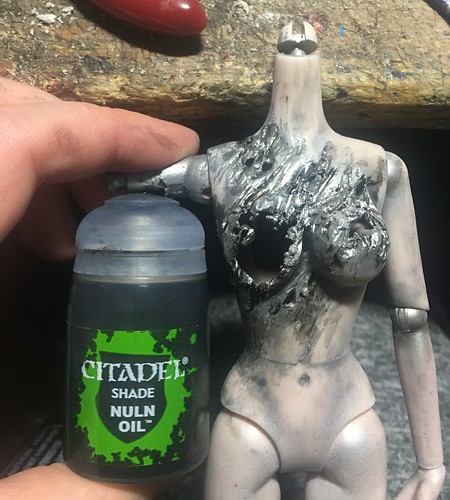
Now thoroughly deflated, her chest looked a little more realistic to me, and I decided to make it a feature by opening up her back as well so I could install an LED for a power core/heart. In hindsight I really should have mangled the back a lot more so it looked like damage rather than a panel being removed or something, but never mind. I also regret making so much of it metallic, especially on the breasts as I think it would have looked way better if it was implied that they were imitation flesh or something, so there'd have been a nice contrast between the metal below and the 'skin' on top. Oh well, maybe this was an older model with less realistic 'jiggle physics'. XD

Round two with the silver spray paint, which I roughly sanded off in places to make it look more realistically weathered. Once dry I went over it all with a few layers of Citadel washes in Nuln Oil and Agrax Earthshade.
This particular body didn't come with a head, which didn't bother me as I have a box full of liberated Barbie and action figure sculpts to use, however, I wasn't expecting the body to be quite so petite, which meant that virtually all the heads I had were too big for it. I considered shrinking a Barbie head, but I've never had much luck in that department as I don't think my acetone is the best quality. Besides, that would take time to do, and I wanted to make this NOW! 😆
Afterwards I gave everything a few coats of matte varnish and left it to dry while I moved on to the next part - the head.
I'd been lucky enough to win a cheap ebay auction the other day for two very well played with Barbie MTMs. I only wanted the bodies, which was just as well because the child that had owned them before me had clearly been having a little too much fun with the sharpies! The head was pretty much useless for repaints as sharpie ink soaks right into the vinyl and is all but impossible to remove, so it was perfect for this project.
After removing the factory paint with acetone, I carved out the eye holes and

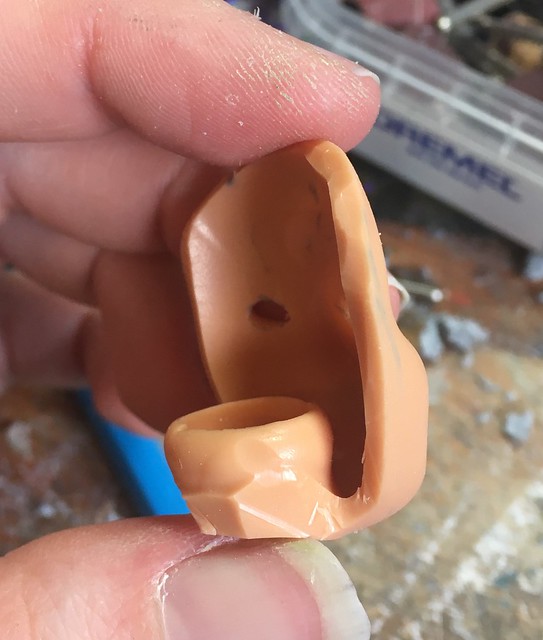
I got the scalpel out and worked on giving her some more extreme damage to the face as well. I toyed with the idea of having the face be pristine in contrast to the mangled state of the rest of the body, but I couldn't resist going all out.

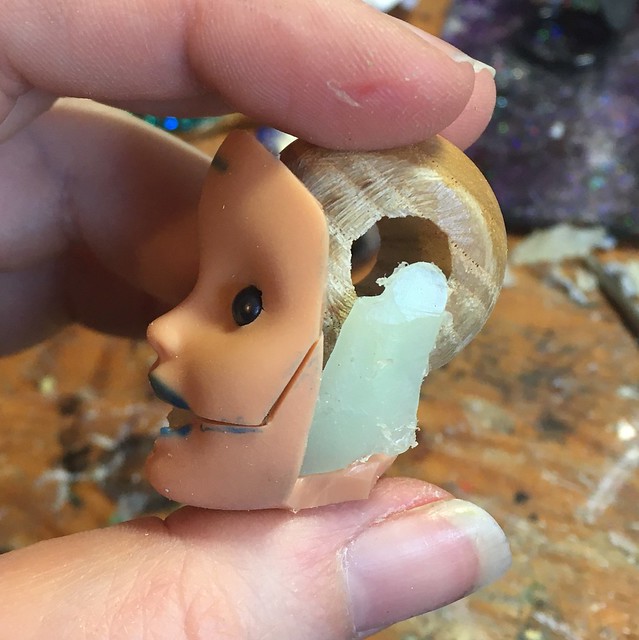
< Ages ago I'd bought a roughly 1/6th scale glow in the dark plastic skeleton to use it with my fantasy figs but it was too tall and frankly, not very accurate, so it had lived in my parts box ever since. I decided that having a metallic jaw showing through the damaged 'flesh' might look cool, so I set to chopping. (that's one of the LEDs I'll talk about later on btw, the blue blob next to the head)

The jaw was really oversized so there was a lot of work involved but eventually I managed to carve it down to something that looked vaguely accurate. In hindsight I could have probably managed to sculpt one myself but I liked the idea of using pre-existing parts.

For the main part of the skull I chose a large wooden bead, which I attacked with the scalpel and dremel to add another hole through the middle. I wanted to go down the BJD route and use elastic to hold the head on, so I needed a place to feed the elastic in and knot it.


I added more damage to the mouth and glued the different parts of the skull together then painted it.


In an ideal world I'd have liked to make the eyes glow, but I wasn't able to work out a good way of installing the LED - maybe next time! The eyes aren't the best either, but uhhh...weathering...or something. 😅

I removed the original neck peg of the body, and fed the elastic down through the neck, looping it around an internal support and tying it in a knot to secure it. It now has much better head movement than it would have ever had before. I'd knotted the bit inside the head before I did many of the modifications.

I knew I wanted to add some lighting in the chest cavity, and had just the tiny LEDs for the job! I bought a load of them on eBay a while ago, (sold as LEDs for balloons) and they're ideal for this kind of project. The ones I got are in tiny little plastic balls and the on/off switch is just a thin piece of plastic that you slide in-between the batteries to break the circuit. This means no wires or complicated faffing about which is exactly how I like to do things!


I found some nice metallic cord that I thought would make really nice wiring, so that got glued in place too, as well as more of the blue beads.


Once painted up and surrounded by more wiring, it's almost invisible which was an unexpected bonus.

I also added some of the cording around the sides of the skull for extra detail.


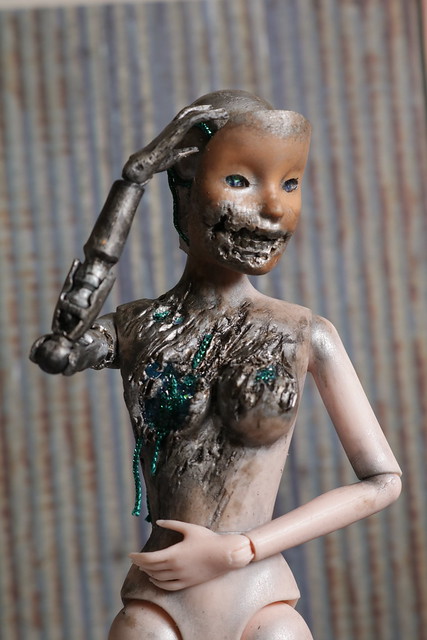
All in all I'm really pleased how she turned out, especially considering I went in with pretty much no plan other than an articulated arm! You will definitely be seeing more sci-fi stuff from me hopefully soon as I've got a few heads on order for characters that I really want to work on.
Wow! It's amazing doll :O. Congratulations on your patience! Respect!
ReplyDeleteRegards Katarzyna from Pegaz Stable :)
I also invite you here: https://stajnia-pegaz-studio.blogspot.com/
Madame TERMINATOR!
ReplyDelete