
So, just what is this thing, I hear you ask?
Well...
As it was our final project of the whole course, it was left entirely up to ourselves to choose. This was a fantastic opportunity as it allowed us all to play to our strengths and pick something that we not only wanted to make, but enjoyed working on. I toyed with the idea of doing a sculpture, but thought better of it as it'd only be one object and I knew I'd get bored and frustrated with the same old thing every day for a couple of months - especially as my first idea (Pilot from Farscape) was so complicated I'd probably never want to go near a lump of clay ever again and my second (a Grindylow from Harry Potter) would require an accompanying tank.
My next idea was to build a miniature set - first thought was to do a stable scene but again, I thought better of it as it was the kind of thing I do all the time at home so I wouldn't exactly be pushing myself. I was still thinking 'miniature' though...
Another and more serious idea was a steampunk interpretation of a 'Cabinet of Curiosities'
Cabinets of Curiosities, also known as ‘Wunderkammer,’ or ‘wonder rooms’ reached their zenith during the sixteenth and seventeenth century as European explorers travelled the globe and brought back strange and interesting artefacts and treasures from far flung shores.
In many cases these ‘cabinets’ were not items of furniture at all, but whole chambers full of exotic creatures, fossils and objet d’art.
Most of the time the items contained within had little, if anything to do with each other in terms of likeness, but they all shared the common theme of being interesting and unique to the collector and illustrated his status as a rich and learned man through his love of collecting.
Actual cabinets rather than dedicated rooms became commoner as the years went by and it was this kind of thing that I was interested in creating.
I would design and produce a wooden box or cabinet, and furnish it in a more 19th century aesthetic, perhaps with some Steampunk and fantasy elements to it as well, like having preserved specimens of mythological creatures such as Dragons and so on. This was incredibly tempting but in the end I decided against it, though I'd still like to make something of this nature in my spare time at some point.
This provided me with the opportunity to create a huge variety of models and scaled down furniture and fittings either by customising and adapting existing items or building them entirely from scratch.
While I labelled the theme as ‘Steampunk’, I wished to distance myself and my work very firmly away from the ‘cogs and goggles’ look which, to me, is almost the opposite of what the genre - which came about as a re-imagining of the Victorian era - suggests. My overall wish for this project was to create something that looked feasible in terms of realism - everything must look as though it would function in real life and if it was a creature, then I intended for it to look as though it had evolved naturally rather than being a purely fantastical invention. (So no pink and sparkly unicorns etc :P)
As I've been a miniaturist for most of my life, it seemed like the perfect fit and I was champing at the bit to get started. The 'research' stage took forever, or so it seemed to me anyway - I was already making things to go inside the roombox at home even before we were technically supposed to start it!
With the help of some online room planners, I made some mockups of what I intended to make.


They weren't perfect but gave me a good indication of the sort of layout I wanted.
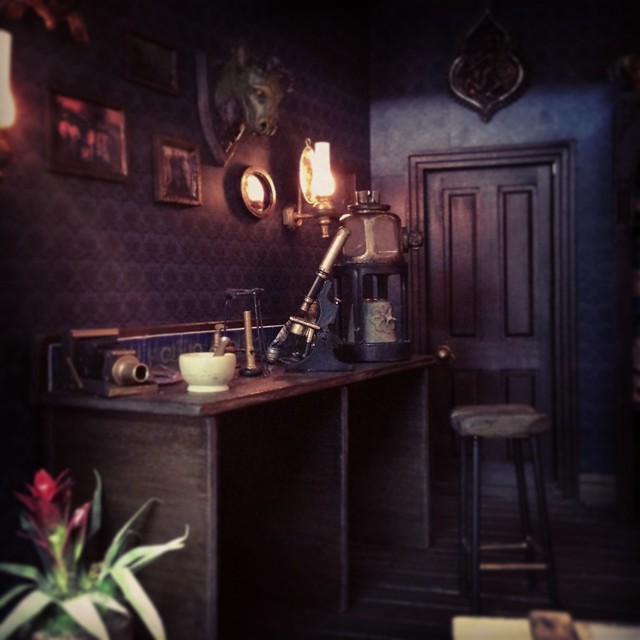
I decided the room would consist of three main ‘zones’ which would represent the different areas the occupant of the room would be interested in.
The Naturalist’s Desk - The focal point of the room; this was a place of study, science and experimentation.
The Collector’s Shelves - This is where objects and interesting items would be displayed along with books and equipment for the workshop aspect. This would probably bleed over onto the walls and floorspace of the whole room as in the Victorian era more was very much preferred to less.
The Gentleman’s Study - Located next to a small fireplace, this would be an area dedicated purely to comfort and the most traditional looking part of the room, with a comfortable chair and a selection of books close at hand with an Aspidistra nearby to keep it fashionable. I imagine the collector behind the room would be a gentleman in his mid to late fifties, possibly older, with a very ‘Darwinian’ beard (or at the very least, a substantial moustache) and a penchant for tweed.
I measured out some MDF and cut out the pieces on the bandsaw. I decided to make the side walls flare outwards as it would allow much more light in, as well as giving me more space to display things. As I'd decided against a corner desk, the discrepancy in angle wouldn't be too noticeable once put together.

The little man is an absolutely terrible quality doll's house figure I bought to act as a rough scale guide when making furniture and the like. He was £4 (£3.50 too much I think!) and I fully intended to dress him up properly at the end but he's still looking awful. Sorry about that, old chap!
I was going to make a door myself and just use a pre-made one as a template but in the end I just used it as it saved me a lot of time. (the lines are horribly wonky here I know, but they'd be hidden by the edge of the door so it didn't matter. :P)

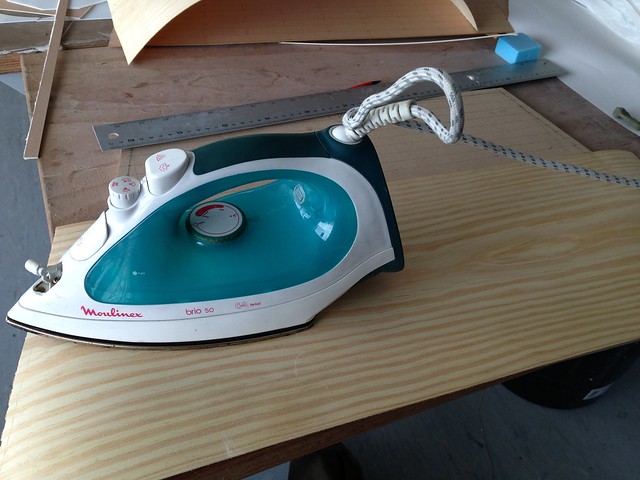
I thought about laser-cutting out individual floorboards and lay them properly but Simon suggested that I used some wood veneer and then laser-etch the lines on top so it would look like I'd put in more work than I actually had. I liked this idea...up until I realised that there weren't any large enough pieces of the really good fine grained veneer so I had to use the stuff with the larger grain which was a bit disappointing.
Still, it was hilarious to apply it to the MDF...with an iron. Not the kind of equipment you expect to find in a modelmaking workshop, is it?
I had to do a test cut with a piece of paper so I could position the MDF in just the right place on the bed but I was still off by a couple of mm. Luckily the veneer was thin enough that I could score the missing sections in with a scalpel. It was definitely preferable to watch the machine cut everything else out than doing it myself!

I applied several coats of wood stain afterwards but the thick grain was still incredibly obvious. I remember feeling really put out by this, as if I'd designed the room to be a bit shallower, the better veneer would have fitted. Oh well, I'd know for next time anyway.

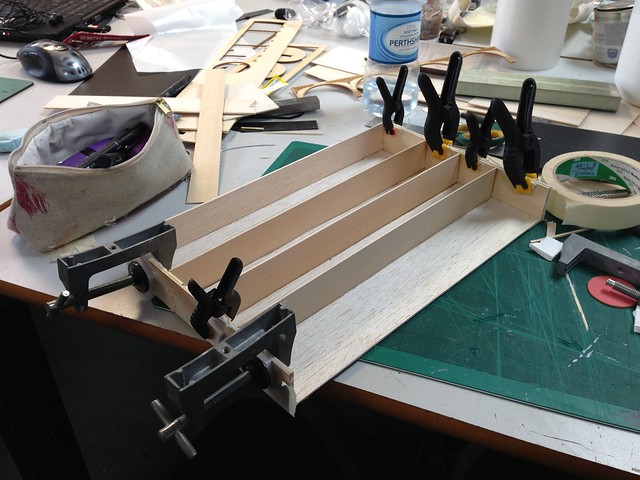
While I waited for yet another layer to dry, I started work on the first and arguably most important item of furniture - the shelves. As they'd be positioned right in the middle at the back of the room, they'd be the first thing to catch the eye of the viewer so they had to be good.
I hadn't done much CAD work before as I find the program incredibly stressful to use but I was able to tame it for much of this project. I'd ordered up some nice thin wood strips from 4D Modelshop and despite my lack of furniture-making experience, I don't think this one turned out half bad, though I think that has a lot to do with how incredibly well the 'carving' on the top parts turned out.
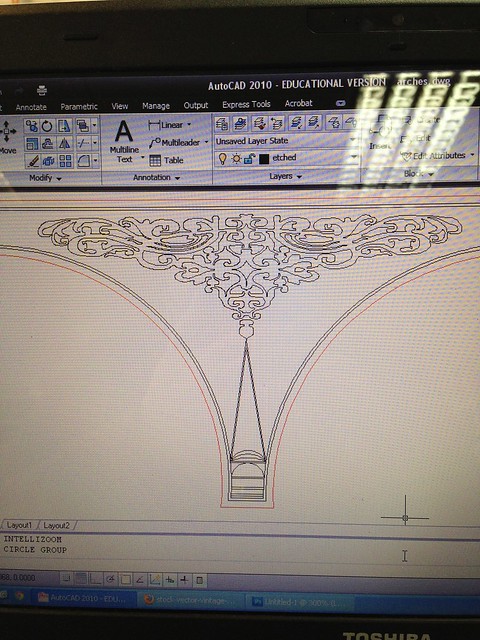
It allowed me to add details that I'd have never managed to achieve myself by hand and if someone could buy me a laser-cutter for my birthday this year I'd love them forever. :P


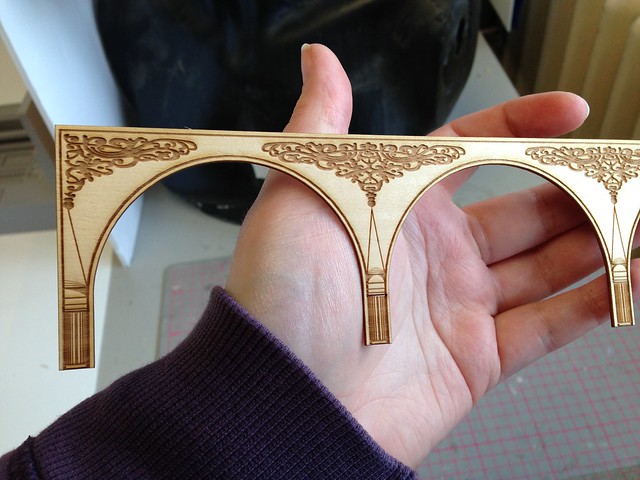
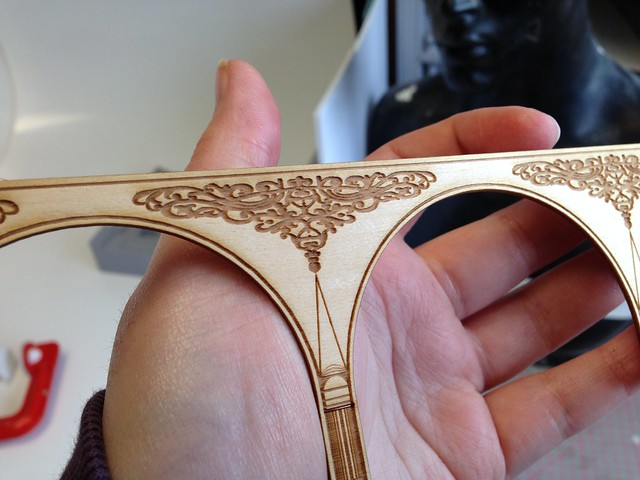
The wood wasn't wide enough for me to cut the entire face out of, so I had to make do with a top piece and separate columns. I could have left it with just the top part but it just didn't look quite right.

I made a smaller 'flat pack' style shelf using a similar method, but one I'd perfected since the previous attempt - laser-etching 'slots' for the shelves to sit into on the uprights. I had to do it twice as I'd accidentally set the laser's power too highly and it simply burnt right through the wood.

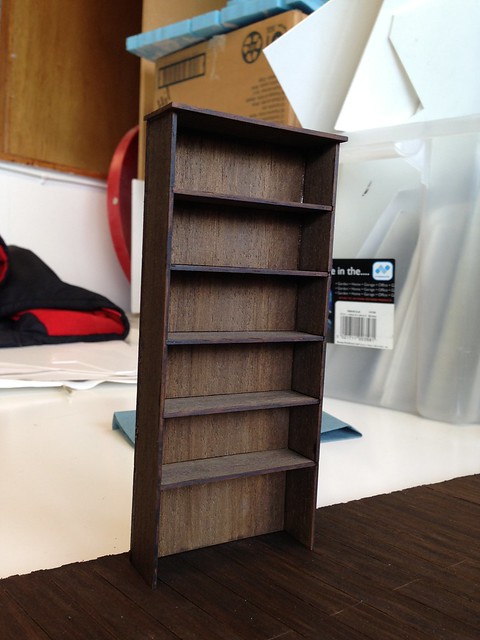
A couple of coats of stain later and both shelves looked great, as did the floor, which wasn't nearly as obviously a piece of veneer once it had things on top of it. I did make the beginners mistake of gluing everything together before staining the back shelves, so there were some areas which the stain didn't work on, though luckily they ended up being obscured by stuff when everything was finished.

But wait, what's that table? The chair? The...fireplace?
You'll have to come back for Part 2 to find out... :P
Loved watching how you used the laser cutter for some of the components. They're fab aren't they? and I love the detail on the shelf *high five*
ReplyDeleteDefinitely! I wish I'd used it more when I had the chance!
DeleteThis is such a cool project - I can't wait to see more pictures!!!
ReplyDeleteWatch this space! :P
DeleteI want to see more! I love miniatures, dioramas, roomboxes and everything in between and this looks really interesting! :)
ReplyDeletePart two will be up tonight all going well! :D
Delete♥♥♥♥!!!!! What a wonderful project! Can't wait to see more. And seeing that laser-cutting-machine in action, I am feeling most fascinated and a little envious. I certainly understand why you'd want one.
ReplyDeleteGot a spare £1,125? XD That'd get you an A4 sized one!
DeleteWow! I love your work! Well done x
ReplyDelete