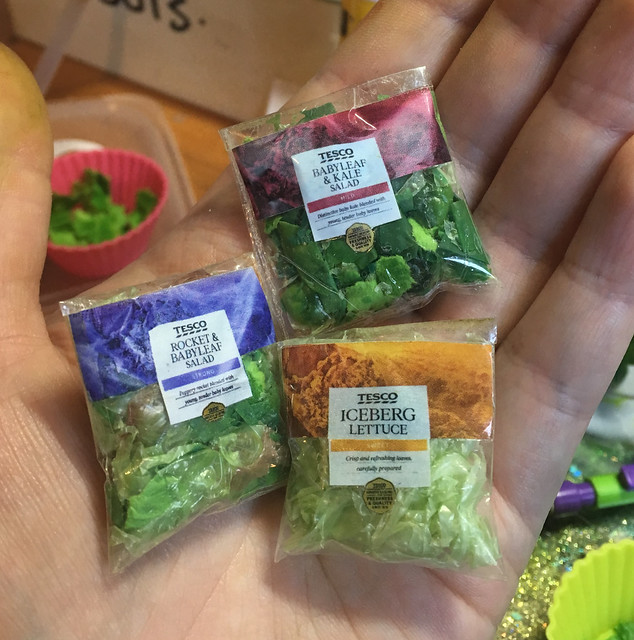
I've been in the mood for making food recently, and after posting photos of these on Instagram and Facebook, got lots of requests for a tutorial, so here it is!
Showing posts with label miniature. Show all posts
Tuesday, 30 July 2019
Monday, 22 May 2017
Warehouse Window Tutorial!
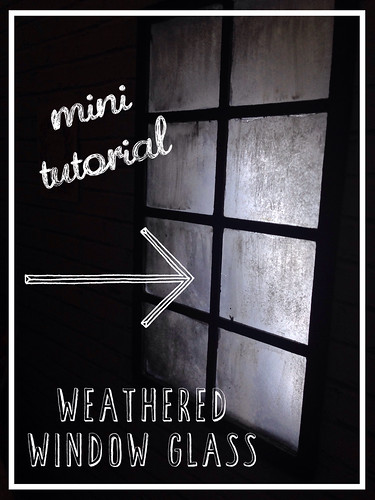
Here's a quick tutorial for you before we get back to holiday pictures! XD
I've been meaning to add an industrial style window to Max and Juno's living room for ages, as I think I've finally settled on their home being a fairly dilapidated old factory/warehouse that's been turned into apartments, and while I could find plenty of tutorials for making windows, or full scale privacy screens I drew a blank at doing the opaque and weathered glass you see so often in those kinds of buildings, so I had to come up with my own methods.
I wanted it to be opaque to disguise the fact that I don't have a background behind the windows and to give it a bit of age and a distressed feel.
Thursday, 26 March 2015
Professor Lynkhart's Cabinet of Curiosities - Final Part!
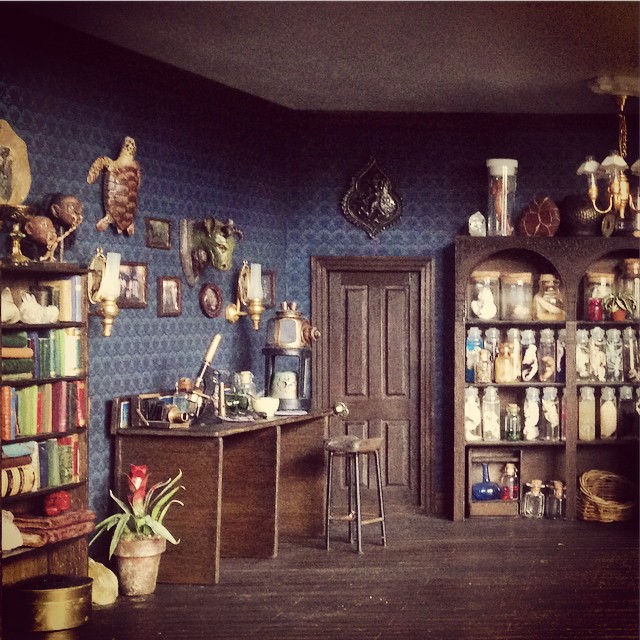
Well, the time has come, you've seen all the work that went into it, so I'm now proud to reveal the final model in all its glory!
Wednesday, 25 March 2015
Professor Lynkhart's Cabinet of Curiosities! (part 2)
Part two! :D
The little occasional table in the last picture of Part 1 looked deceptively simple from a distance, but that couldn't have been farther from the truth!
I've always loved Moroccan styled furniture, especially the intricately patterned fretwork in tables and screens, and as there was a laser-cutter handy I really couldn't pass up the opportunity to make my own...
The little occasional table in the last picture of Part 1 looked deceptively simple from a distance, but that couldn't have been farther from the truth!
I've always loved Moroccan styled furniture, especially the intricately patterned fretwork in tables and screens, and as there was a laser-cutter handy I really couldn't pass up the opportunity to make my own...
Monday, 24 December 2012
Christmas Nibbles! (in 1/12th scale)
I felt like making some more polymer clay food the other day. It's odd, I find it incredibly relaxing!
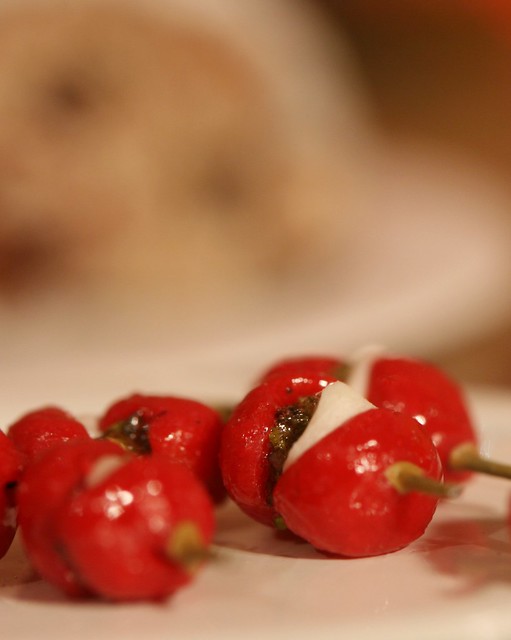
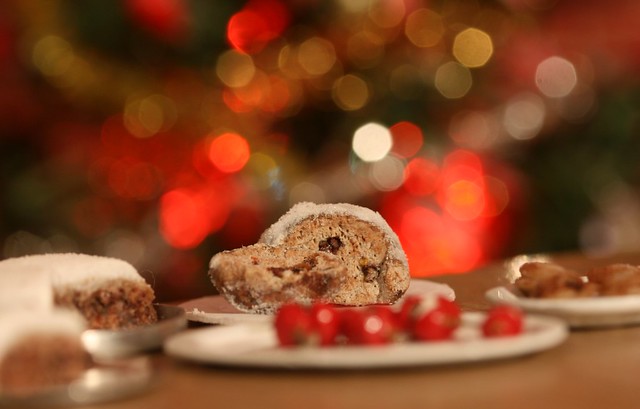
Every Christmas we make up a selection of 'nibbles' to have as a kind of starter before we get the turkey and trimmings sorted out. They're usually small and light snacky things and my favourite is always these - cherry tomatoes with pesto and mozzerella on cocktail sticks. Here's the ones I made up a couple of years ago...
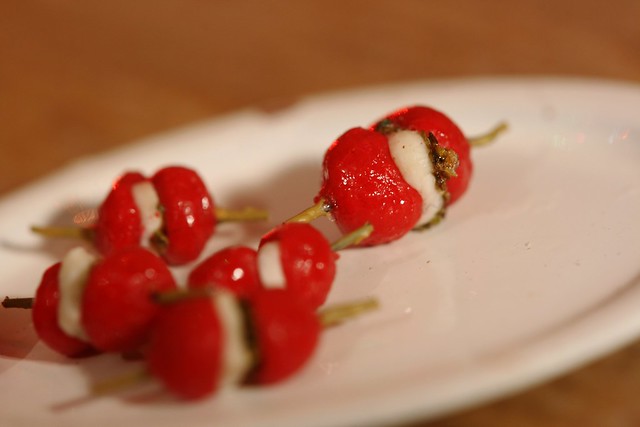
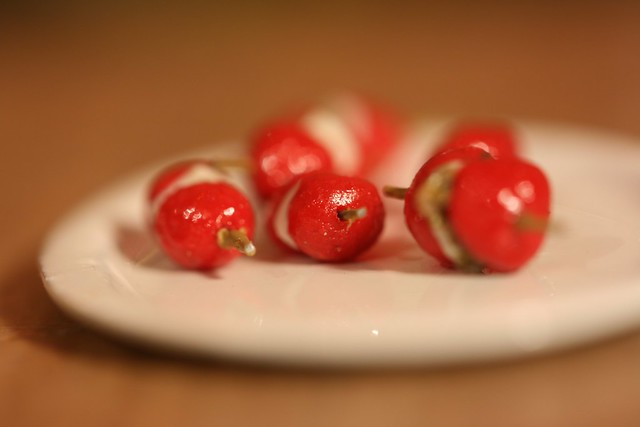
...and the fimo version from the other day...
The mince pies worked out really well though and I probably would eat one if they weren't so small...


Now, onto things that I really want to make in real life!

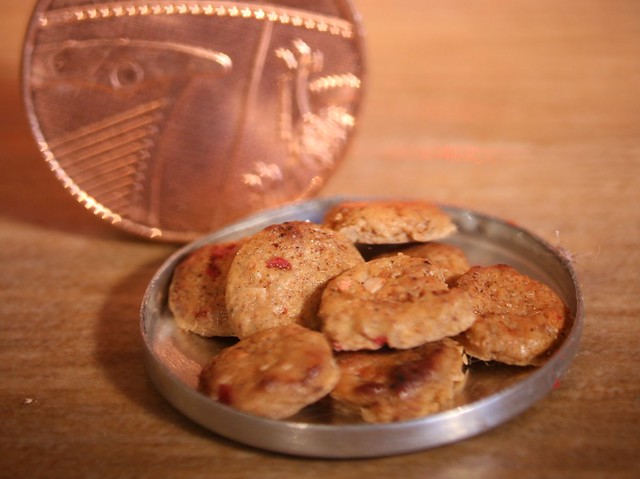
White chocolate and cranberry cookies! I've got a recipe for these somewhere so I might see if I could attempt to make them sometime in the new year because they're just so damn tasty!

Same process as the Stollen with all the ready-made fruit/chocolate chips mixed in and I sprinkled some pastel dust over them before baking to simulate cinnamon.
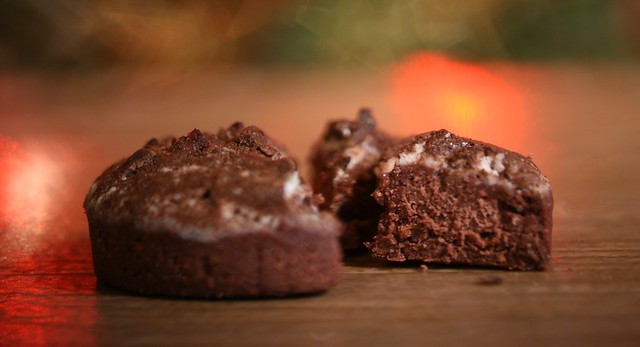
Seeing as I didn't really like the christmas cake, I thought I'd go for something that I was sure to like instead - CHOCOLATE!


You can never go wrong with chocolate cake, let's be honest. ;)
So yeah, that's what I've been doing, well, I was going to say 'this week' but I actually made all that on the same day so it doesn't really count, lol. I have a rather exciting project starting at college that I can't wait to get started on but you'll have to wait a little longer to find out what as I need to do rather a lot of planning before I can actually do any making which is a pain but hey-ho.
Anyway, if I don't get the chance on the day I wish you all a very merry christmas/cake-nomming day and all the best for 2013! :D
EG out!

Every Christmas we make up a selection of 'nibbles' to have as a kind of starter before we get the turkey and trimmings sorted out. They're usually small and light snacky things and my favourite is always these - cherry tomatoes with pesto and mozzerella on cocktail sticks. Here's the ones I made up a couple of years ago...
| NOM! |
...and the fimo version from the other day...
The pesto is simply some green 'scenic scatter' for dioramas mixed with some clear nail varnish and a little drop of Games Workshop paint wash to give it a little more colour. The cocktail sticks are actually very very fine wire, painted afterwards. Annoyingly they make them look more like little stuffed chillies but oh well!
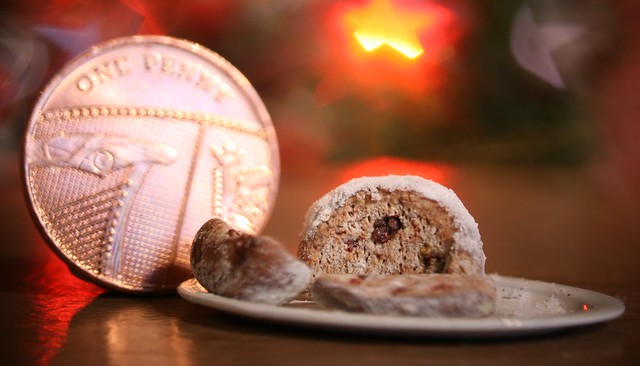
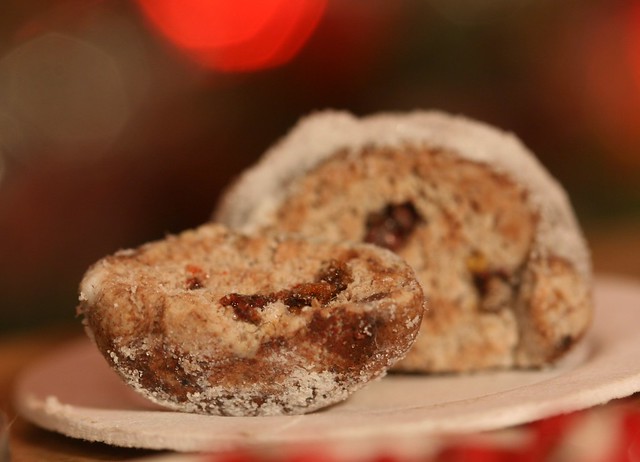
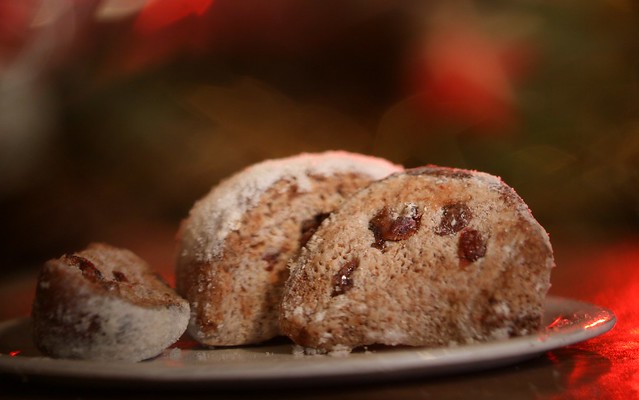
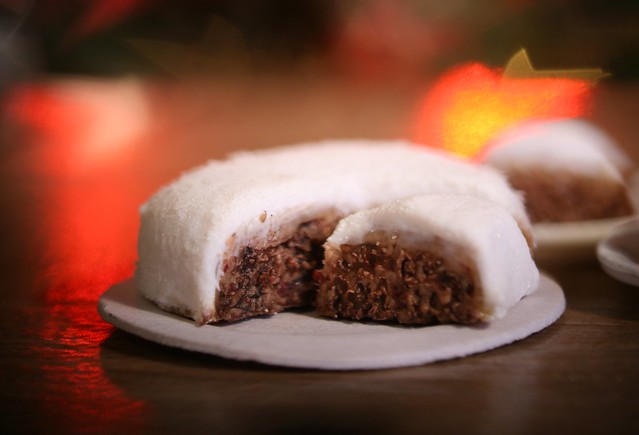
One thing that my parents love to get every year is Stollen. I'm not a big fan because I don't really like dried fruit (which explains why I don't like fruit cake, christmas cake, christmas pudding or indeed, mince pies!) but I love the smell and the look of the thing so I couldn't resist trying to make one for my little people who don't have such picky appetites!


It's all fimo - the 'fruit' was baked prior to the actual loaf being made and then glossed with clear varnish to give it that lovely moist look. I mixed lots of other bits into the 'dough' of the loaf but they didn't really show up afterwards which was a bit disappointing so I ended up just shoving these ones in afterwards, texturing the surface, colouring it all with pastels and some thinned down paint and then baking. The sugar effect was created with a combination of oil, baking powder and pastel dust. I have no idea if it'll stand the test of time but it looks brilliant in photos so I'm happy. :P
As I mentioned before, two of the other things I don't actually like are christmas cake and mince pies...

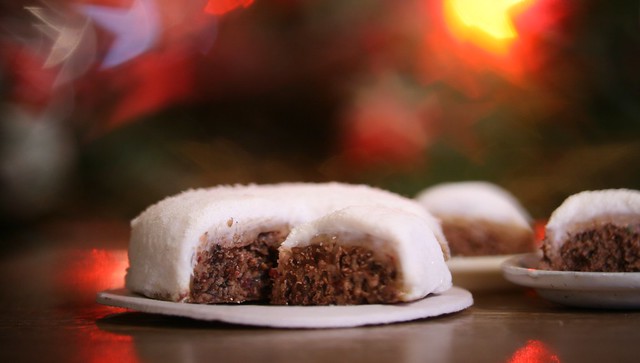
These photos are terrible but in reality that icing looks AMAZING! The cake texture itself is awful though; I wish I'd spent more time on it before I baked it. :/


These photos are terrible but in reality that icing looks AMAZING! The cake texture itself is awful though; I wish I'd spent more time on it before I baked it. :/

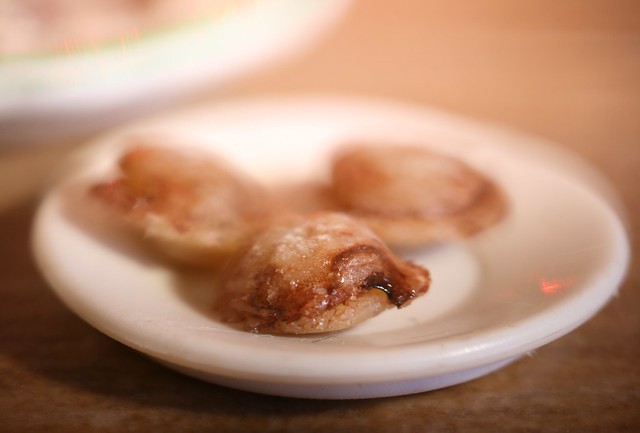
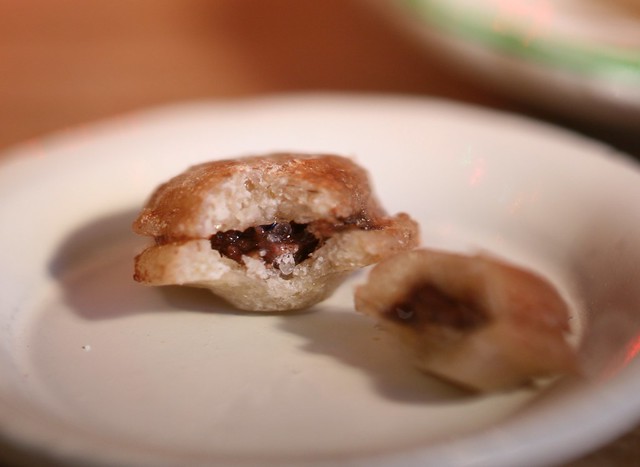
The mince pies worked out really well though and I probably would eat one if they weren't so small...


Now, onto things that I really want to make in real life!

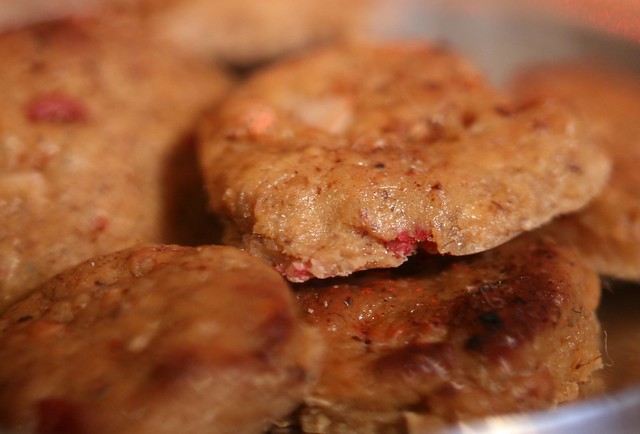
White chocolate and cranberry cookies! I've got a recipe for these somewhere so I might see if I could attempt to make them sometime in the new year because they're just so damn tasty!

Same process as the Stollen with all the ready-made fruit/chocolate chips mixed in and I sprinkled some pastel dust over them before baking to simulate cinnamon.
Seeing as I didn't really like the christmas cake, I thought I'd go for something that I was sure to like instead - CHOCOLATE!


You can never go wrong with chocolate cake, let's be honest. ;)
So yeah, that's what I've been doing, well, I was going to say 'this week' but I actually made all that on the same day so it doesn't really count, lol. I have a rather exciting project starting at college that I can't wait to get started on but you'll have to wait a little longer to find out what as I need to do rather a lot of planning before I can actually do any making which is a pain but hey-ho.
Anyway, if I don't get the chance on the day I wish you all a very merry christmas/cake-nomming day and all the best for 2013! :D
EG out!

Thursday, 4 October 2012
Anyone hungry?
I've been doing some cooking!
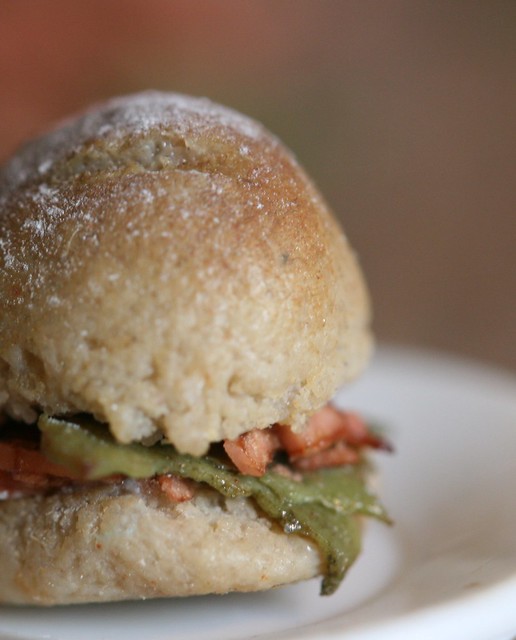
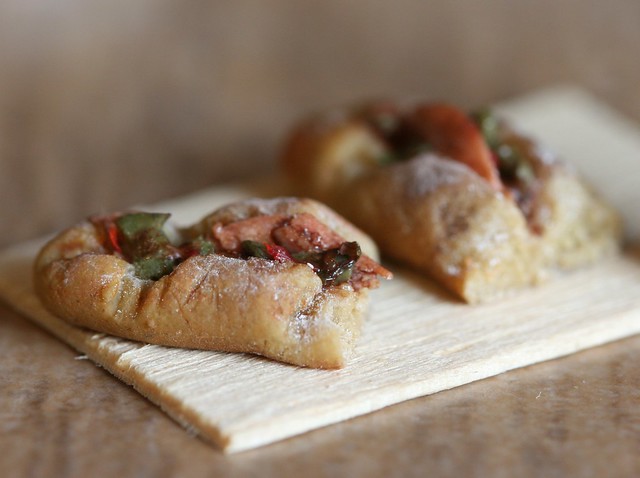

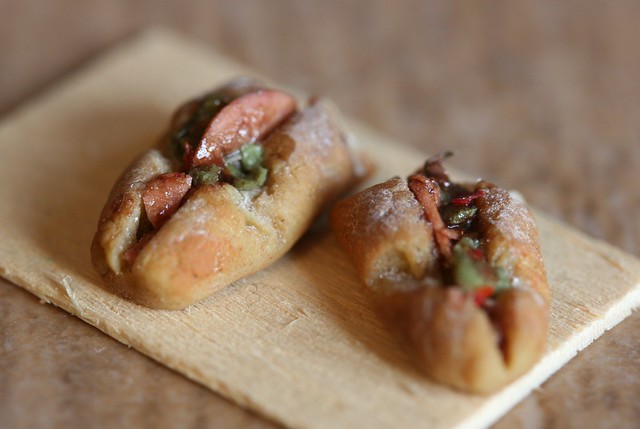

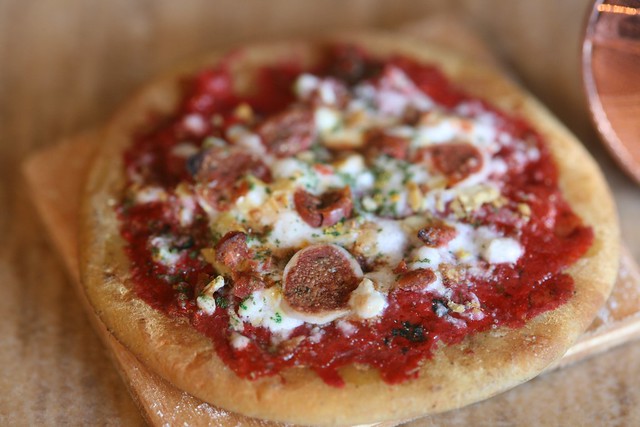
But only in 1/12th scale. :P
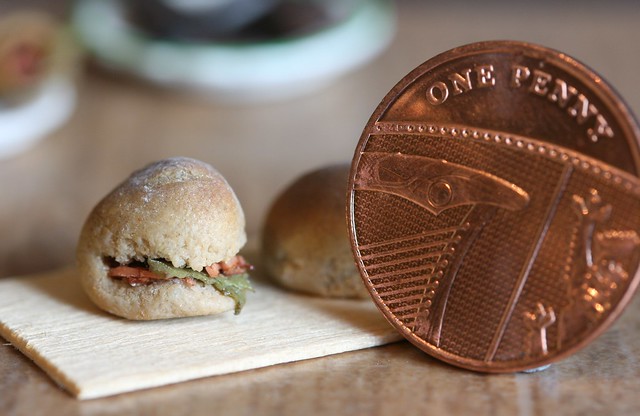


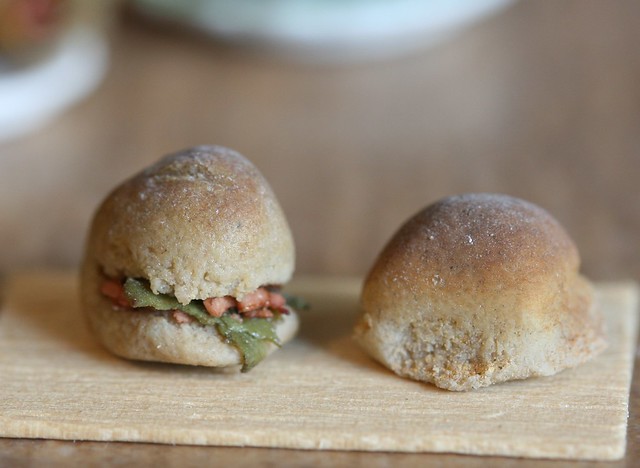
The other day, whilst I was still choked up with the cold, I decided to make some doll's house food. No idea why, I had no real need for it but after having had a really rather delicious bacon roll that morning I knew exactly what I wanted to recreate in miniature.
Prior to this I'd only ever made a couple of really basic food items when I was a kid so I shocked myself by how well they turned out! I didn't have a phenomenally good selection of fimo either so this was made mostly from plain flesh coloured super sculpey, a touch of ochre and dark brown fimo and a lot of pastel dust. I mixed in some very fine sand too which gave it a lovely texture.
I meant to take loads of photos as I went along but as my fingers ended up covered in clay and pastels, I ended up taking very few.
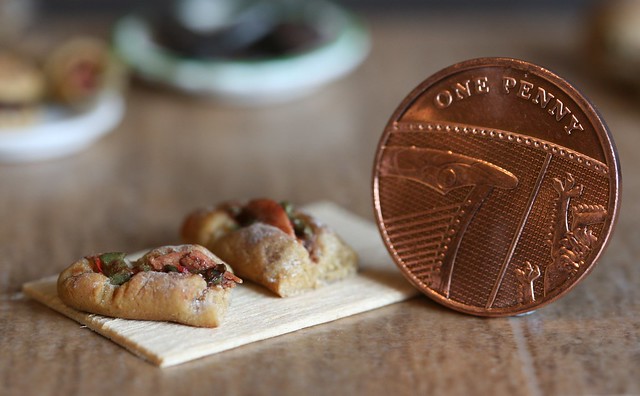
This for example shows the evolution of the pizza.
Here's the dough...

...Here's the fine sand being mixed into it...

...the base being pastelled...

...and...oh.
Finished. XD

I can't remember what went into all the toppings but the green bits were scenic scatter (for dioramas!) and the cheese and tomato sauce were, I think, paint mixed with liquid fimo. (which sets INSANELY fast, to my initial horror) I have a feeling I mixed in some nail varnish as well but don't quote me on that! I definitely used it at the end of that layer though as it gave it a lovely shine.
I'd really like to make some more pizzas (I don't even like pepperoni, what gives?!) so next time I'll be sure to do a proper walkthrough!
I used -this- tutorial for the pizza, -this- for the baguettes (both with a lot of tweaking as I didn't have everything in the tutorial) but the morning rolls, which ironically were the first thing I made, I came up with myself.
After mixing up a nice light coloured clay, I mixed in some fine sand and rolled it over a piece of sandpaper to give it texture before forming it into a vaguely roll-shaped lump. After lightly pressing it onto the sandpaper, I used the end of a broken wooden coffee stirrer to drag three of the sides down, replicating the 'tears' that are made when each roll is separated from the rest of the batch.

I went over it for half a minute with the heatgun to set its shape before adding in the colours with pastels. It was mostly guesswork as to what colours I used but I went from light to dark with a light dusting of white prior to the final blast of heat to simulate flour.

I baked everything in this lot with a handheld heat gun rather than in the oven - more out of laziness than anything else (going downstairs to the kitchen is just so much effort! XD) but it allowed me a lot more freedom when it came to making things and as they were so small, it only took a couple of minutes to cure each item. It also helpfully set the pastel into the clay so there was no need to go over anything with a sealant!
I was so tempted to just leave these as they were but I felt they needed a filling.

You'll notice that pretty much everything appears to have been filled with a strange looking ham salad. It's not a lack of imagination but one of practicality as I was VERY limited in my fimo colours and until I restocked this week, I didn't have very much to work with at all!
The ham I made up from scrap clay and baked just enough that it retained some flexibility so when I 'carved' it, it curled naturally. It crumbled really nicely too which made it perfect for sprinkling over things.


These burgers really didn't turn out all that well. I didn't have any really dark fimo so I mixed some acrylic paint in with the clay. The burgers themselves aren't bad but the bun, oh god, the bun.

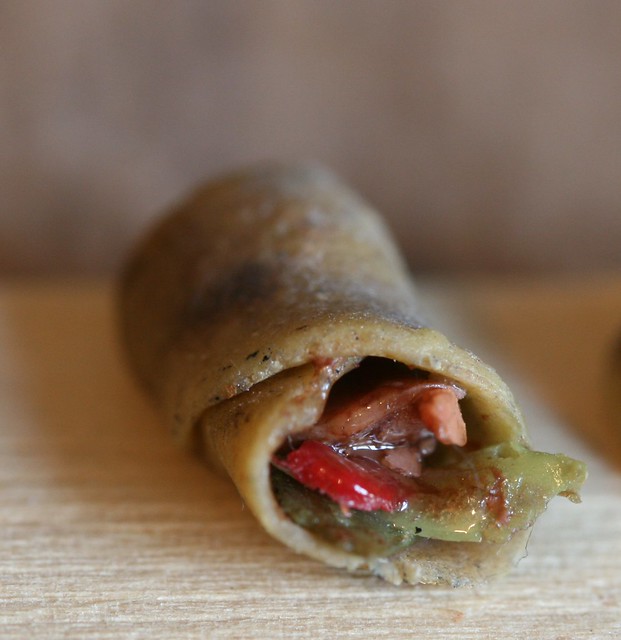
This wrap was a bit of an experiment too and one which really didn't work all that well.

I haven't got photos yet but I also made some Japanese dishes including some chicken katsu curry, miso soup and a noodle dish!
I got some more fimo this week so I'll probably be making some more nibbles soon.
Sushi will DEFINITELY be on the agenda but any other suggestions I'll take on board. :D
EG out!


But only in 1/12th scale. :P


The other day, whilst I was still choked up with the cold, I decided to make some doll's house food. No idea why, I had no real need for it but after having had a really rather delicious bacon roll that morning I knew exactly what I wanted to recreate in miniature.
Prior to this I'd only ever made a couple of really basic food items when I was a kid so I shocked myself by how well they turned out! I didn't have a phenomenally good selection of fimo either so this was made mostly from plain flesh coloured super sculpey, a touch of ochre and dark brown fimo and a lot of pastel dust. I mixed in some very fine sand too which gave it a lovely texture.
I meant to take loads of photos as I went along but as my fingers ended up covered in clay and pastels, I ended up taking very few.
This for example shows the evolution of the pizza.
Here's the dough...
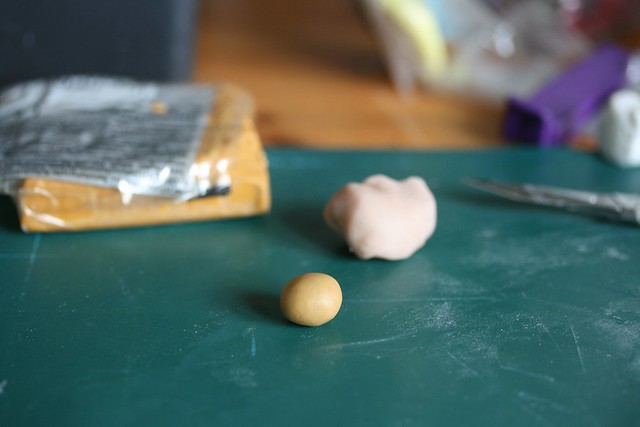
...Here's the fine sand being mixed into it...

...the base being pastelled...
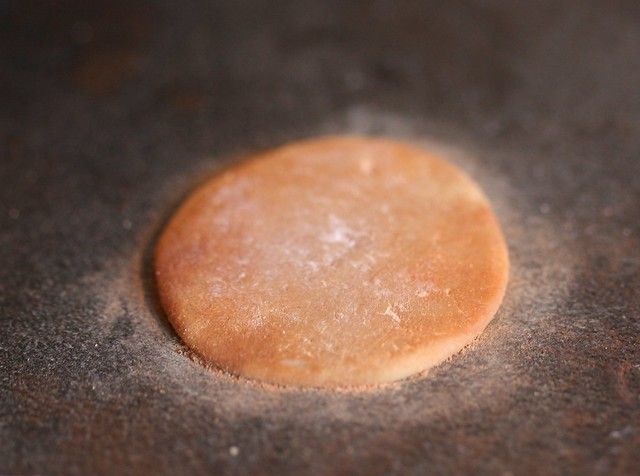
...and...oh.
Finished. XD

I can't remember what went into all the toppings but the green bits were scenic scatter (for dioramas!) and the cheese and tomato sauce were, I think, paint mixed with liquid fimo. (which sets INSANELY fast, to my initial horror) I have a feeling I mixed in some nail varnish as well but don't quote me on that! I definitely used it at the end of that layer though as it gave it a lovely shine.
I'd really like to make some more pizzas (I don't even like pepperoni, what gives?!) so next time I'll be sure to do a proper walkthrough!
I used -this- tutorial for the pizza, -this- for the baguettes (both with a lot of tweaking as I didn't have everything in the tutorial) but the morning rolls, which ironically were the first thing I made, I came up with myself.
After mixing up a nice light coloured clay, I mixed in some fine sand and rolled it over a piece of sandpaper to give it texture before forming it into a vaguely roll-shaped lump. After lightly pressing it onto the sandpaper, I used the end of a broken wooden coffee stirrer to drag three of the sides down, replicating the 'tears' that are made when each roll is separated from the rest of the batch.

I went over it for half a minute with the heatgun to set its shape before adding in the colours with pastels. It was mostly guesswork as to what colours I used but I went from light to dark with a light dusting of white prior to the final blast of heat to simulate flour.

I baked everything in this lot with a handheld heat gun rather than in the oven - more out of laziness than anything else (going downstairs to the kitchen is just so much effort! XD) but it allowed me a lot more freedom when it came to making things and as they were so small, it only took a couple of minutes to cure each item. It also helpfully set the pastel into the clay so there was no need to go over anything with a sealant!
I was so tempted to just leave these as they were but I felt they needed a filling.
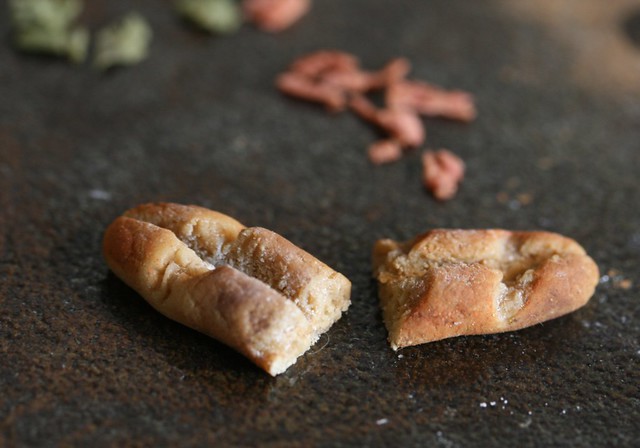
You'll notice that pretty much everything appears to have been filled with a strange looking ham salad. It's not a lack of imagination but one of practicality as I was VERY limited in my fimo colours and until I restocked this week, I didn't have very much to work with at all!
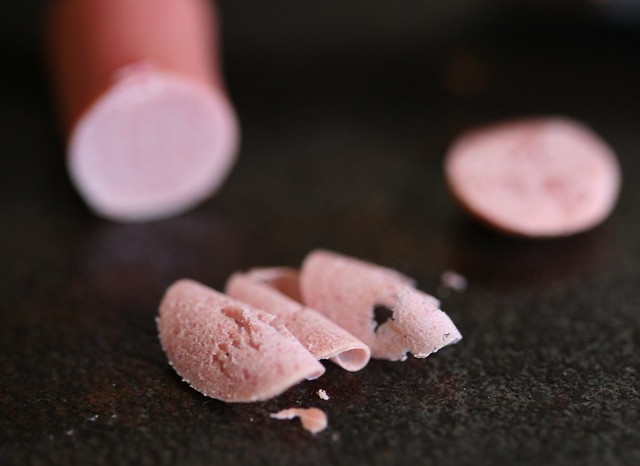
The ham I made up from scrap clay and baked just enough that it retained some flexibility so when I 'carved' it, it curled naturally. It crumbled really nicely too which made it perfect for sprinkling over things.

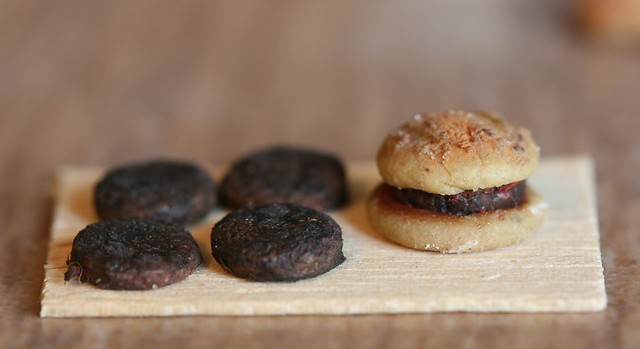
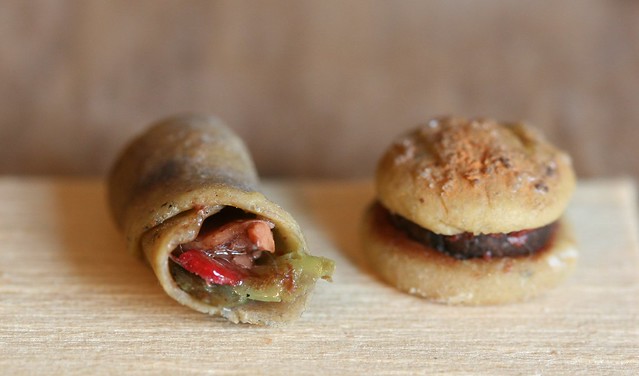
These burgers really didn't turn out all that well. I didn't have any really dark fimo so I mixed some acrylic paint in with the clay. The burgers themselves aren't bad but the bun, oh god, the bun.
This wrap was a bit of an experiment too and one which really didn't work all that well.
I haven't got photos yet but I also made some Japanese dishes including some chicken katsu curry, miso soup and a noodle dish!
I got some more fimo this week so I'll probably be making some more nibbles soon.
Sushi will DEFINITELY be on the agenda but any other suggestions I'll take on board. :D
EG out!
Friday, 29 July 2011
The EA Equestrian Tack Room
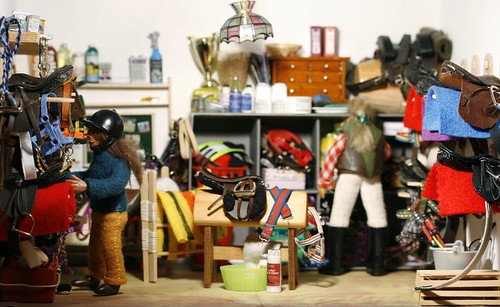
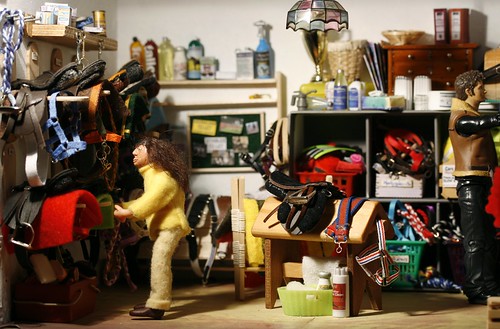
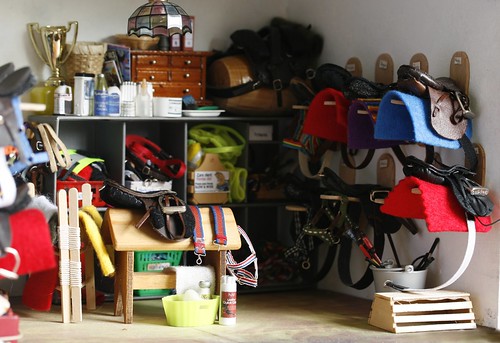
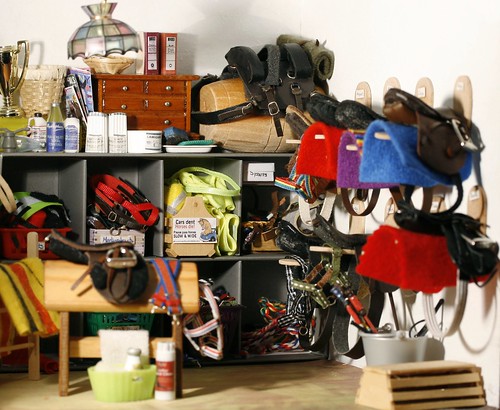
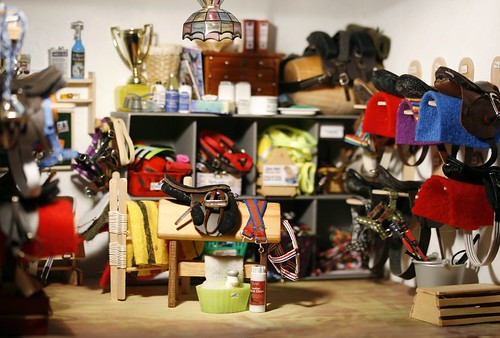
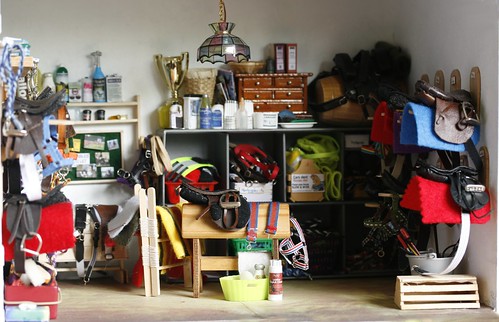
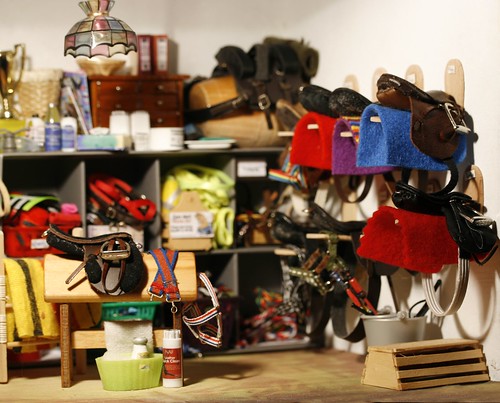
After months of procrastinating and 'I'll get round to it later'-ing, my tack room is finally complete!
I still need to make a saddle for Pirate and sort out tack for some of the non riding school horses but yeah, here it is! I used a doll's house roombox which can technically be lit as all the wiring's done - I just need to find a transformer and a pluggy thing I think and that little lamp will light up nicely.


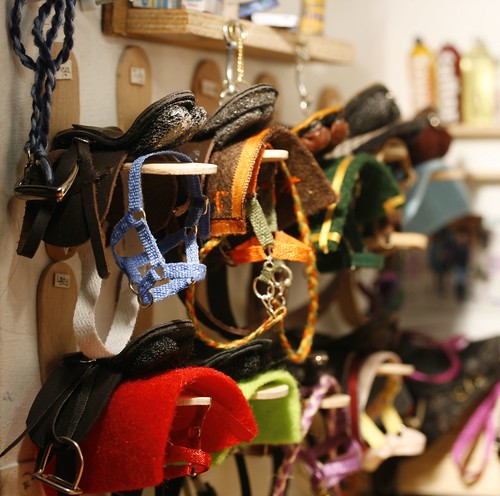
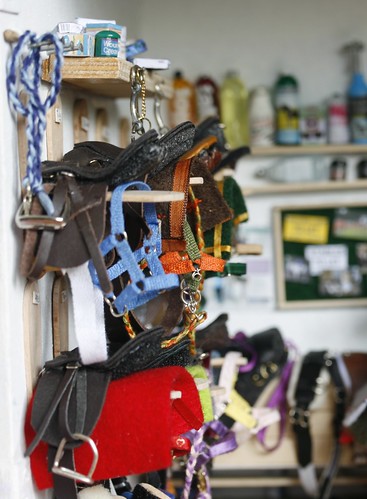
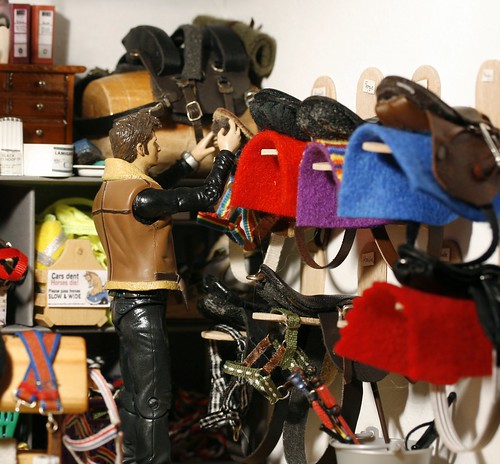
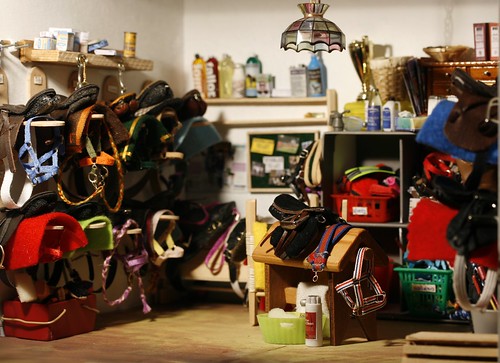
Each horse has their own saddle rack (made from Magnum ice cream sticks cut in half) with a little name tag at the top so they get put back in the right places after lessons. I wanted to put some hooks underneath for the bridles but it would have ended up far too cluttered so you'll just have to imagine a couple of rows of bridles hanging on the wall you can't see! XD
I thought the headcollars could go on the ends of the racks though to add a bit of interest.


Maisie's deer stalking saddle isn't used very often so is stored up high to keep it out of the way.

There's a rack for drying saddlecloths and numnahs on, a massive grooming kit, two boxes full of spare headcollars and leadropes, spare browbands and straps in the corner and of course, a box to stand on if you can't reach the top saddles. XD


The little bottle of saddle soap is one of my favourite accessories and it didn't cost me a penny! It's just a lid from an old blue pen with a label from a tack catalogue glued on. The green 'trug' is another nifty little cheat - I bought a packet of silicone cupcake cases from a supermarket for a couple of pounds and with handles cut out of the sides doesn't it look good?

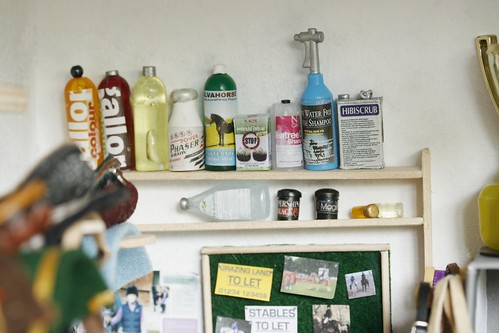
Some more products:

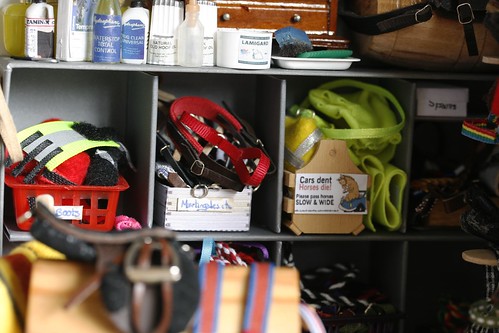
The 'Gallop' and 'Alvahorse' brand bottles are cheap doll's house wine bottles trimmed to size with painted on lids, the white bottle next to them was originally a wooden milk bottle from a job lot of miniatures and the teatree shampoo is a superglue lid trimmed to size. The Hibiscrub container was an oil canister thing I bought from a doll's house fair and I'm not sure where the blue spray thing came from but I think it's from the Grand Champions range or something similar. The clear bottle on the second shelf was actually part of a medicinal eyedrop thing that I salvaged and cleaned out. (waste not! :P) The two little black tubs next to it are probably my favourites - nothing more than those little stoppers you get at the bottom of ballpoint pens to stop the ink tube coming out! The things on the right are the tops of the wine bottles but I thought they looked like interesting little bottles in themselves.
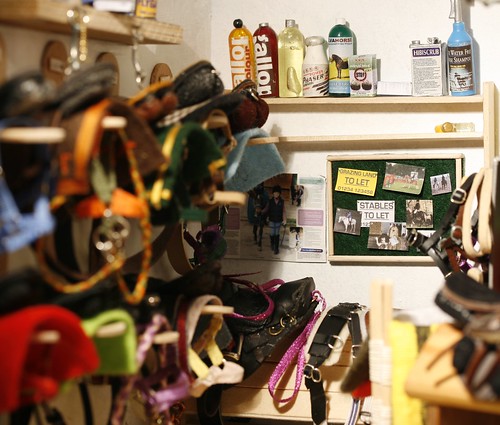
Wonky shelves come as standard! XD The noticeboard is just a rectangle of felt with some cocktail stick edging.

The supplement bottle on the left and rug cleaner on the right are doll's house milk bottles, the taller packet on the left, between them was from a Barbie Vet playset that I had as a kid - I kept it on as I just knew it would come in handy one day! The hoof oil containers are Bostik glue lids and the Waterstop stuff is another wine bottle. The humane twitch sitting on the left is nothing more than a bit of wire bent into shape and then painted. :)
Organisation is paramount at EAE; with so many people on the yard at once it's so easy for things to get mixed up, hence all the labels.


The ponies' tack is helpfully closer to the ground as more often than not, their riders are too!

Anyway, that's it - any questions/comments etc go to the usual place and are very much appreciated! :D
I still need to make a saddle for Pirate and sort out tack for some of the non riding school horses but yeah, here it is! I used a doll's house roombox which can technically be lit as all the wiring's done - I just need to find a transformer and a pluggy thing I think and that little lamp will light up nicely.


Each horse has their own saddle rack (made from Magnum ice cream sticks cut in half) with a little name tag at the top so they get put back in the right places after lessons. I wanted to put some hooks underneath for the bridles but it would have ended up far too cluttered so you'll just have to imagine a couple of rows of bridles hanging on the wall you can't see! XD
I thought the headcollars could go on the ends of the racks though to add a bit of interest.


Maisie's deer stalking saddle isn't used very often so is stored up high to keep it out of the way.

There's a rack for drying saddlecloths and numnahs on, a massive grooming kit, two boxes full of spare headcollars and leadropes, spare browbands and straps in the corner and of course, a box to stand on if you can't reach the top saddles. XD


The little bottle of saddle soap is one of my favourite accessories and it didn't cost me a penny! It's just a lid from an old blue pen with a label from a tack catalogue glued on. The green 'trug' is another nifty little cheat - I bought a packet of silicone cupcake cases from a supermarket for a couple of pounds and with handles cut out of the sides doesn't it look good?

Some more products:

The 'Gallop' and 'Alvahorse' brand bottles are cheap doll's house wine bottles trimmed to size with painted on lids, the white bottle next to them was originally a wooden milk bottle from a job lot of miniatures and the teatree shampoo is a superglue lid trimmed to size. The Hibiscrub container was an oil canister thing I bought from a doll's house fair and I'm not sure where the blue spray thing came from but I think it's from the Grand Champions range or something similar. The clear bottle on the second shelf was actually part of a medicinal eyedrop thing that I salvaged and cleaned out. (waste not! :P) The two little black tubs next to it are probably my favourites - nothing more than those little stoppers you get at the bottom of ballpoint pens to stop the ink tube coming out! The things on the right are the tops of the wine bottles but I thought they looked like interesting little bottles in themselves.
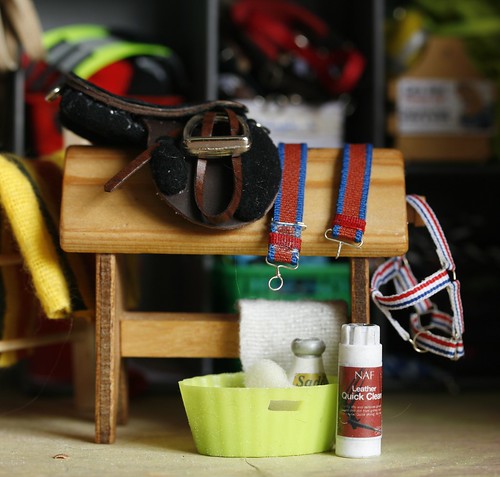
Wonky shelves come as standard! XD The noticeboard is just a rectangle of felt with some cocktail stick edging.
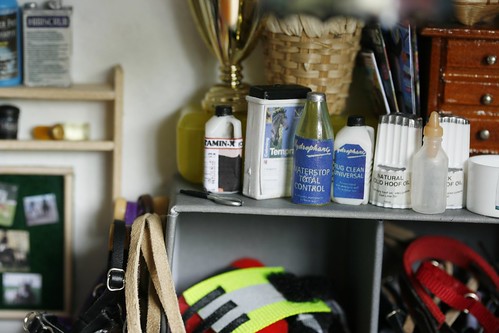
The supplement bottle on the left and rug cleaner on the right are doll's house milk bottles, the taller packet on the left, between them was from a Barbie Vet playset that I had as a kid - I kept it on as I just knew it would come in handy one day! The hoof oil containers are Bostik glue lids and the Waterstop stuff is another wine bottle. The humane twitch sitting on the left is nothing more than a bit of wire bent into shape and then painted. :)
Organisation is paramount at EAE; with so many people on the yard at once it's so easy for things to get mixed up, hence all the labels.


The ponies' tack is helpfully closer to the ground as more often than not, their riders are too!

Anyway, that's it - any questions/comments etc go to the usual place and are very much appreciated! :D
Subscribe to:
Posts (Atom)