
The little occasional table in the last picture of Part 1 looked deceptively simple from a distance, but that couldn't have been farther from the truth!
I've always loved Moroccan styled furniture, especially the intricately patterned fretwork in tables and screens, and as there was a laser-cutter handy I really couldn't pass up the opportunity to make my own...
I spent more time drawing this up on CAD than perhaps anything else but it was definitely worth all the hassle. I traced some of the design on another layer using a photo of a pattern I found online, then tweaked and added bits until it was just as I liked it. I invented the tabletop design myself though and I kinda wish I'd put more of the details from the side pieces into it.
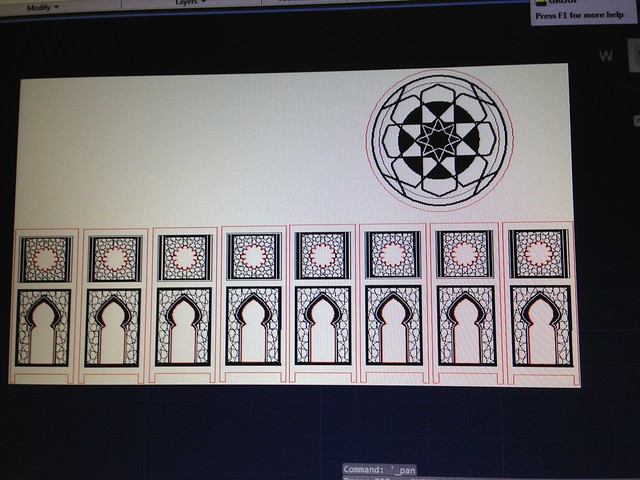
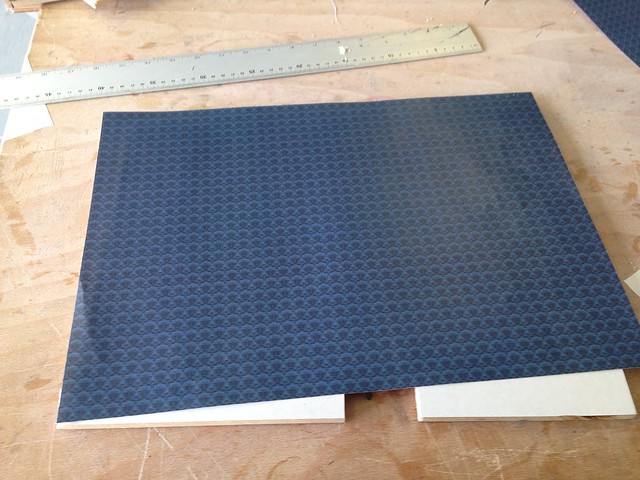
For those of you who don't speak laser-cutter, the black lines are engrave lines and the red ones, cut.
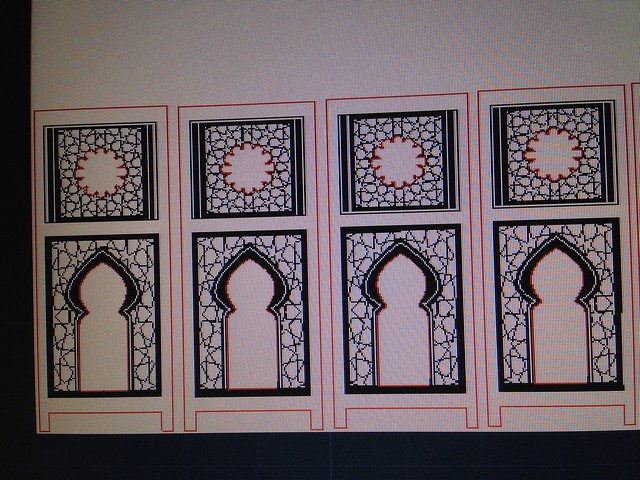


They cut out brilliantly, though I'd chosen the wrong type of wood and it went very soft and brittle and some actually warped after it came out of the machine. Luckily I'd made sure to cut out more than I needed which was just as well as I managed to snap a couple of them just by sanding the edges lightly.

I didn't want to risk breaking it again by using clamps, so instead of PVA I resorted to superglue. I added some matchstick supports on the inside which seems to have done the trick as it's nice and sturdy now. The legs kept snapping off so I just cut the rest off and it doesn't look too bad, though I'd have preferred it to be properly off the floor.

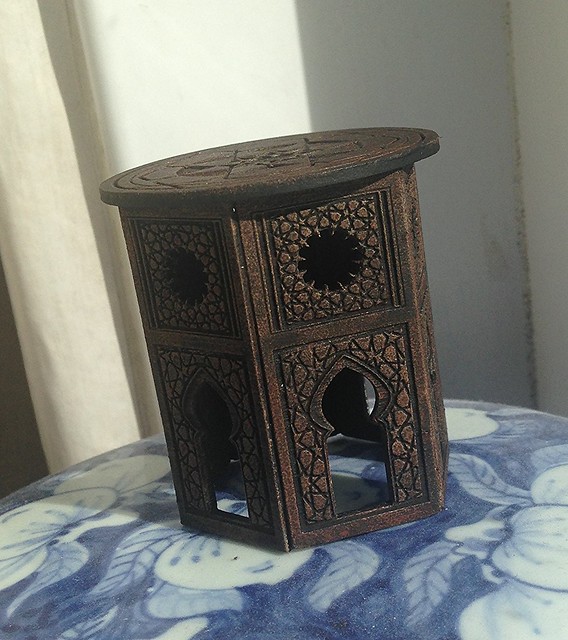
Annoyingly, my hand slipped as I went to put on the top and it's now squint, but it's not noticeable when it's in the room with things on it. If the wood hadn't been so brittle I'd have taken it off and repositioned it but I wasn't going to take any chances!

I must confess that the accompanying chair was not entirely my own work - I bought a horrible cheap one off ebay, tore it to pieces, added new padding and arms and recovered it entirely in new fabric. The old stuff would fray as soon as you looked at it and it just screamed 'cheap and nasty'. I'd seen a few good tutorials for chairs and was intending to make my own but as time was limited, I decided my time was better spent on the more intricate details.
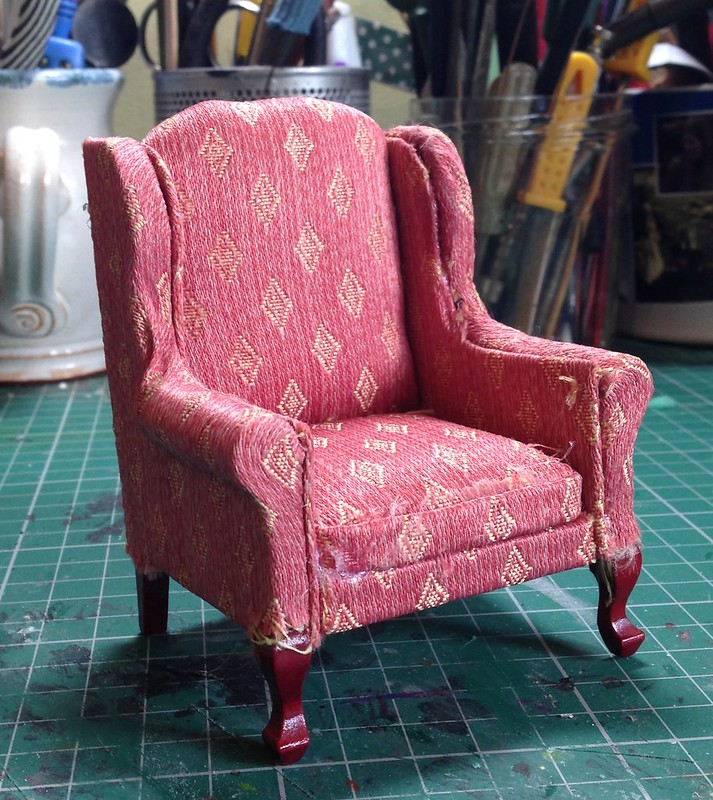
The replacement fabric was not particularly Victorian in style but as this whole project isn't exactly historically accurate I think I can get away with it!


The room also needed a fireplace, so it was back to CAD to design myself one. Originally I was going to go for something with lots of fancy mouldings and/or tiles, but in the end I decided to make something relatively plain as the rest of the room's contents would be rather garish. It was cut out of several layers of clear acrylic.
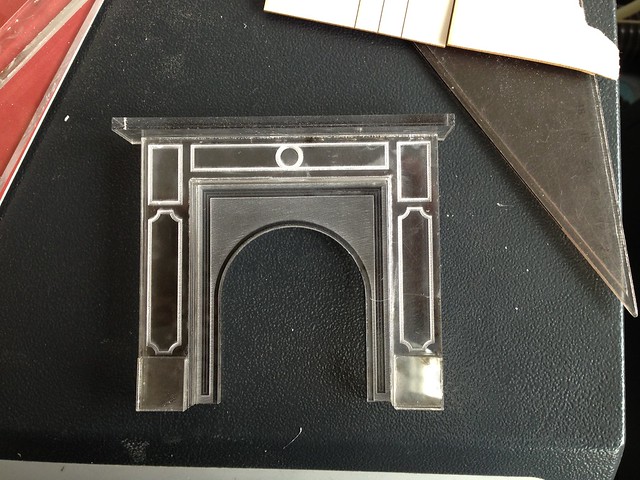
It painted up well as cast iron and I was rather pleased with how well the grate turned out too - the white bit is styrene, the silver part is some sprue from a model kit and the black bit at the back is one of my grandma's old plastic hair curlers!

The fire itself is made of twigs with some black and grey paint dabbed on for charring, and some 'coal', for which I came up with a very simple method - superglue and bicarbonate of soda! I use that for model horse repairs a lot and realised that the grainy texture it gets when you drip a drop of glue into a pile of the stuff, then sprinkle more on was perfect for coal. Once painted up to match it looked great, especially with some tiny scraps of yellow and orange cellophane nestled in amongst the ashes.

The best part however, is the flickering. When I bought the lights for the room, I also got one of the special 'flickering' fire bulbs but I found it too bright and not very realistic - not to mention the bulb got quite hot and I was concerned that it might cause an actual fire right where I didn't want it!
My alternative was to cannibalise another £1 shop 'flickering' tea-light. The LED ran off a coin battery and having used them before in another make, I was confident I could do the same here with a bit of bodging. It ended up being a lot trickier than I'd originally anticipated as I had it set up so that the 'switch' was on the side of the box, but then remembered that I'd be covering that up later for the end of year show, so I had to add some extra wiring and whatnot so it could be adjusted from the back like the rest. It was definitely worth all the hassle however, and it's one of my favourite aspects of the entire build.

With a hole cut out for the door, lights and the fireplace, all that remained was to add the wallpaper and then I could start putting it all together.
There were a huge variety of genuine Victorian wallpapers I could order in 1/12th scale but I wanted to do as much as I could myself, so I had a go at designing my own in photoshop.
Although it's barely noticeable in photos, I made the 'damask' pattern in the form of a dragon's head, with smoke and fire billowing from its mouth.

Once glued on, it was trimmed to size and I was able to stick it together at last. I added some distressing with pastels beforehand though as it looked far too new and clean. Simon suggested I add in some fake lines to show where each strip of 'wallpaper' had been applied but I wasn't sure I'd be able to do it justice so I just left it as it was.

The desk was my first bit of non-laser-cut furniture, and I really like it. I added some tiles at the back using images of real Victorian ceramic tiles by William De Morgan. I really ought to have added some grouting but they look pretty nice in person without. I went over the tiles with a few layers of gloss varnish which gives them a really lovely finish.
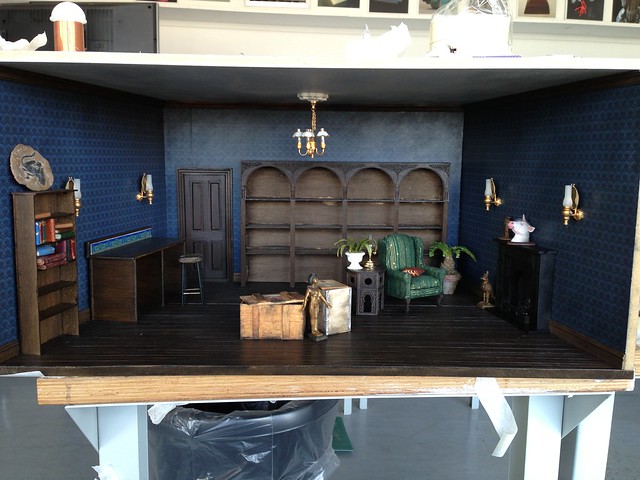
Some of the other objects seen in the above picture...
A stocky and squat little palm tree, made from a pine cone with paper/wire leaves.

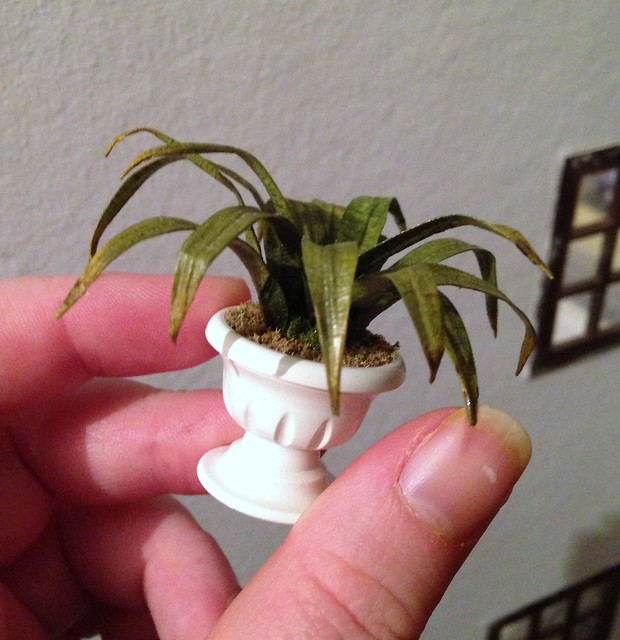
An Aspidistra of course!
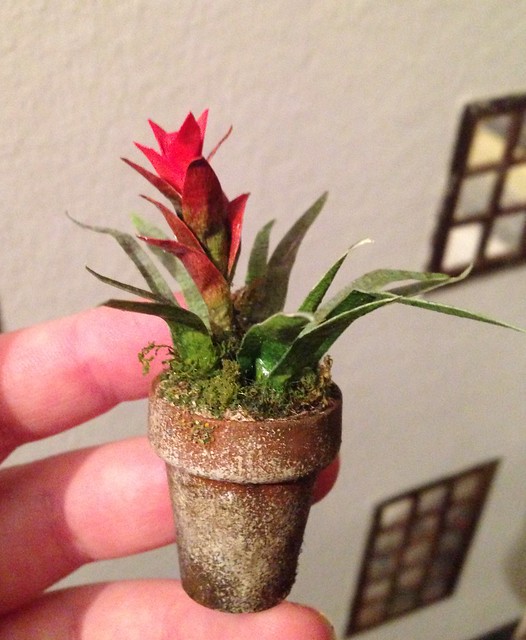
A bromeliad-y plant - I can't for the life of me remember the name but I did use references for it.
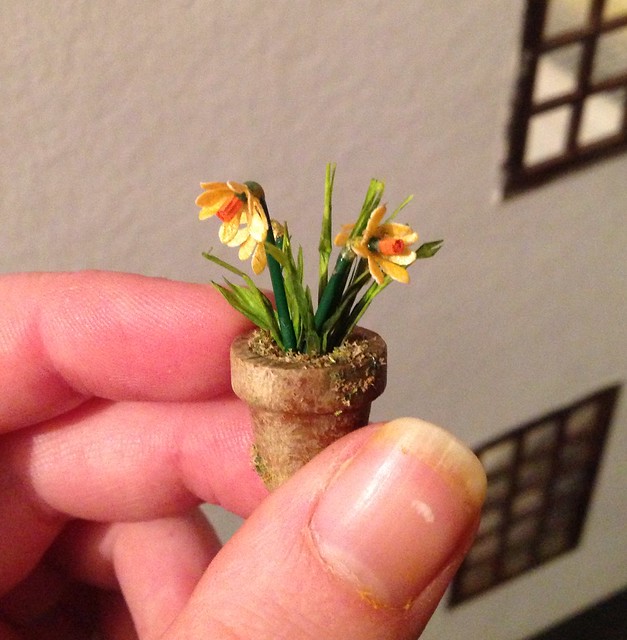
Some daffodils were made too, though they're not very good.
I was a little apprehensive about doing the lights as I wasn't sure how I'd cope with all the copper tape and whatnot but luckily I ended up using the simpler method of running the wires along the sides of the box and double-sided taping the switchbox to the back panel.
I knew I'd need some taxidermy for the walls and what better than a mini version of Ferdinand?
It was made from Super Sculpey with a tiny shell for a horn, then flocked and haired with mohair.

It turned out far more equine than caprine this time but oh well. I really enjoyed making it and may make up some more to sell at some point.

I made a dragon head too - like the unicorn, from Super Sculpey.


I also made a 'live' specimen, with the intention of making the whole scene be about the moment of its arrival amongst other crates of interesting things from far flung countries. Had I had the time I thought about making a pile of burned bones and tweed, as if the dragon had escaped from its box and incinerated the collector, but I felt that was a bit unfair for the poor chap so he escaped destruction this time, though I'd imagine his study won't with a dragon on the loose!
He was made entirely from super sculpey and painted in acrylics.
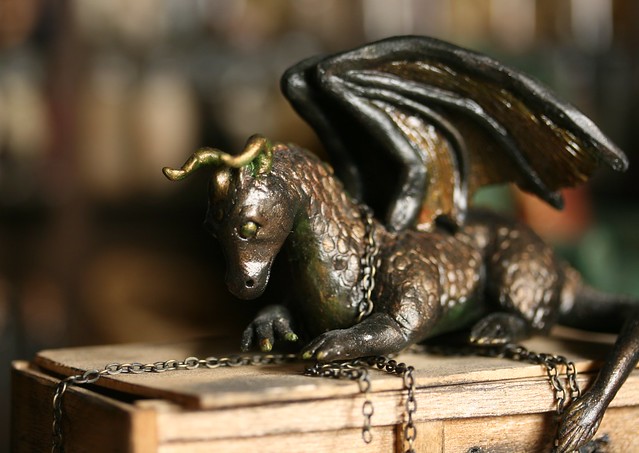
His 'travel crate' was made from balsa wood with extra 'grain' scored on with a scalpel and weathered with acrylics to simulate soot and charred wood around the breathing holes.
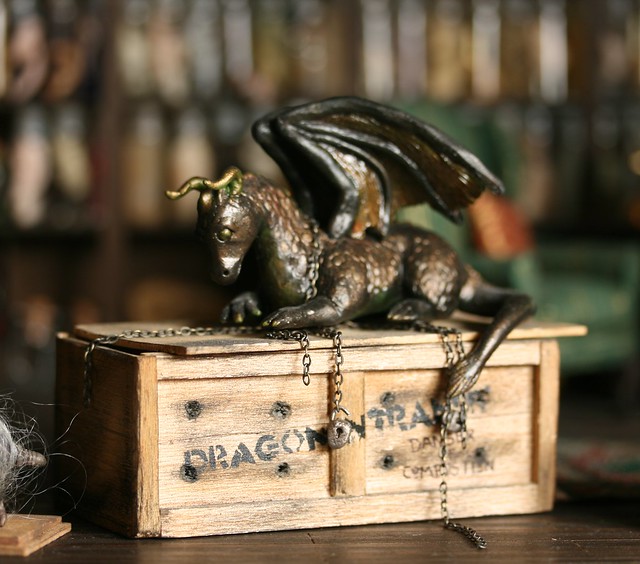
Now that I think about it, I'm not sure how he managed to escape from it at all, as the lid is still mostly on top and intact - perhaps he put it back on himself? XD
The fluffy thing on the floor next to him is a Yeti head.
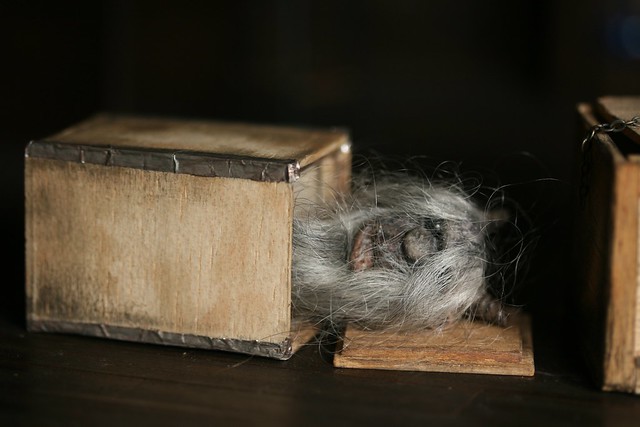
I wanted to make a full size mounted Yeti to stand in the corner, arms out like it was ready to attack, but in the end I wasn't sure and decided to just stick with the head by itself. It fits into the tea-chest rather well though so that was a nice unintentional bonus. Super Sculpey again, with mohair and toothpicks for tusks.
Another thing I was really keen on making was a fossil. Inspired by the famous Archaeopteryx specimens, I broke out the sculpey again (no prizes for guessing my favourite material to work with) and my trusty sword toothpick and got to work.


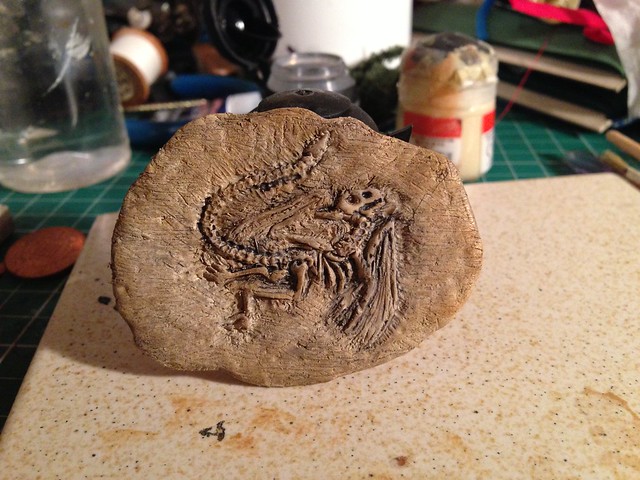
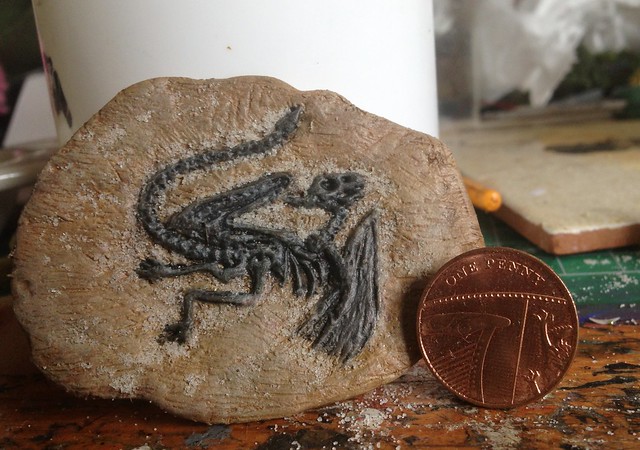
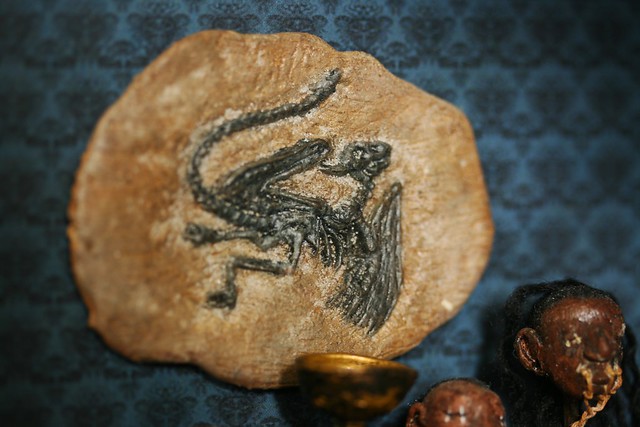
Seen here next to some shrunken heads, also made from sculpey.

Most of the books were homemade, from leather and balsa wood, but a few were mass produced doll's house ones. The goblets I got with an Indiana Jones figure years ago. They already looked pretty good but I gave them a couple of little coats with some GW washes just to bring out all the details and make them look a little older. The 'jaw bone' on the left is actually a scrap bit of car body filler I'd had left over from another project. It's easy to carve as long as you don't inhale any of the dust (VERY toxic!) and I chipped away at it in my spare time. A couple of washes brought out the striations in the 'teeth' and it looks perfectly at home next to a tiny and perfect little arrangement of quartz crystal I'd been hoarding for a display such as this.
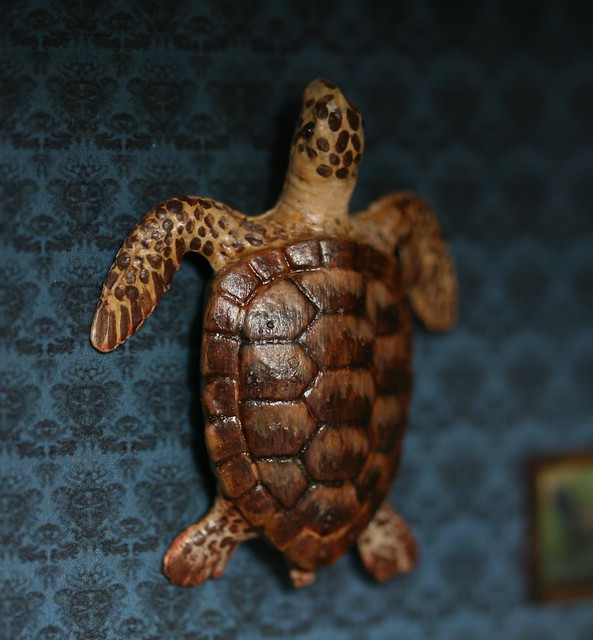
Not far away from that is a turtle. I put this in as a nod towards my own family, as we have a stuffed Hawksbill Turtle in the wardrobe. You know, as you do.
Some relation on my dad's side picked it up in the far east in the 1920s and as much as I'd like it to be on display somewhere, mum has very firmly said no, so this is the closest I'm going to get I reckon!
I didn't sculpt this one, it was a plain plastic toy I'd had knocking about for years, but I did repaint it.
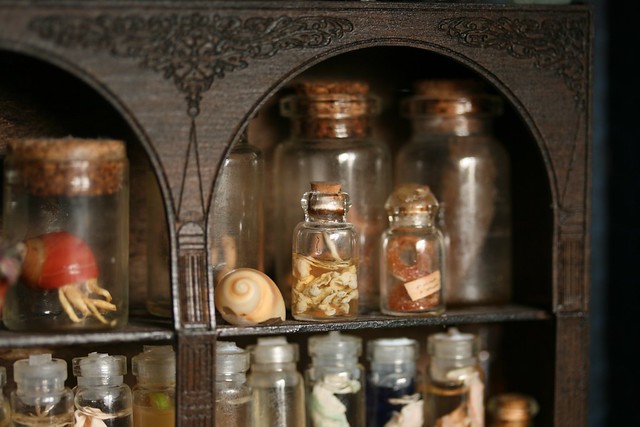
Possibly the most important thing the room had to contain was a good collection of preserved specimens in jars.It's the kind of thing that adds an air of eccentricity to any room and I wanted that to come across rather strongly in this one. Sourcing suitable jars wasn't too hard and although I'd have preferred ones with less of a neck, I was able to buy them in batches from the £1 shop, where they were sold containing 'nail caviar' which was then donated to my nail varnish aficionado friend. I had a few other ones from a previous project which helped to break up the uniformity.
As for the contents, I tried everything, and because I started making them before I'd officially started the project, I was able to see which things were going to be a problem. Some things went a bit mouldy so I was able to discard them, and although I know that latex won't stand the test of time, but the way it reacts to the water in the long term gives just the right kind of effect. I found that the little strips that build up around the screw top on a bottle of latex made excellent tapewormy things for instance. XD
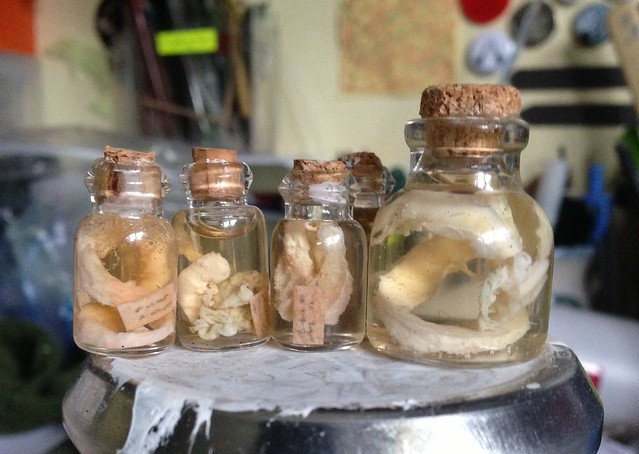
I was really pleased with all these but nearly everyone looked absolutely disgusted when I showed it to them - I can't imagine why! :P

Above we have some plastic ants from a halloween set of 'creepy crawlies', some scraps of latex, a sculpey foetus of some unknown creature, a bit of tree lichen and more latex.
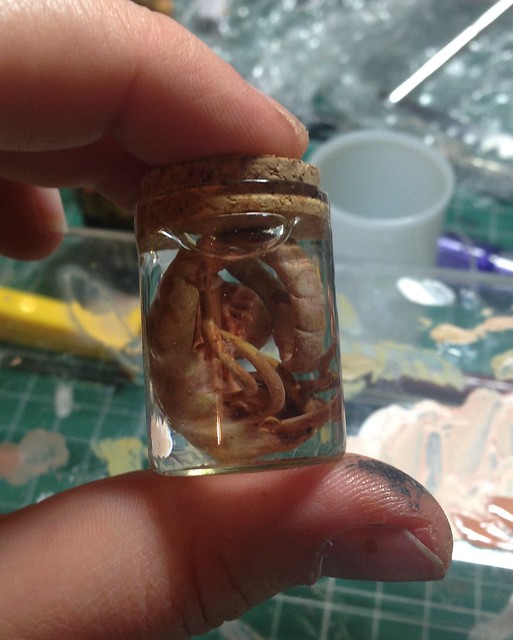
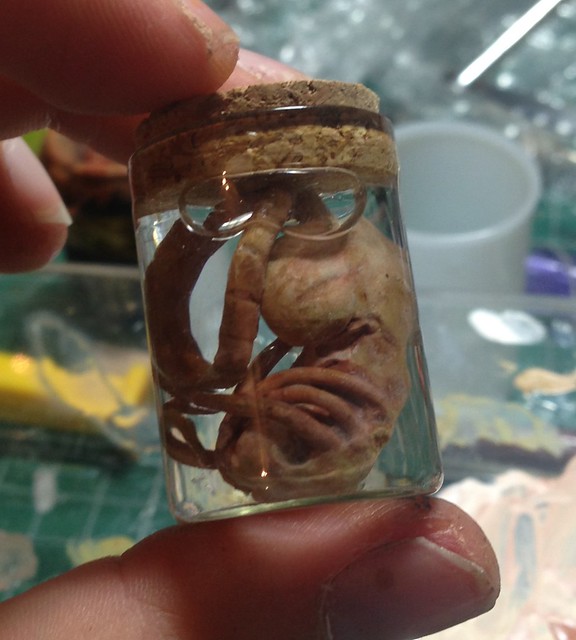
I promised Simon I'd sneak in a Facehugger from Alien, so I made it from sculpey, baked it and popped it into a jar, where it looked quite at home! I'd painted and sealed it beforehand, but over time this has reacted with the water and it has gone much more opaque and white which actually looks far more realistic.
Watch this space for Part 3!
Wow. Just... Wow. This is some incredible stuff!
ReplyDeleteThank you! :D
DeleteOH MY GOD THIS IS SO COOL! I seriously don't have words, just internet-yelling. I love everything but the fossil is absolutely stunning. I would love to do a program where something like this is the final project. Superb idea, and superb execution!
ReplyDeleteXD Why thank you!
DeleteI love that fossil!!! :D Nice work all around. I'd love to learn laser cutter speak.
ReplyDelete
ReplyDeleteTruly, this article is really one of the very best in the history of articles. I am a antique ’Article’ collector and I sometimes read some new articles if I find them interesting. And I found this one pretty fascinating and it should go into my collection. Very good work.
car removal sydney
free car removal sydney