
I've been on a real 1/6th scale kick recently and my poor ponies have been abandoned for the time being in favour of my dolls. I'll get back to them soon I promise, but for now the girls have taken over!
As seen in my last post about them, Max and Juno now have a sofa, but it was hardly a living room! After perusing Pinterest for inspiration I decided to make them a fireplace to go with it, and an assortment of walls and flooring options. It would probably have been sensible to make the walls and floor first, then the fireplace but when have I ever gone for the sensible option?
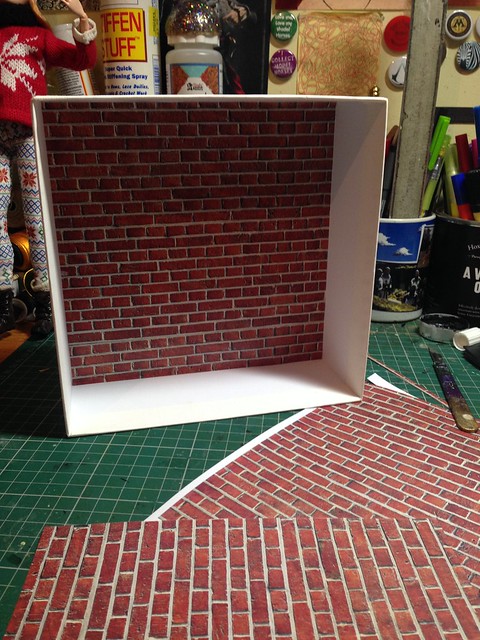
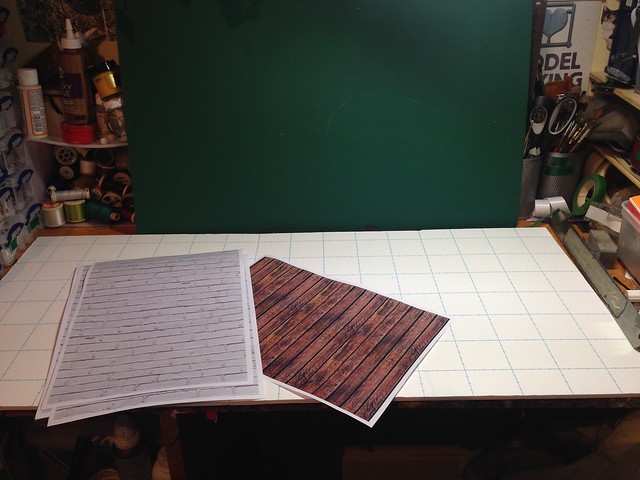
I hunted around for a suitably sized box and eventually found one in the form of packaging for some bath products. It was just the right height and depth, and despite the sides being relatively thin, it was made from very sturdy card. I found some tileable brick patterns online and printed out a few pages for the back and side which were affixed with double-sided tape.
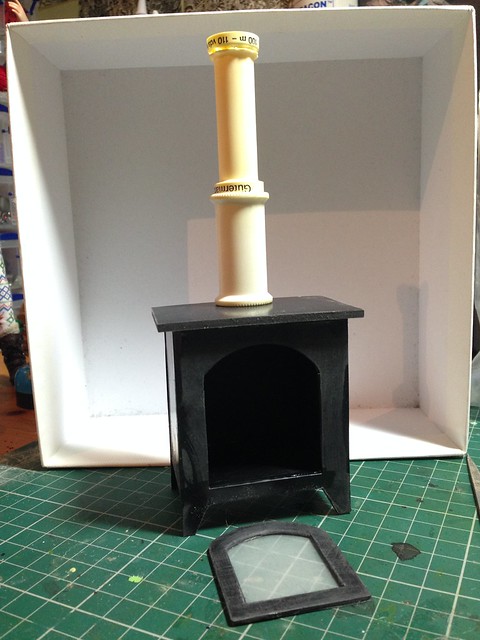
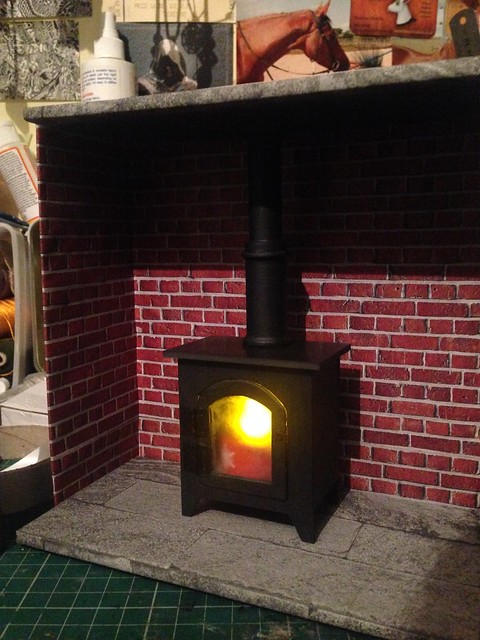
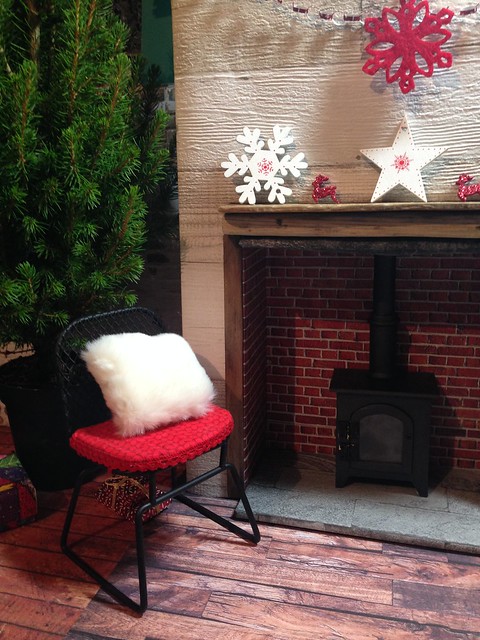
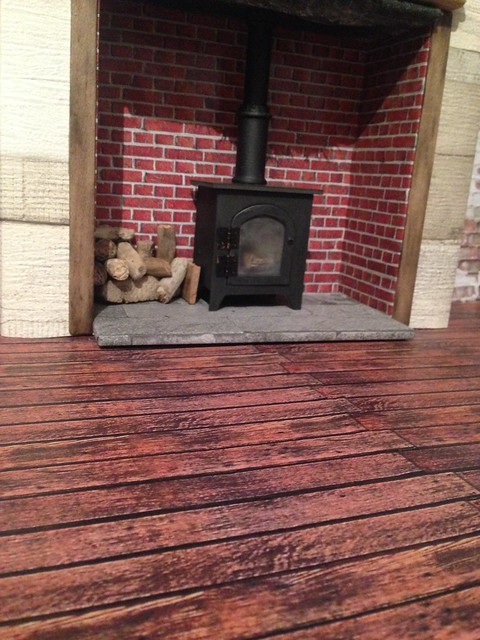
I wanted to make a little wood-burning stove to go inside, so after another trip to Pinterest for inspiration and a brief raid on my styrene stash, I cobbled this together during a binge session of Person of Interest. The chimney is two empty thread reels but once painted up its really difficult to tell!
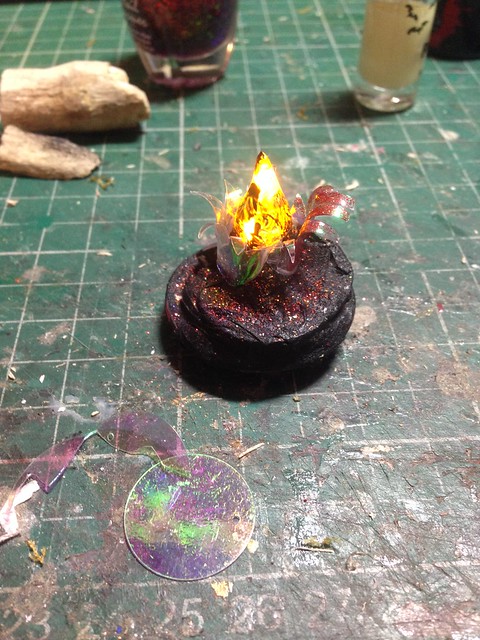
I used another of my favourite sources of LEDs (battery powered tealight) for the fire, with the addition of paint, glitter and some melted and repainted sequins for 'flames'. None of this is visible out the window of course, but I know its there.
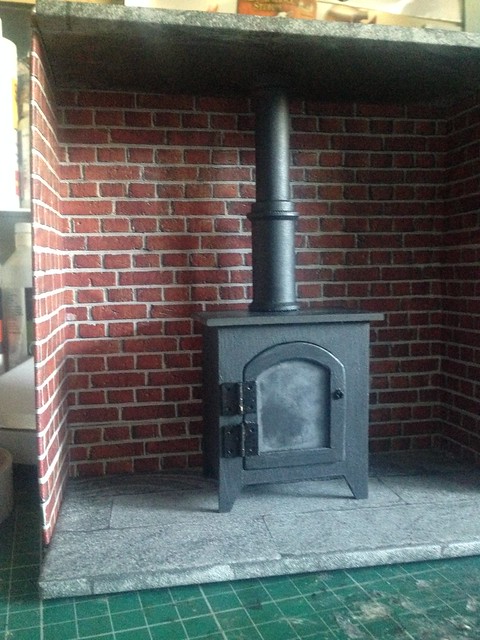
The stone mantel and hearth are just sections of card covered in textured wallpaper.
I love using wallpaper for stuff and I actually made a trip to my local Homebase down the road specially for the free samples. I felt really guilty doing it though, as although I didn't take that much of each, there was a lot of choice so I ended up with rather a lot, and I kept imagining that I was going to get stopped on my way out the door with my big armful of papers!

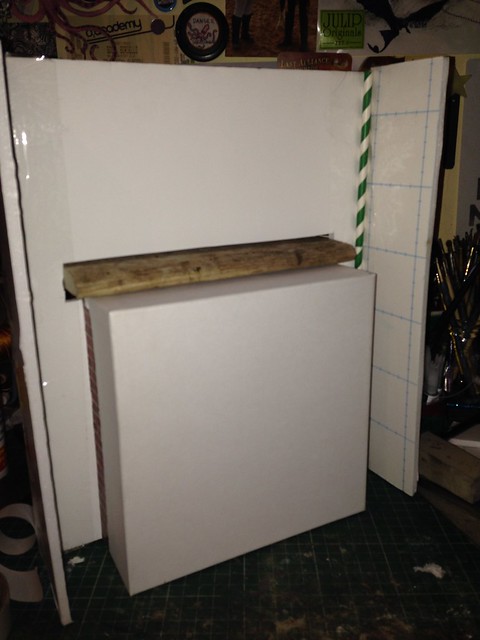
I bought some massive sheets of foamboard
when The Artstore in town closed down last year and everything was
heavily discounted (I bought about £80 worth of stuff for about £15, it
was amazing)
so I had plenty to use for the walls. I traced around my fireplace and cut out a section for it to slot into. The
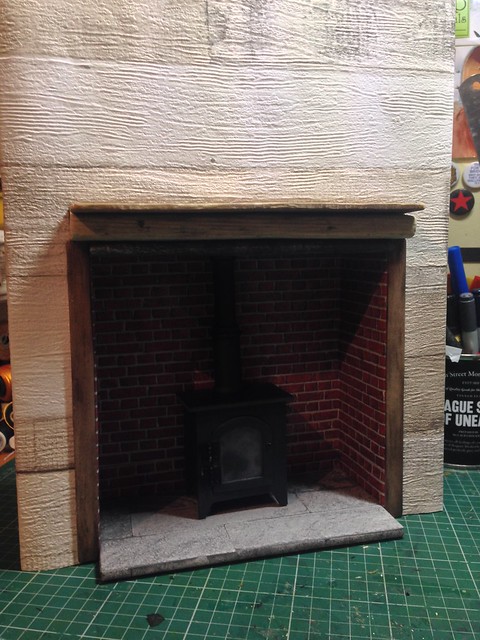
wooden mantel is actually a piece of driftwood we found on holiday
years ago! It was already nicely smoothed and weathered but I gave it
another buff with some fine sandpaper to finish it off.
Because the fireplace would stick out into the room, I added some side pieces, securely glued and supported by some strong paper straws in the corner.
There was a slight gap between the top of the fireplace and the wall, even using the chunky piece of wood, so I found another bit of driftwood and stuck it on top. It's not exactly what I wanted, but I like the finished result. The fireplace walls itself were trickier to cover up. I wanted bricks originally, or weathered white painted bricks like the other walls were going to be but in the end I went for this textured wood effect wallpaper. It's kind of out of scale but we'll jut have to pretend that it's miniature wallpaper with dramatic scaling. :P
A quick mockup with scrapbook paper walls and floors showed I was definitely on the right track.
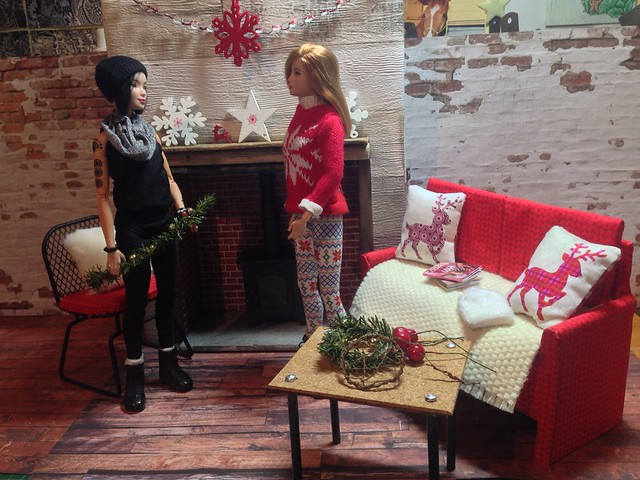
Because I'm sad a diligent and caring doll owner, I bought Max and Juno an actual bona fide living Christmas tree.
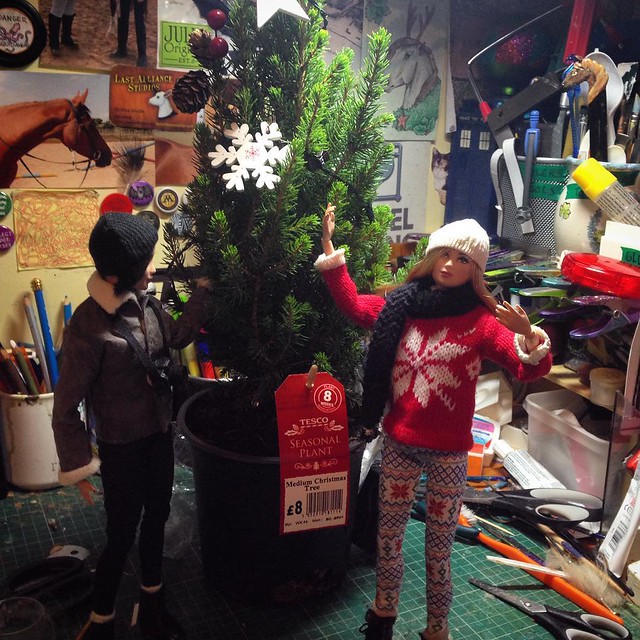
I repotted it as it was far too high to fit properly but I'll probably plant it outside somewhere eventually so it'll be able to grow out nicely later on.
The white decorations on the fireplace were actually attached to it when I bought it so I got some bonus ornaments which is no bad thing.
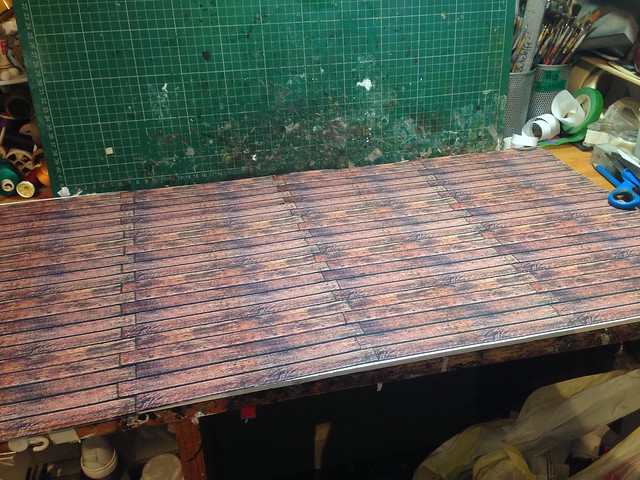
There was still the matter of the floor to be sorted however, so once again I scoured the internet for tileable floorboard patterns and printed a load out, along with some white brick which was as close a match I could find to the commercially made scrapbook paper I'd already got for the back walls.
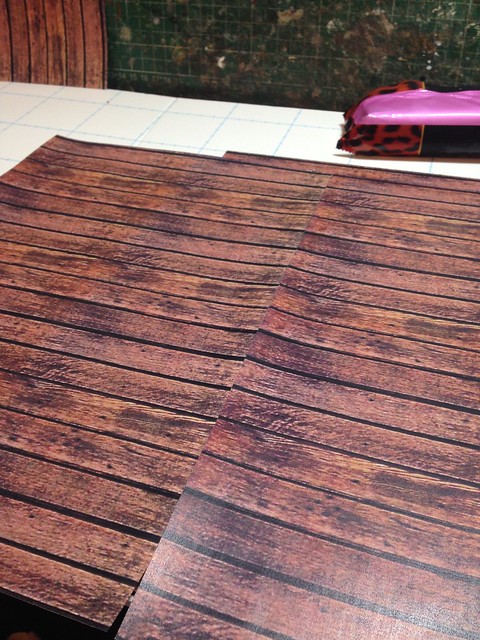
Despite being tileable, there were colour differences I hadn't noticed until I put them next to each other. That really would stand out and make the joins look really obvious, and I was on the verge of trying to find a replacement texture when my mum suggested a fix and wow, what a difference!
By cutting out sections at one end and going over the raw edges with a copic marker to look shadowed, I could overlay it on top of the previously glued in piece and make it look like proper planks.
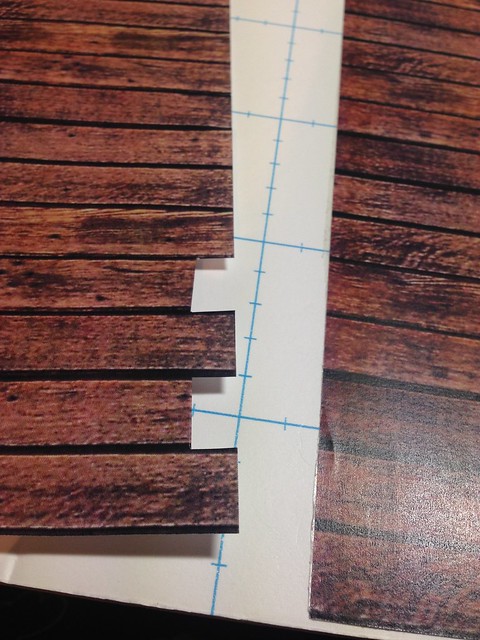
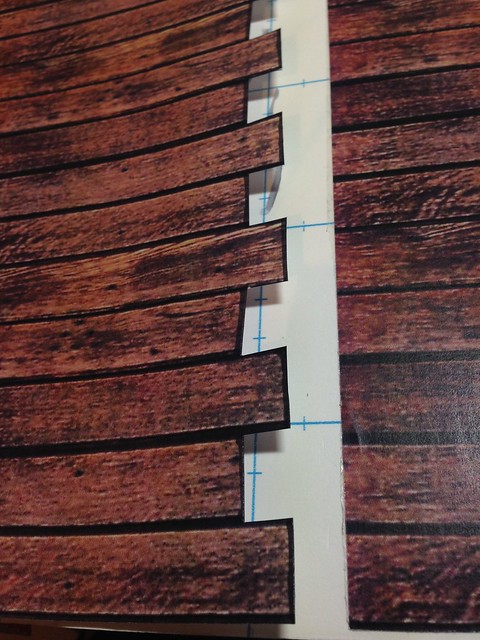
It was a little more time consuming but it really paid off.
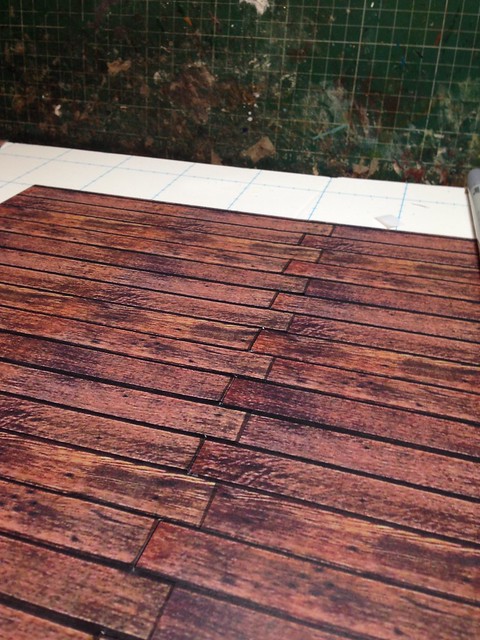
From afar, the repeat pattern is still obvious, but as soon as you put furniture and things in you don't notice it at all.
The walls were just cardboard from a big box that got a big damaged in the post and was only going to be recycled if I didn't find a use for the sides.I need to add another layer of paper at the top as they aren't quite high enough up in some photos but that's a job for another day. I made some skirting board from strips of card and more wallpaper. They're not ideal but do the job.
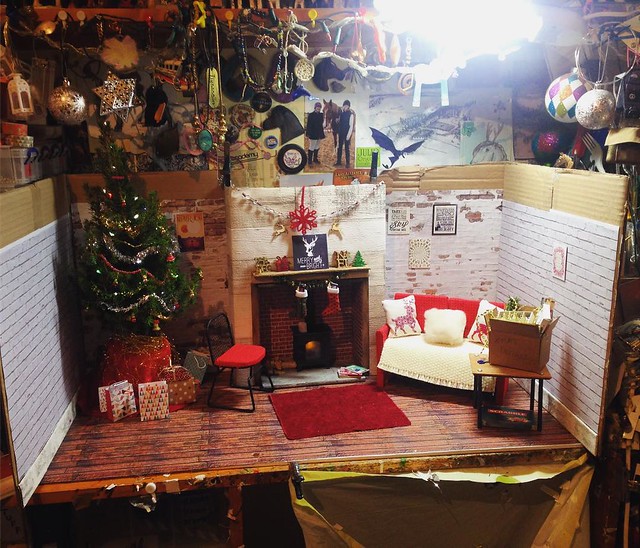
On that note, stay tuned for the next post where you can see it all decorated for Christmas!
Can I say that I absolutely love this?! I love, love, love how you did the flooring and the empty spools of thread are a great idea for the chimney. How did you make the fire place itself??
ReplyDeleteWhy thank you! :D
DeleteAs I've already covered the fireplace itself I'm assuming you mean the stove? I drew out the shape of the front (roughly copied from real ones) onto some black styrene, cut out two - one for the front and back, then guesstimated the sides and underside (the top part was actually a vinyl floor tile I also had in my stash, lol) then stuck them all together with Plastic Weld. I cut out the door from the front bit and glued some plastic from packaging to the back of it after giving it a buff with some fine sandpaper to give it a kind of frosted feel. The hinges were some doll's house ones I'd had knocking around for years and are only superglued on so while the door does open, one hinge likes to swing loose, lol)
Yes, the stove is exactly what I meant and did not say! I do love it! Thanks for sharing.
Delete