
When it isn't actually a rock!
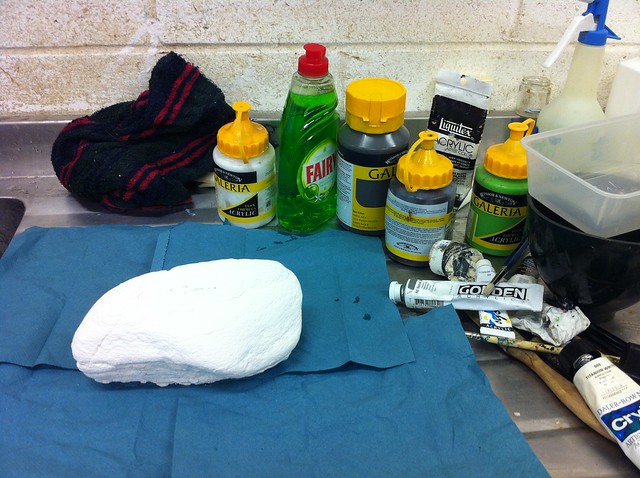
As my next base will be for a gull, I needed some rocks for it to stand on and seeing as real rocks are far too heavy for the purpose, I had to make my own!
Laurence had some latex moulds he'd made of a selection of really nicely textured stones and after a quick 'how to mix plaster' guide (which resulted in one batch rather hilariously going off in a matter of moments after a monumental cockup in water to plaster ratios) I was well on my way to full scale geological production.

Well, after a week or two anyway. Plaster takes ages to go off if it's mixed properly. :P
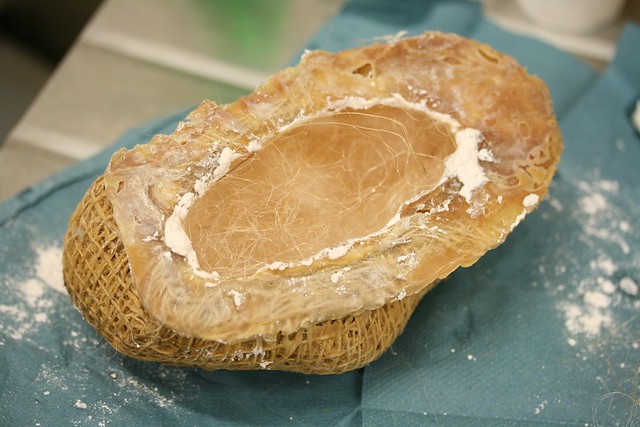
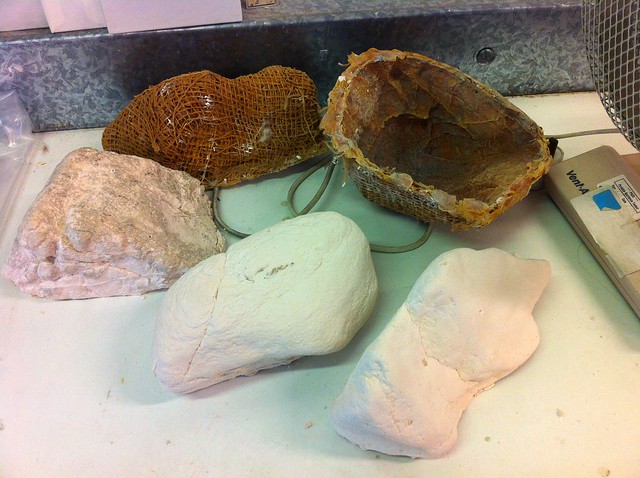
The following Friday they were decanted from their moulds (one with major difficulty as it had a particularly awkward undercut and we actually had to cut the latex to remove it) and left to dry out for a bit just in case there was any residual moisture still on the surface.

There wasn't, so, last week I set about turning the plain chalky pebbles into something a bird would be proud to stand upon.
 |
| My beloved Hadrian resin still doesn't have a name. :( |
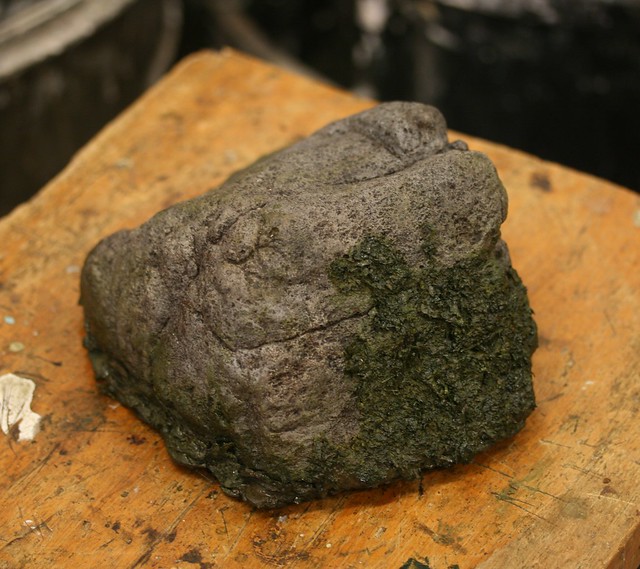
I never make 'recipes' for paint colours so don't expect a list of the types I used. All I remember was that 'Neutral Grey' was my basecoat for two of them and an 'Olive' of some kind made EXCELLENT mossy algae.
 |
| First coat - 'Neutral Grey' |
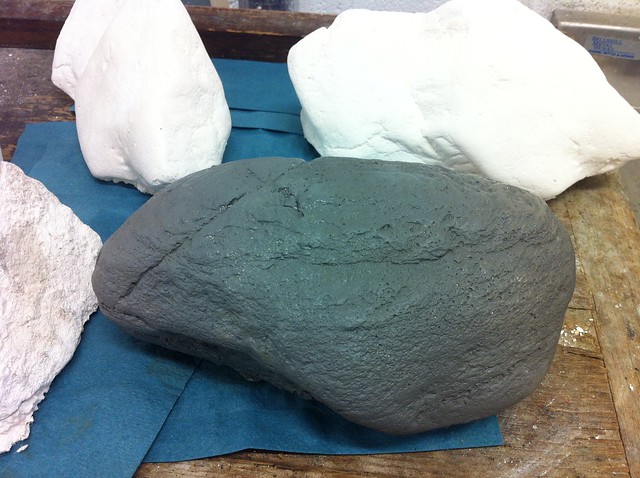
This was them after their first coat - I faffed about a lot with the two at the back and just went where the paints took me.

I staggered the painting process so that by the time I'd finished a coat on the fourth one, the first one would be ready for the next layer. In this picture above, the one on the left has just had its second coat - a wash of dark grey/brown paint which was patted off with a bit of paper towel so that the colour remained only in the cracks and crevices. I did a few layers of that and built up the patina subtly as there's nothing worse than seeing a fake rock that looks like it's fake!

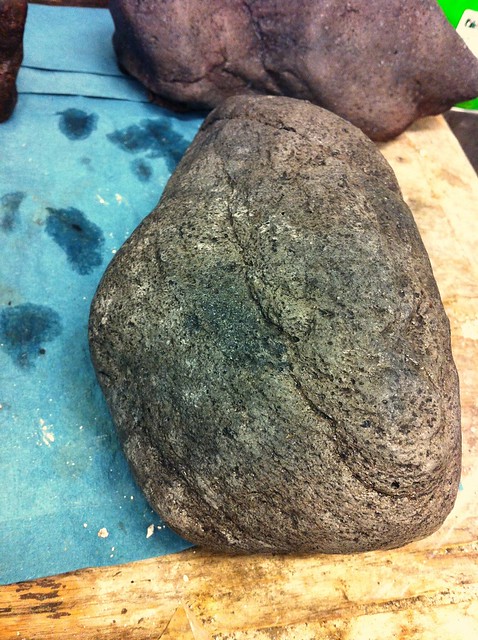
The purpley one on the top right got a roughly stippled on coat of neutral grey, followed by several washes, while the orange one got a similar treatment with more browns and ochres than grey.
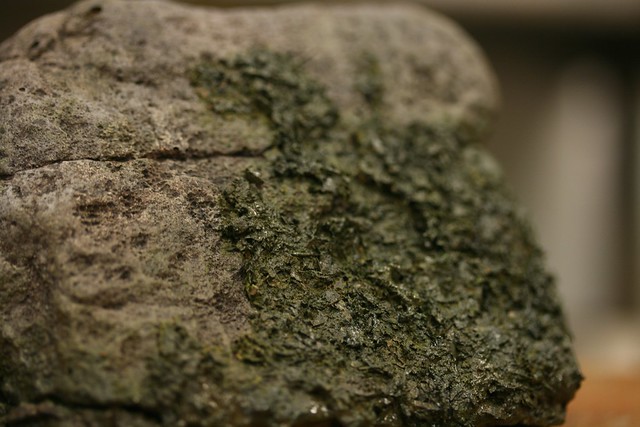
This was one of my favourites purely because of the incredible detail the mould had created.

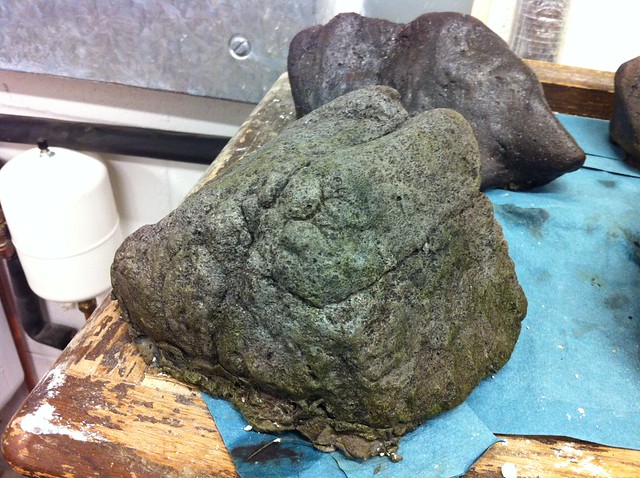
After a couple of hours they were starting to look much more like rocks and not plaster casts. I could have left them as they were but they still didn't look finished to me. (forgive the oddly coloured photos - my phone likes to mess things up from time to time)

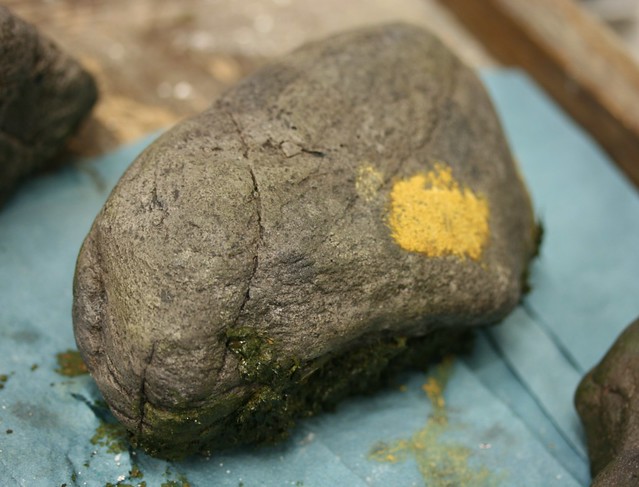
I used the good old fashioned toothbrush technique to add random speckling to each of them which made a remarkable difference in how they looked, texture-wise. This one had perhaps a bit too much but then again, it was the first one I did it to so you had to start somewhere. XD
My favourite rock here had some lighter and darker grey stippled on to break up the monotony as well as the aforementioned toothbrush flicking.
They looked good but something was still lacking - life!
Cue the algae...

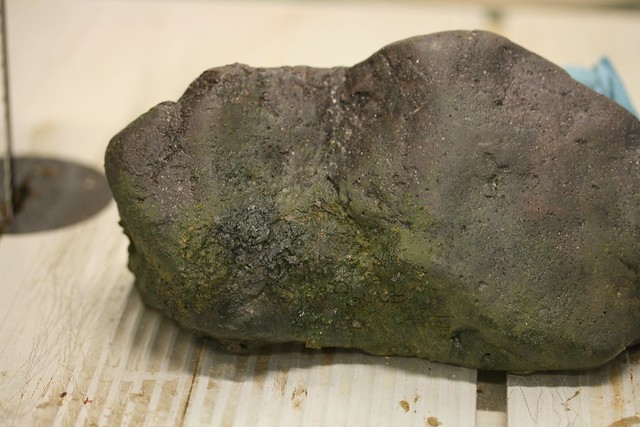
As soon as the greeny brown paint went on I knew I'd made the right call. They looked far more used and weathered than before and I was very nearly ready to use the 'finished' word. However, I still reckoned they could do with a bit more planty material.
I really wanted to do some lichen like this...
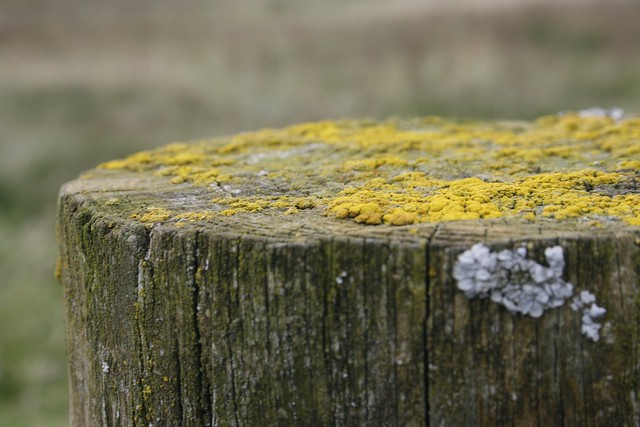
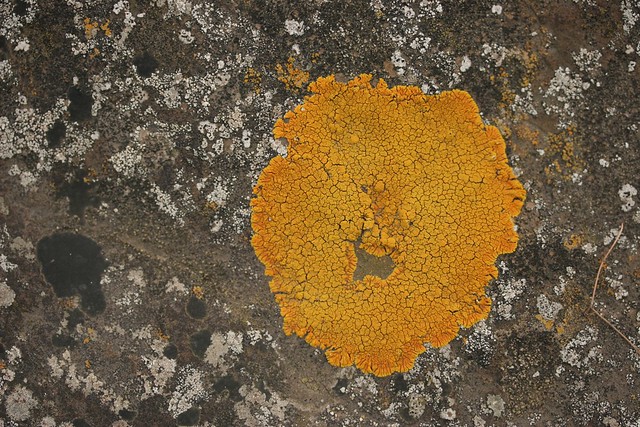
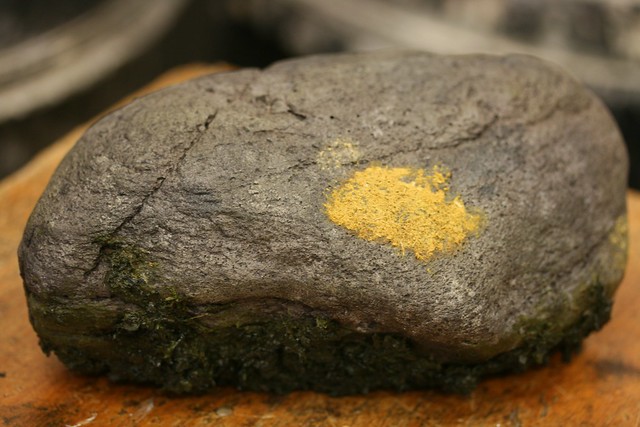
...but I wasn't entirely sure how. Laurence recommended using painted sawdust so I set about mixing up a big gunky bowl of the stuff with a liberal quantity of PVA to bond it all together.
The results were...ok....ish.

Up close it's still really obviously sawdust but from a distance it isn't too bad.
You'll notice there that I added some seaweed around the base of the rocks. This was the one part of the project that I really wasn't sure about. I haven't actually started to make the base itself but I knew I'd want it to be set on a shoreline/beach kind of thing so seaweed was a must. The only downside was that I didn't have any to hand so it was up to me to cobble something together.
Salvation came in the form of more sawdust and paint, this time mixed with LOADS of PVA and some of the crushed leaves and moss I'd used earlier on the hedgehog base. This gave some really convincing weedy shapes but when I blobbed it onto the rocks themselves I had a horrible, horrible feeling that I'd just ruined a whole day's work.
It didn't look convincing at all. It just looked awful!

That was last week.
This Friday I brought out the olive paint again and phew, it worked a treat!


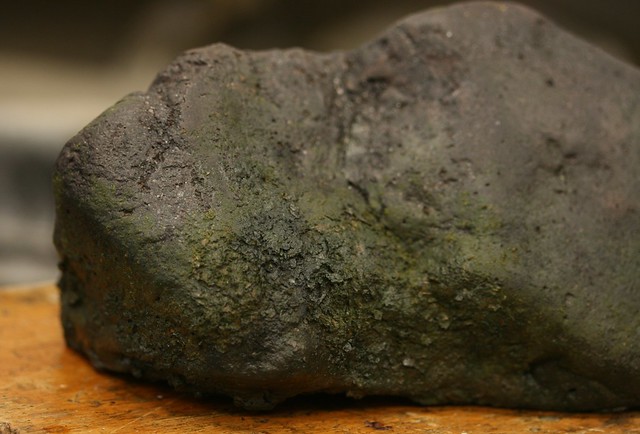
Finally, finished!
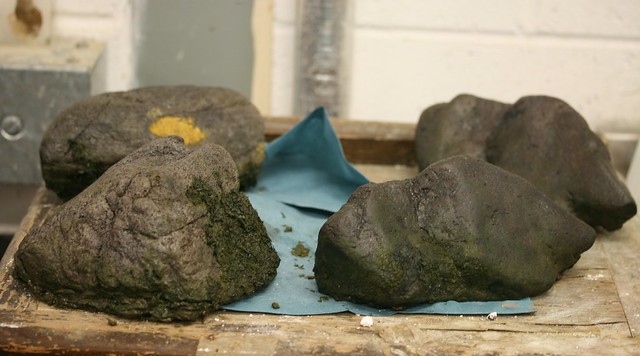
I'm REALLY pleased with how well they've turned out - far better than I ever thought they would, and I cannot wait til next week when I'll hopefully be able to start work on the base itself.
When I actually have some money (I'm painfully skint at the moment) I'm going to invest in some latex so I can make my own moulds. I'd love to make some more rocks for model horse bases and things as well as some speciality props... ;)
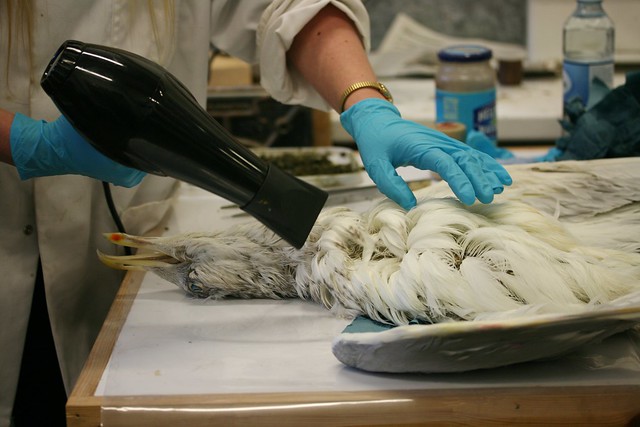
To conclude, here's a photo of Barbara blow-drying the Glaucous Gull she and Laurence have been working on for the past few weeks. They'd just given the skin a bath and needed to dry it as quickly and thoroughly as possible to prevent it slipping. (to clarify, this isn't what'd going on my rocks btw - she's just a skin, not to be mounted, I just thought it was suitably bizarre to finish the post with. XD)
EG out!
Wow, great job! Fake rocks are surprising difficult, and those look totally real!
ReplyDeleteThanks! I still can't believe it was all mostly done in one day as well!
DeleteI agree, the rocks look totally real. I love the moss you have applied to them.
ReplyDeleteAwesome! You're really good!
ReplyDeleteI've awarded you! Go to my latest post titled An Award for more info.
Rosie