
I meant to post photos of this as I went along but with one thing or another I kept putting it off so I'm afraid you'll have to put up with a big massive post instead. XD
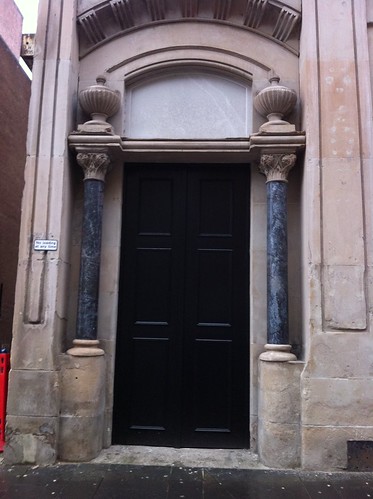
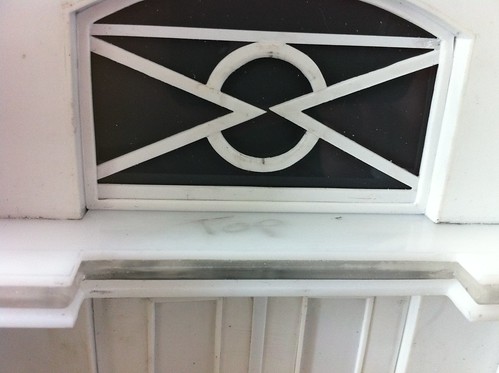
Anyway, one of our projects at college for Block Two was to recreate a specific door in 1/20th scale. (I think!) The door in question was just a few minutes’ walk away from the college so Simon took us to see it before we did anything else.
In the rain.
Don’t we all look thrilled?
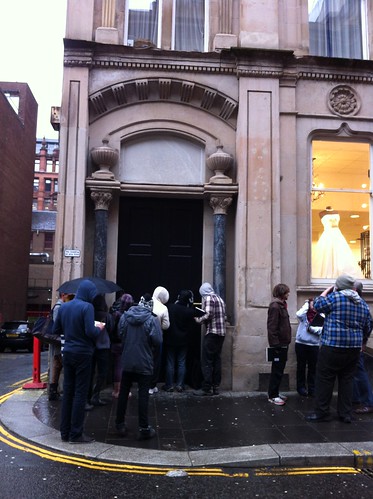
Cheers Simon. DX
The idea for this was to take photos for future reference as well as take accurate measurements - both of which were ultimately pointless as he already had these back in the workshop but hey, it was a learning experience(!)
There was an awful lot of measuring to be done which worried me as I'm of the mindset that 'if it looks right, then it'll probably do' which isn't quite what this course is about! lol
Luckily help was on hand so I was able to cope with it all and managed to chart out what needed to be cut out and whatnot. We'd make the main structure out of MDF which would then be clad with 1mm styrene sheets and gradually build up different layers of complexity.
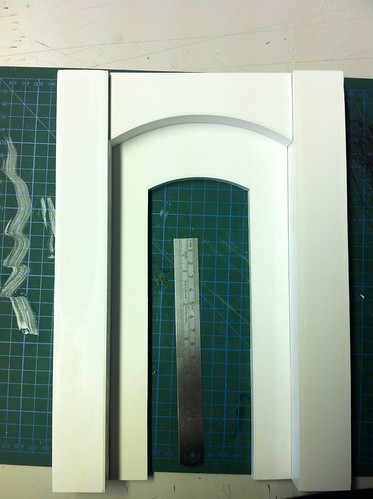
The curvy bits were cut out using a bandsaw; a frankly terrifying looking bit of kit which I was initially a bit wary of using but found strangely relaxing after a while. You’re concentrating so hard your vision seems to go blurred at the edges as you focus in on the blade and before you know it you’re practically touching it...

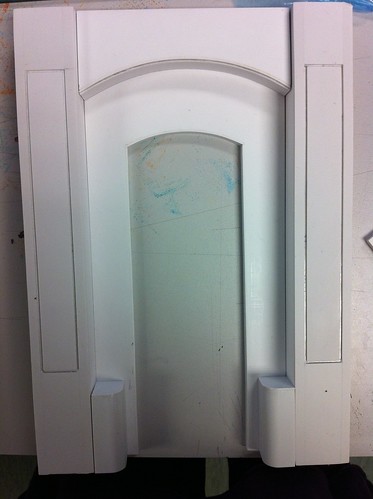
After cutting the MDF it was onto the sanding...and the sanding...and the sanding. Once it was nice and smooth a layer of styrene was stuck on...and sanded...and sanded.
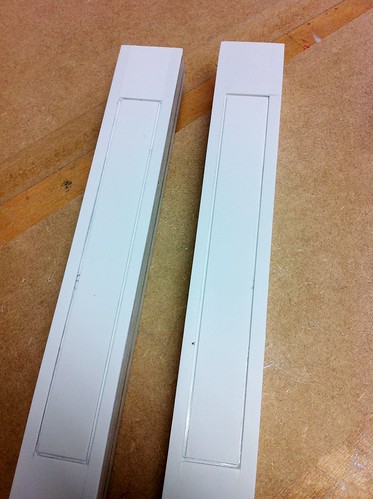
These, oh these were a right arse to make. They look deceptively simple but to do the facing required an inordinate amount of measuring, scalpeling, dichlo-ing and swearing when you superglued it on the wrong way round and had to spend an hour and a half trying to peel it off without breaking it.(not that I did that or anything >.>) Although it looks like it’s only made up of two pieces, in reality there were four separate sheets to be applied and they had to be done VERY carefully or the entire door would look off.
The curved pieces at the bottom were vacformed and glued to MDF blocks that took forever to sand to the right shape. (You soon learn to accept that no matter how smooth you think a surface is when you’ve put it together, it could always do with another half an hour’s sanding. ¬¬)
Next to add were the resin-cast carvings for the top. To begin with I was quite intimidated by the idea of casting in resin as I'm hopeless with measurements and volumes thanks to my dyscalculia but after several demonstrations I'm pretty confident and managed to pour a batch of mouldings completely solo last week. :D In the grand scheme of things it’s not a big victory but I’m still pretty chuffed.
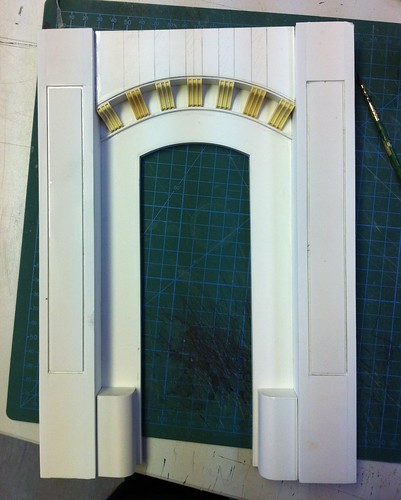
Next up was the actual door itself. This was two 1mm sheets stuck together - one of which had the panels cut out. Half mil strips were then applied to the edges which was really fiddly and the end result is probably the weakest part of the door in all and something in hindsight I wish I'd spent longer on.


The window now...oh that window! We were allowed to come up with our own designs for this and I'd made up a nice one...until I lost the sheet of paper with it the day I had to make it so this was made up pretty much on the spot. I'm pleased with the end result but it's not nearly as nice as my first idea. Again, styrene, all handcut with a little help from some calipers.
The ledge underneath it is made up of three strips of acrylic - cut out on the bandsaw (which I had to wait THREE HOURS to do one morning as we aren't allowed to use it without someone in the workshop with us for health and safety and Simon was busy) and then sanded with mini files to get the bevelled edges.
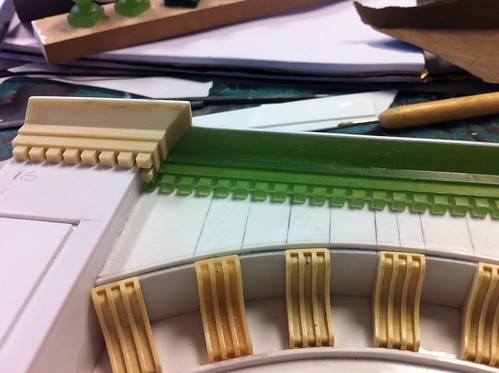
I made up some more resin castings (in a wonderfully fetching shade of green which resembled solidified 'Fairy' washing up liquid and/or boiled sweets!) and added them in. The mouldings at the top were really tricky and I, and most of the class, needed a lot of help to get them to fit as you had to sand the edges VERY carefully in order that the mitre would fit accurately. I managed to glue the one on the right in wonkily first time round and removing it without breaking it or the rest of the door was a feat in itself!

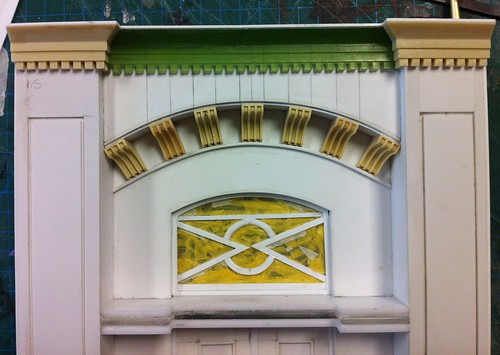

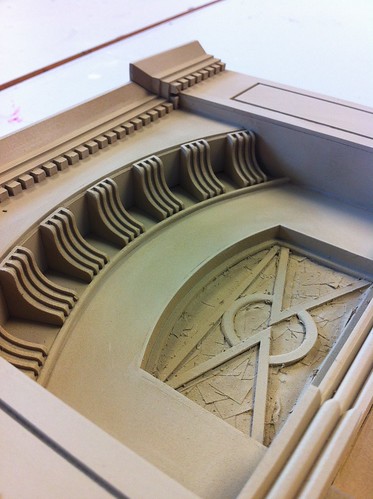
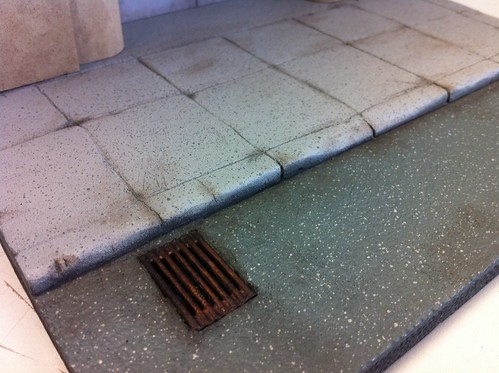
This is what it all looked like just prior to being given its first coat of paint. I made the base out of two layers of foamboard and carved out the slabs with a scalpel and added texture with a sculpting tool. (The yellow around the window is masking tape to protect the acrylic 'glass' behind it.)

First coat of primer.

I really struggled with the spraygun to begin with.(This was probably not helped by the fact that the lid for the top of the gun had gone missing so if you were too extravagant with your arm movements you'd spill paint everywhere.) I couldn't get used to pulling the trigger right back - especially when it was set to a high pressure and eventually Simon took over. XD
See what I mean about the door? Urgh. So many issues. DX

I fared better with the sandstone colour however as someone reset the air pressure to something I was more comfortable with and I managed to get the hang of it eventually.
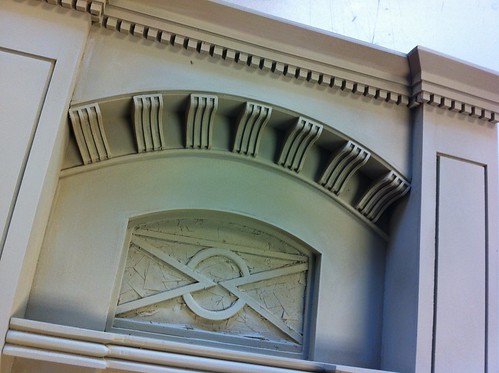
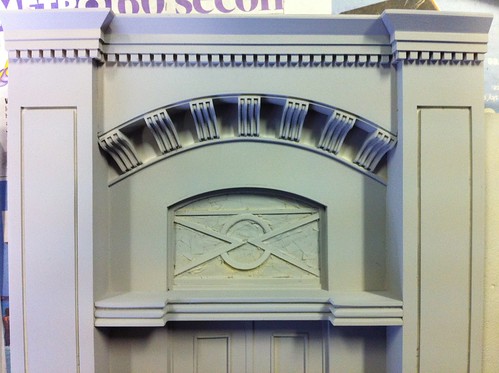
Finally, the painting was done and I could move onto my favourite aspect of it all - WEATHERING! :D An hour or so later and...it was done. O_O
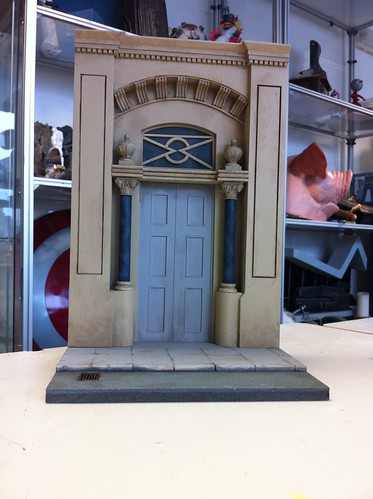

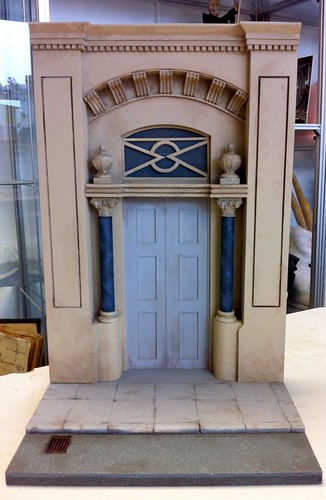


Although there are a few things I wish I'd sanded more (lol) overall I couldn't be happier with it. When I first started this course I would never in a million years have guessed I'd be able to make anything like this so aside from anything else it's a massive confidence boost. :D
Umm... words kinda fail me (mark that in the calendar!) because this is just awesome! O.O You're getting really really good at this!
ReplyDeleteConsider it noted! :P
DeleteThanks! I think everyone in the class burst out laughing when Simon showed us the example door we were going to make. XD
Wow, I'm extremely impressed! You do such fantastic work, and it seems like this class has really helped you expand on your already amazing skills!
ReplyDeleteYou know those models they did for LoTR, for some of the shooting in Minas Tirith, etc? That should be your job. You would rock.
Thank you! Oh it definitely has, no doubt about it!
DeleteYeah, that would be my dream job tbh but I don't think I'm quite at that stage yet! lol
Wow! This looks so amazing! It was worth all the hard work. o____o
ReplyDeleteI've used a bandsaw before,I think they're quite fun to use. XD
Cheers. :D
DeleteI think it's just the fact that they look so terrifying to begin with...until you actually use them. XD
How cool is that? Now I want to make a door!!
ReplyDelete:)
Do eeeeeet! XD
DeleteI really want to make some kind of period driving setup to stick in front of it but at 1/20th scale nothing would really fit. :/ My Julips are on the smaller end of 1/12th so they might get away with it...maybe.
Wow, that is just stunning! I can't see what you'll make next. What exactly is this course you're taking? Because the homework looks like fun...
ReplyDeleteHeh, if this were homework I'd have NEVER finished it! XD
DeleteIt's 'Modelmaking for Film and TV' :)
Wow! Is that for a full degree, or just a one-time course, or...?
DeleteI'm currently in my final block of the NC which is a one year course but I've got a conditional for the HND which is the follow on to it and will last two years. :)
DeleteIt looks like a door that would lead to Narnia-esque places :D
ReplyDeleteFantastic!
Haha, it does a bit! XD
Delete