Monday, 24 December 2012

Christmas Nibbles! (in 1/12th scale)

I felt like making some more polymer clay food the other day. It's odd, I find it incredibly relaxing!

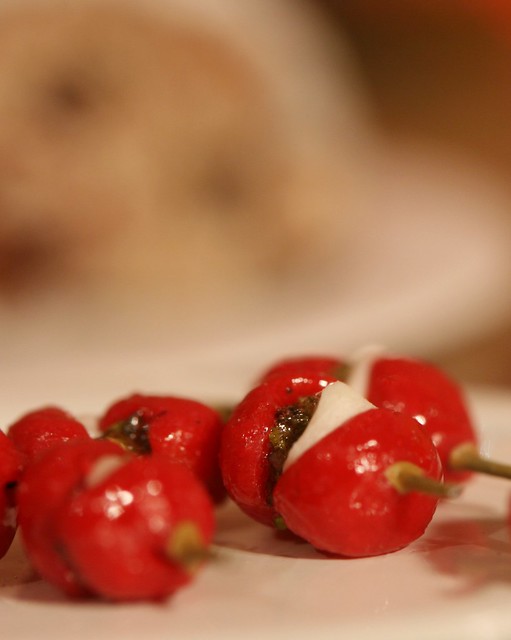
Every Christmas we make up a selection of 'nibbles' to have as a kind of starter before we get the turkey and trimmings sorted out. They're usually small and light snacky things and my favourite is always these - cherry tomatoes with pesto and mozzerella on cocktail sticks. Here's the ones I made up a couple of years ago...

NOM!


 ...and the fimo version from the other day...

1/12th scale tomato, mozzerella and pesto bites


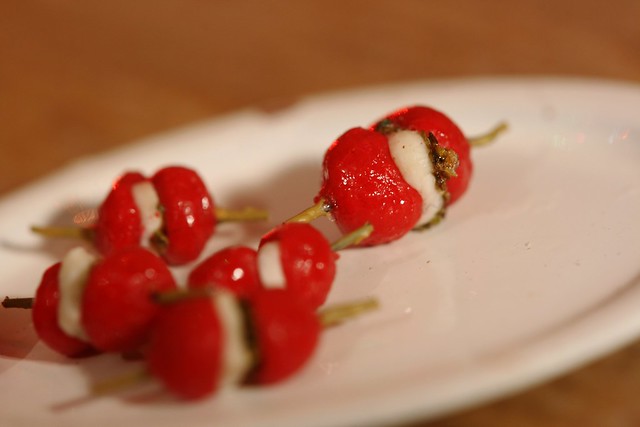
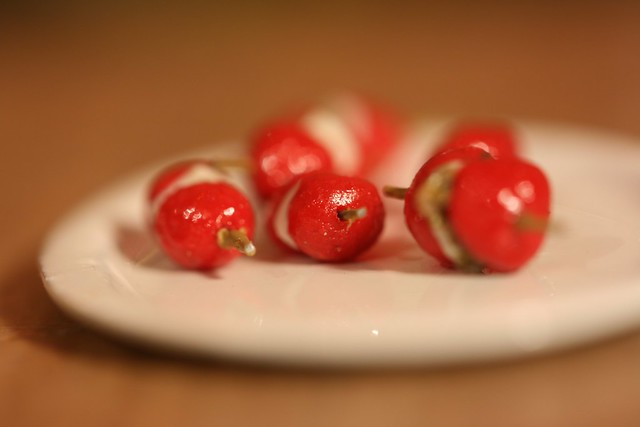
 The pesto is simply some green 'scenic scatter' for dioramas mixed with some clear nail varnish and a little drop of Games Workshop paint wash to give it a little more colour. The cocktail sticks are actually very very fine wire, painted afterwards. Annoyingly they make them look more like little stuffed chillies but oh well!

1/12th scale tomato, mozzerella and pesto bites


One thing that my parents love to get every year is Stollen. I'm not a big fan because I don't really like dried fruit (which explains why I don't like fruit cake, christmas cake, christmas pudding or indeed, mince pies!) but I love the smell and the look of the thing so I couldn't resist trying to make one for my little people who don't have such picky appetites!


1/12th scale Stollen

1/12th scale Stollen

1/12th scale Stollen

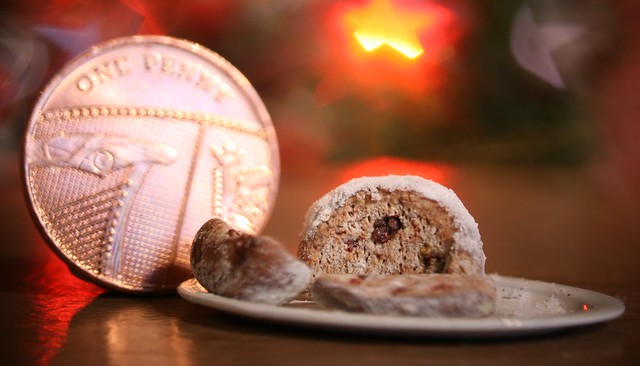
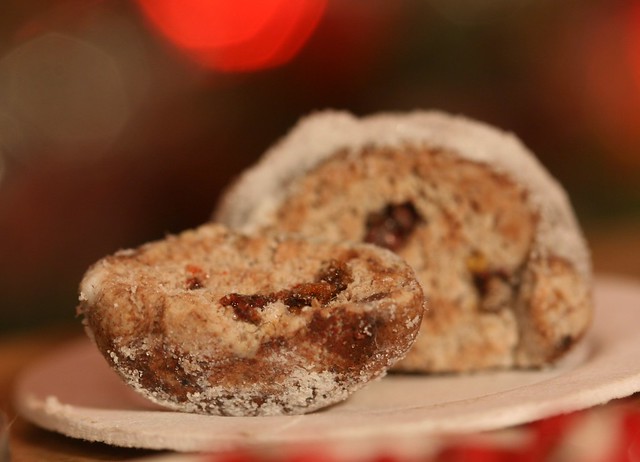
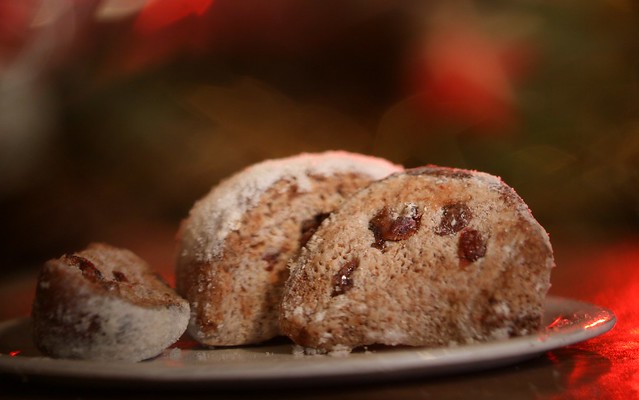
It's all fimo - the 'fruit' was baked prior to the actual loaf being made and then glossed with clear varnish to give it that lovely moist look. I mixed lots of other bits into the 'dough' of the loaf but they didn't really show up afterwards which was a bit disappointing so I ended up just shoving these ones in afterwards, texturing the surface, colouring it all with pastels and some thinned down paint and then baking. The sugar effect was created with a combination of oil, baking powder and pastel dust. I have no idea if it'll stand the test of time but it looks brilliant in photos so I'm happy. :P
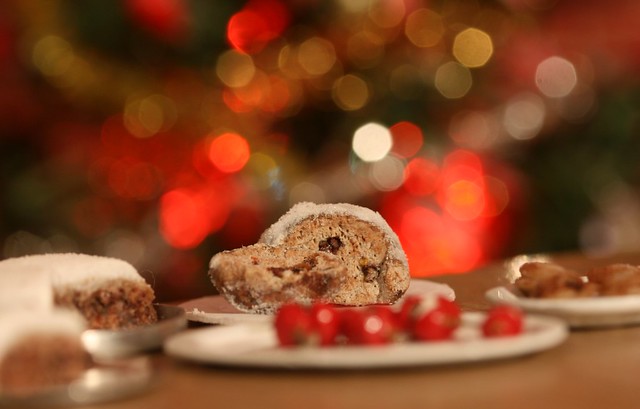
1/12th scale Stollen
Bokeh ftw!
As I mentioned before, two of the other things I don't actually like are christmas cake and mince pies...

1/12th scale Christmas Cake

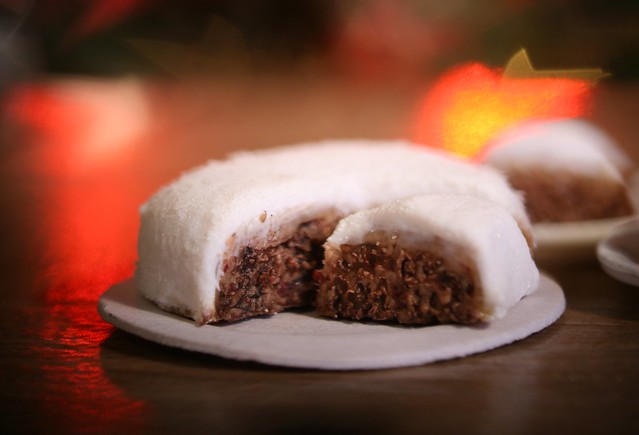
These photos are terrible but in reality that icing looks AMAZING! The cake texture itself is awful though; I wish I'd spent more time on it before I baked it. :/

1/12th scale Christmas Cake

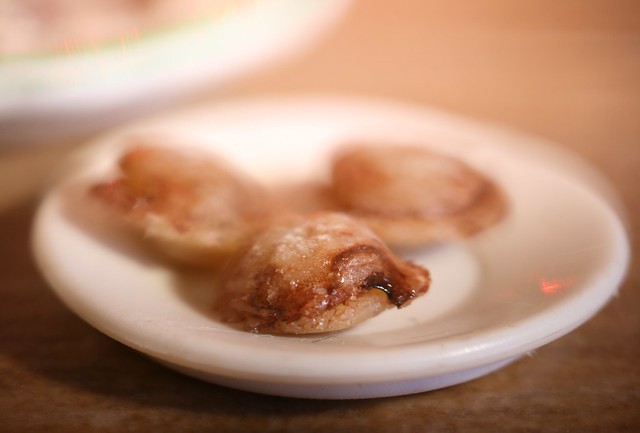
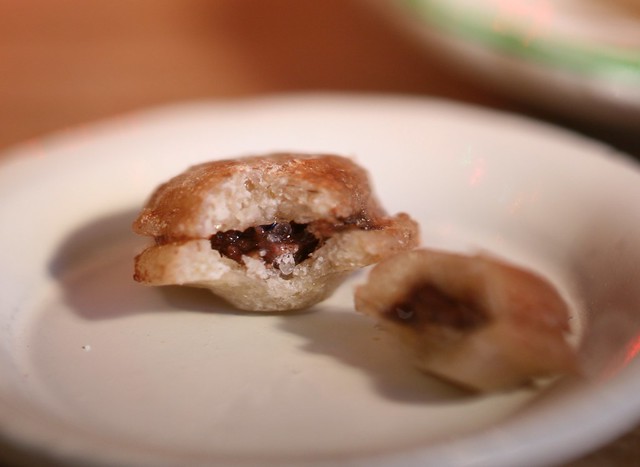
The mince pies worked out really well though and I probably would eat one if they weren't so small...

1/12th scale mince pies


Now, onto things that I really want to make in real life!

1/12th scale white chocolate and cranberry cookies

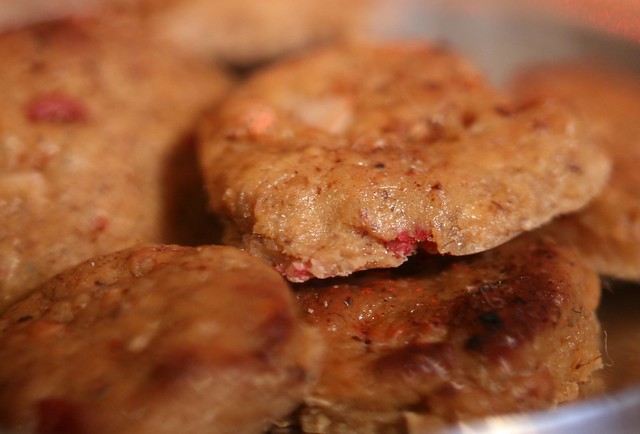
White chocolate and cranberry cookies! I've got a recipe for these somewhere so I might see if I could attempt to make them sometime in the new year because they're just so damn tasty!

1/12th scale white chocolate and cranberry cookies

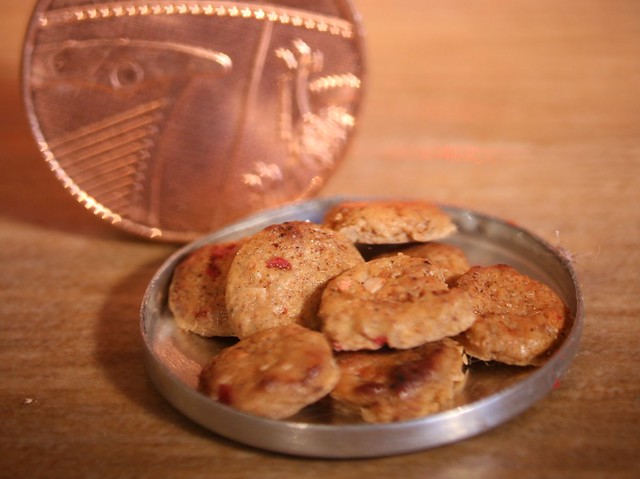
Same process as the Stollen with all the ready-made fruit/chocolate chips mixed in and I sprinkled some pastel dust over them before baking to simulate cinnamon.

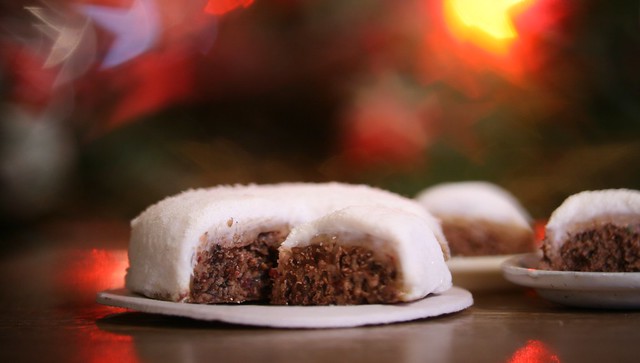
Seeing as I didn't really like the christmas cake, I thought I'd go for something that I was sure to like instead - CHOCOLATE!

1/12th scale Chocolate Cake

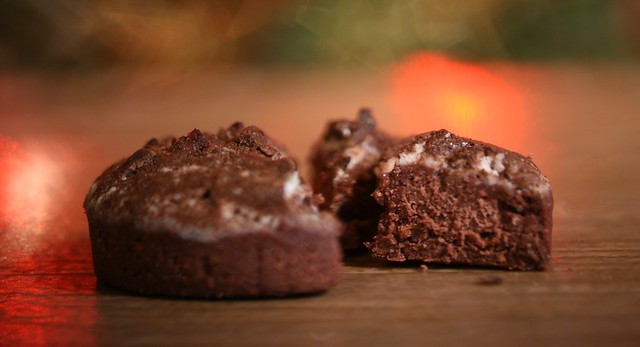
You can never go wrong with chocolate cake, let's be honest. ;)

So yeah, that's what I've been doing, well, I was going to say 'this week' but I actually made all that on the same day so it doesn't really count, lol. I have a rather exciting project starting at college that I can't wait to get started on but you'll have to wait a little longer to find out what as I need to do rather a lot of planning before I can actually do any making which is a pain but hey-ho.

Anyway, if I don't get the chance on the day I wish you all a very merry christmas/cake-nomming day and all the best for 2013! :D


EG out!

Photobucket


Saturday, 8 December 2012

House model FINALLY FINISHED!

 The last couple of months have been pretty crap for just about everyone I know.
 I managed to escape the worst of it with the only real blip being that my boyfriend and I broke up a couple of weeks ago. (well I might add, we're still really close friends and there's no animosity between us so it's all good if a little disappointing) 
However, the real thorn in my side was this, the most irritating and time consuming thing we've had to do thus far - an architectural model of a house on a base made up of cork contours. 


 House Model - Block 1


Looks pretty simple right?


WRONG!


Photobucket

 
This model became the bane of everyone in the class's existence fairly early on and now that it's over and done with I feel like a weight has been lifted from my shoulders; it's such a relief!


I’m not afraid to say that this project nearly drove me mad. A combination of having to be very accurate, cutting straight lines and using a variety of noisy and intimidating machinery did not a happy Christine make!


The first thing I did before starting the CAD drawings and the base was make up some samples to practice techniques on. First up was the cork which I cobbled together some simple contours with and experimented with adhesives. 

House Model - Block 1
The double-sided tape proved the most effective and held each layer in place as planned, while the PVA failed miserably by pretending to work perfectly up until I went to pick it up, at which point it fell apart and lay in beautifully shiny sections on my cutting mat, mocking me by its refusal to do as it was told.

The styrene was much more co-operative and I found myself getting rather carried away with adding little windowsills and ledges. As much as I dislike cutting out lots of geometric shapes, I did find this rather relaxing in an odd kind of way.

House Model - Block 1House Model - Block 1

I also made up some trees for the landscaping out of wire. I tried to go for the minimalist look with only a few strands of thick copper wire but ended up  with far more organic and realistic looking ones made from many stands of cable wire.

House Model - Block 1The base was constructed from five sections of MDF glued together. The ‘pond’ was then cut out of the top sheet using a Jigsaw and then glazed with a sheet of clear acrylic to represent the water.

I’d used the Jigsaw last year on the set project and found it relatively easy to use but this time round I struggled a little; though I think that was more to do with the lack of manoeuvring space thanks to the way the clamps were positioned than anything else.


House Model - Block 1
 Once assembled, the contours of the landscape were laid in layers of 2mm cork sheeting, atop a base layer of 4mm, using double-sided tape to stick them down. I used the A3 blueprint to work from; cutting out each consecutive layer of cork by tracing along the lines with a scalpel. This gave a very neat finish but I found that especially towards the back of the model, the vertical edges were starting to creep inwards which was less than ideal.
Luckily I managed to catch myself before it became un-salvageable but it’s still a mistake I regret not noticing sooner. 
A styrene box the same dimensions as the house was used to make sure there was enough space for the final model to sit without gaps.


This was the stage at which point everything started to go wrong.
Although this particular project had been used for first years for ages, for some reason this year it was decided to scale it up a bit so we had more opportunities to detail it. Nice idea, but what had been forgotten about was that by making the whole thing twice as big, we'd need twice as much material!


A couple of weeks in, we ran out of cork. 


The cork contour aspect had to be postponed until we could order in some more so we all moved onto the CAD drawings and making the main structure out of clear acrylic...until we ran out of that as well.


Photobucket
House Model - Block 1

 Having never used it before, drawing with CAD was really rather challenging  as I found the program to be incredibly counter-intuitive. Although there were many excellent tutorials available online, I didn’t pick it up as quickly as I normally do with computery things and I was really worried that I wasn’t going to be able to get it all done in time.
 

 In the end I managed to produce the required drawings and printed them out to use as reference for building the house so all was well. 

As the
Varga saw was out of commission at the time, (it rather unhelpfully decided to break at the point in the project where just about everyone needed to use it!)  I cut the clear acrylic for the main structure on the Bandsaw instead and sanded down the edges using the sanding wheel.
 
House Model - Block 1After some overzealous sanding on the angled roof parts, I had to remake the gable ends and a new  base as I was now several mm too short. Luckily, I was able to salvage the base part and reuse it as the floor level with some styrene supports dichlo’d onto the sides of the building to hold it level. 
This was my first real experience of working with acrylic and I wasn’t very happy with how it turned out, although, having now used the Varga saw, I think most of my dislike for it has abated as that particular piece of equipment cuts out a lot of the hassle I had to go through when it was unavailable. (even though it's insanely loud!)

I then clad the whole thing in 1mm styrene with the appropriate windows and door cut out. (ironically the easiest part of the entire project, lol)


House Model - Block 1


My first attempt at the ‘sunroom’ part that fitted into the large gap on the left was something of a disaster. After what felt like weeks spent working on it I realised to my horror when it was nearly fully assembled that I’d miscalculated the length of it and made it at least 10mm too long.


 Photobucket

Luckily by then the
Varga saw was back in action and I was able to recreate the whole thing in far less time than I had previously. (and this time it was actually correct!)


House Model - Block 1House Model - Block 1

I found that if the base - made from styrene - was incorrect by even just a couple of mm, the entire thing would look terrible so I did my best to make it as accurate as possible. A couple of the inner corners were a little bit rough but this wasn’t very noticeable as the acrylic pieces were installed on top of the styrene rather than at the sides.

 House Model - Block 1House Model - Block 1
 
House Model - Block 1

When I came to attaching the sunroom to the rest of the building I ran into a spot of bother. The gap it was to sit into was too wide by about a millimetre so I had to carefully cut a thin strip of styrene the right size and install it without making it look out of place. I’m pleased with how snugly the sunroom now fits but I would like to do a little work on the join as it’s not quite as invisible as I would have liked.

 House Model - Block 1House Model - Block 1


I tested out the house on the base and I have to admit, seeing it reflected in the pond like that gave me a massive confidence boost as it now looked like a valid
thing rather than a pile of styrene and acrylic!

Unfortunately, all that hard work was tarnished slightly when I accidentally managed to sand a line across one of the windows. 


Photobucket

Had I more time, I would have remade it but as this was my second attempt already and I only had a few days in which to finish the whole thing, I couldn’t so I was forced to leave it as it was.
I covered up all the windows with masking tape to protect them from this happening again, however, this proved to be a bad decision as, when I was using Dichlo’ to stick the roof part on, some of it leaked through, marking the acrylic with lots of horrible little lines and smudges! 

House Model - Block 1
I know you can't see it very clearly here
but it's 3/4 of the way up on the left.

 I was beyond annoyed - I’d spent so much time and effort trying to make it look good, only to have it undone in a matter of minutes by a frankly stupid error of judgement. 
If the brief didn’t specify that the windows had to be clear, I would be sorely tempted to sand them all down and make them frosted to hide it.

The top part turned out a lot better, and although it did suffer from a couple of scratches it wasn’t nearly as bad as the other one.
  
Now that the main structure of the building was assembled, all that really remained to do was make the little box room and install the roof.
While the cube shaped room was easy to make in general, I found cutting out the circular window a bit of a pain as the set of dividers I was using were a bit blunt and I ended up gouging out a window that was more oval than perfectly round which forced me to start it again from scratch, luckily this time with far more professional looking results!
 
Once put together, I sanded a small section of clear acrylic and affixed it to the inside of the window to emulate frosted glass.

House Model - Block 1
 
 House Model - Block 1

In order for the box room to fit correctly I had to create a support structure to brace it. I cut beams from styrene and
dichlo’d them to a thin strip of styrene that I attached from gable end to end. Aside from keeping the box room in place it also helped to stabilise the overall building as I noticed the gables were in danger of creeping inwards slightly.


House Model - Block 1

I had to recut the beams as I’d measured them off the outside edges and hadn’t taken into account the material width - something I find myself forgetting on a regular basis I’m afraid to say. Once I’d realised my mistake it was easily rectified but I won’t deny that it took up valuable time that could have been better spent on other things.


 House Model - Block 1

House Model - Block 1


With only a matter of an afternoon left to finish, my main concern was now the roof. If having to work around a box room and a sticky-outy sunroom wasn't enough, the roof itself changed angle part of the way up!


It turned out that part wasn't so difficult to deal with as if you scored the styrene and bent it without snapping it formed a really nice roof almost automatically.


We got to use some of the expensive patterned styrene for the roof so we were all very aware of how we really couldn't afford to waste any!

 I made a paper template to base the more complicated side on which was very useful - even when I had to use masking tape to fill in the gaps and adjust the fit.


House Model - Block 1


Then suddenly, with about fifteen minutes to go, it was done!


House Model - Block 1

Granted, I still needed to make a little walkway thing to connect the front door to the driveway, lasercut a balustrade and backspray the pond but I'd got the majority of it done on time which was what was required!


I had just enough time to stain the aforementioned driveway before the end of the class. I think this was 'Indian Rosewood' colour, lol.


House Model - Block 1 

So yeah, here's the accursed thing in its entirety!

House Model - Block 1

House Model - Block 1

House Model - Block 1 

I have absolutely no intention to ever do architectural modelling as a career so I'm hoping that this will be the last one I ever have to make as it was incredibly stressful to do! I'm pleased with how it turned out but frankly, I don't really want to have to deal with it again! XD


 We ended up going out for a celebratory pizza afterwards which made it all worthwhile. (and is it sad that I photographed it so I could recreate it in polymer clay later? XD)


Celebratory Pizza at Bier
om nom nom nom nom


I'm more interested in the next block's project which couldn't be further up my street if it had my name and address glued to it! We're going on a trip to Stirling Castle on Monday to start it off so you'll find out more about it then... ;)

EG out!

Photobucket